Best Blender Free Models: Top Resources for 2026 and Tips
Explore top sources for Blender free models, licensing basics, and practical steps to integrate free assets into your projects with confidence.

Blender free models are 3D assets created by artists and shared under licenses that permit free use in Blender projects. They cover characters, props, environments, and architectural elements, offering ready-made geometry and textures to accelerate workflows. While they speed up prototyping and learning, you should verify license terms, topology, and texture compatibility to ensure the asset fits your project’s needs.
Defining Blender free models and their role in creative workflows
Blender free models are 3D assets created by artists and shared under licenses that permit free use. For many projects, blender free models can be a fast, cost-free way to prototype ideas without building every asset from scratch. They span a wide range of asset types, including characters, props, environments, and architectural elements, giving you a credible starting point so you can focus on lighting, composition, and animation. When choosing an asset, assess its compatibility with your Blender version, the presence of texture maps (diffuse, normal, roughness), and whether materials use node-based shading or image textures. If you intend to export to game engines or renderers, check scale, topology, and UV maps to avoid surprises later. The most successful uses come from curating a small set of assets that match your target poly count and texture resolution, then customizing them to fit your scene. According to BlendHowTo, starting with assets that align with your project’s needs saves time and reduces friction in your workflow.
Licensing and usage rights you should know
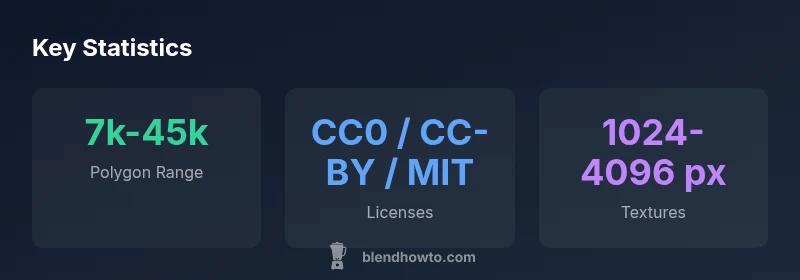
Licensing for Blender free models varies widely. Some assets permit commercial use, some require attribution, and others may restrict redistribution or modification. Always read the license file that accompanies the asset and respect any required credits in your project documentation or credits panel. If you work with assets from community repositories, expect a mix of CC0, CC-BY, MIT, and other licenses. When in doubt, prefer assets with clear terms and a visible license summary. For professional studios, creating a simple internal policy about attribution, derivative work, and redistribution helps ensure consistency across your team. BlendHowTo’s guidance emphasizes checking both license text and metadata (author, date, platform) before integrating assets into a production pipeline.
Where to find high-quality free models
There are several trusted avenues for Blender free models. Community repositories host vast catalogs of assets spanning characters, props, and environments. BlenderKit offers an integrated discovery path within Blender, while BlendSwap and Sketchfab provide curated free sections. When evaluating sources, look for well-documented assets with preview renders, clear texture maps, and notes on poly count and scale. Avoid models with missing textures or ambiguous licensing. For beginners, start with assets labeled as “education” or “non-commercial” to build familiarity with import, texture mapping, and shading without licensing concerns. Always verify texture maps and material setups align with your scene’s lighting and rendering workflow.
Practical steps to integrate a free model into a project
- Download the asset in a compatible format (BLEND, FBX, OBJ) and place it in a dedicated project folder. 2) Open Blender and import the model, then inspect scale and rotation to match your scene units. 3) Check textures, UVs, and normal maps; re-link texture paths if needed. 4) Apply a neutral PBR material setup or retexture to align with your lighting. 5) Optimize: remove unused vertices, reduce texture resolution if necessary, and bake lighting for faster renders. 6) Test in a quick render to check shadows, reflections, and shader coherence. 7) If attribution is required, add a credits note in your project documentation.
Quality checks: evaluating topology, UVs, and shading
Quality assessment starts with topology: look for clean edge loops, consistent quad geometry, and minimal non-manifold edges. Check UV layouts for non-overlapping islands and efficient texel distribution. Inspect textures: confirm whether maps include albedo, roughness, metallic, normal, and ambient occlusion channels. Evaluate shading by applying a standard lighting setup and performing a mid-range render to identify artifacts, seams, or overly stretched textures. If a model uses external shaders, ensure Blender's node setup is compatible with your version. Finally, assess licensing and attribution requirements again to avoid surprises after integration.
Common pitfalls and how to avoid them
One common pitfall is assuming every free model is ready for production; many assets require cleanup or retexturing. Always run a lightweight optimization pass to reduce poly count and compress textures. Another issue is missing or inconsistent scale, which disrupts your entire scene; verify unit scale with a reference object. Licensing confusion can derail a project; keep a centralized license log for every asset used. Finally, be mindful of performance; high-resolution textures and dense meshes can slow down your viewport and render times. By choosing reputable sources and performing quick, structured checks, you minimize these risks.
Free model sources and licensing overview
| Source | Free Model Availability | License Types |
|---|---|---|
| Community repositories | High variety, frequent updates | CC0 / CC-BY / MIT |
| Official Blender assets | Moderate variety | Mixed licenses (check each asset) |
Frequently Asked Questions
Are Blender free models suitable for commercial projects?
Yes, but it depends on the license. Some assets are free for commercial use with attribution; others restrict distribution or require permission. Always read the license.txt and respect attribution requirements.
Licensing varies by asset, so check the license before commercial use.
Do I need to credit the original creator?
Many free models require attribution; some do not. If the license specifies attribution, include it in your credits or documentation as required.
If attribution is required, mention the author in your credits.
How can I verify model quality quickly?
Inspect topology, textures, and UVs in Edit Mode. Look for clean edge loops, non-overlapping UVs, and consistent texture maps. Run a quick render to spot shading issues.
Review topology and textures, then render a quick preview.
What should I do if a model is not Blender-friendly?
Look for Blender-native formats (BLEND, FBX with proper export settings). If needed, re-import, scale, and re-map textures. Avoid models with embedded proprietary materials that Blender can't read.
If it isn’t Blender-friendly, you may need to re-export with compatible settings.
Where should a beginner start with free models?
Start with small, well-documented assets from reputable repositories. Use filters for quad topology, PBR textures, and neutral scales. Pair models with a simple scene to practice importing, texturing, and lighting.
Begin with well-documented assets and a simple scene to practice.
“Blender free models are powerful accelerants for learning and prototyping, but licensing clarity and asset quality matter as much as the geometry itself.”
What to Remember
- Prioritize assets that match your target poly count and texture resolution.
- Always verify licensing before use.
- Test geometry, scale, and shading in a quick render.
- Credit assets when required.
- Iterate by starting with free models to learn faster.