Download Blender Models: A Complete Step-by-Step Guide for 2026
Learn how to download Blender models the right way. Find reputable sources, understand licensing, import seamlessly, and manage your library for faster, safer 3D workflows.

According to BlendHowTo, you can download Blender models by following a straightforward workflow: verify licensing, choose reputable sources, download in Blender-friendly formats, and import them with correct scale and materials. This guide covers where to find models, how to assess quality, licensing basics, and practical steps to integrate assets into your project quickly. It also includes tips for organizing a growing library.
Why download Blender models matter
Downloading Blender models accelerates your creative process and helps you prototype scenes faster. For home hobbyists and aspiring 3D artists, ready-made models can jump-start projects, letting you focus on composition, lighting, and storytelling rather than building every asset from scratch. When you download Blender models, you gain access to a diverse library of props, characters, and environments that you can modify to suit your project. The key is to choose assets that align with your vision, be mindful of licensing, and ensure compatibility with your Blender version. In this guide, you’ll learn how to evaluate quality, select trustworthy sources, and import assets with confidence, so your workflow remains smooth and efficient.
Licensing basics for downloaded models
Licensing for downloaded Blender models varies by source and intended use. Some assets are offered for personal use only, while others allow commercial projects with attribution or under a paid license. Always read the license terms before downloading, and look for clear indications of rights, exclusions, and redistribution restrictions. If attribution is required, keep a record of the model’s origin and license text. BlendHowTo emphasizes verifying licenses because licensing confusion is a common hurdle for beginners, and clear terms protect both you and the model creator.
Where to find high-quality Blender models
Quality sources for Blender models typically come from reputable marketplaces, Blender community libraries, and official asset packs. When evaluating options, prioritize assets with clear licensing terms, texture maps, properly named files, and documented material setups. Look for models with clean topology, UV maps, and rigging where relevant. Start with free libraries to learn, then explore paid options for higher fidelity. Always preview the assets in a quick render or viewport check to gauge compatibility with your project.
Evaluating model quality: topology, textures, UVs, rigging, and compatibility
A good model should have clean topology with evenly distributed polygons, sensible edge loops, and no hidden geometry. Check UV maps for seams, overlapping islands, and texture tiling. Textures should be mapped correctly, with proper normal, roughness, and metallic maps when applicable. If the model is rigged, inspect bone structure, weighting, and skinning. Finally, verify compatibility with Blender’s version you’re using and confirm whether any baked materials require re-linking to texture files.
Download workflow: formats, organization, and licensing checks
Most Blender-ready assets come in OBJ, FBX, GLTF/GLB, or layered formats that Blender can import directly. Before downloading, decide which format best fits your pipeline and hardware. After download, organize files with a consistent folder structure (e.g., by asset type, project, and license). Always re-check licenses after download and note any attribution requirements or usage restrictions to stay compliant.
Importing into Blender: steps to import, verify scale, and adjust materials
Importing a model begins with File > Import and selecting the correct format. After import, apply any necessary scale, rotation, and transforms to match your scene. Reconnect textures if paths are broken, reassess materials, and switch to Eevee or Cycles as needed. Test render and lighting to confirm the asset integrates well with your environment. If materials don’t look right, consider baking or relinking textures to ensure consistent shading.
Managing your model library: organization, metadata, and backup strategies
Build a structured asset library with clear naming conventions, licenses, and version tracking. Add metadata for each asset: license type, author, source, and download date. Regularly back up your library and prune unused or outdated assets. A well-organized collection reduces search time and helps you build repeatable workflows across projects.
Performance considerations for large models and optimizations
Large models can slow down scenes and render times. To mitigate this, consider decimation or reducing poly count for distant objects, using LODs, and combining multiple objects into a single optimized mesh where appropriate. Use instances for repeated elements to save memory, and enable simplifying shading when editing heavy scenes. Always test performance on your target hardware to avoid surprises during production.
Common pitfalls and how to avoid them
Common issues include missing textures after import, scale mismatches, and licensing disputes. Verify texture paths and ensure textures are embedded or provided with proper references. Ensure the model’s scale matches your scene by comparing with known reference objects. Finally, respect licensing terms and attribution requirements to avoid legal or ethical issues.
Tools & Materials
- A computer with internet access(Stable connection to browse and download assets)
- Blender (latest stable version)(Ensure Blender can open the chosen formats)
- File management app(Organize downloads into a dedicated assets folder)
- A note-taking app or spreadsheet(Log licenses, sources, and attribution requirements)
- External storage (optional)(Backup large asset packs)
Steps
Estimated time: 45-60 minutes
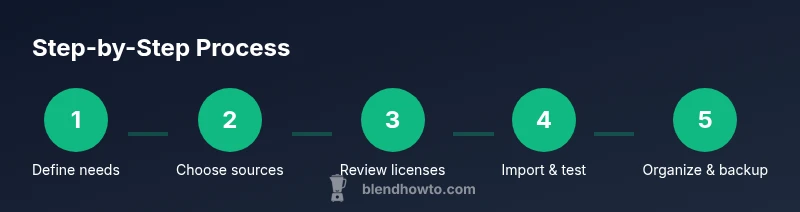
- 1
Define asset needs
List the kinds of models you require for your project and the minimum quality level. This helps you filter sources and licenses efficiently.
Tip: Write a quick brief for each asset type to guide your searches. - 2
Choose reputable sources
Select sources with clear licensing and up-to-date content. Preview assets and read reviews or comments when available.
Tip: Favor sources that present licensing terms prominently on the asset page. - 3
Check licenses and usage rights
Open licenses to confirm personal vs. commercial use, attribution, and redistribution rules before downloading.
Tip: Document license text or attribution requirements for future projects. - 4
Download in Blender-friendly formats
Pick formats like OBJ, FBX, or GLTF/GLB that Blender handles well and that fit your pipeline.
Tip: If unsure, download multiple formats for testing in Blender. - 5
Import and inspect in Blender
Import the asset, check scale, textures, and basic shading. Resolve any path or material issues before integrating.
Tip: Test with a simple scene to verify compatibility. - 6
Organize and annotate assets
Place assets in a logical folder structure; add metadata such as license, author, and source.
Tip: Keep a consistent naming scheme for easy retrieval. - 7
Optimize for performance
Review poly count, textures, and materials. Use decimation, instances, or LODs where appropriate.
Tip: Run a quick viewport performance test on typical scenes. - 8
Document usage restrictions
Record attribution requirements and any constraints tied to the asset for future compliance.
Tip: Create a simple checklist you can reuse for new assets.
Frequently Asked Questions
What file formats can Blender import, and which should I choose?
Blender can import OBJ, FBX, GLTF/GLB, STL, and other common formats. Choose a format that preserves textures and animation data for your project, and prefer GLTF/GLB for broad compatibility with PBR textures.
Blender can import OBJ, FBX, GLTF, and more. Pick the format that keeps textures and animation when possible.
Are downloaded models free to use for commercial projects?
License terms vary by asset. Some are free for commercial work with attribution, others require a paid license. Always read and record license terms before using assets in commercial projects.
License terms vary; check if attribution or a paid license is required before commercial use.
How can I quickly test if an asset fits my project?
Import the asset into a simple Blender scene, check scale, texture fidelity, and shading in your lighting. If it doesn’t fit, try a different format or tweak materials.
Test the asset in a small Blender scene, checking scale and textures under your lighting.
What should I do if textures are missing after import?
Relink or re-embed textures, or replace with similar textures. If textures aren’t included, you may need to bake or recreate them.
If textures are missing, relink or rebake textures as needed.
How do I organize assets for a growing library?
Create a folder structure by asset type and project, add metadata (license, source, date), and back up regularly.
Organize assets with folders and metadata, and back them up.
Watch Video
What to Remember
- Verify licenses before download and use.
- Choose reputable sources with clear terms.
- Import assets and adjust materials in Blender promptly.
- Organize assets with consistent naming and metadata.
- Monitor performance and optimize assets for large scenes.