Is Blender Worth It? A Practical Review for 3D Artists in 2026
A rigorous, balanced review of Blender's value for 3D modeling in 2026, covering costs, learning curve, workflows, and when to choose paid tools.

Is Blender worth it? For many 3D artists, yes. Blender is free, open-source, and packed with modeling, sculpting, animation, and rendering tools that rival paid software. It integrates with Python for custom tools and has a thriving community. The main caveats are a steep learning curve and occasionally uneven UI, but with consistent practice, Blender delivers professional results without upfront costs.
Is Blender Worth It in 2026? The Big Picture
Is blender worth it? For many aspiring 3D artists, the answer is yes, especially when you consider the license cost and breadth of capabilities. Blender’s core philosophy is to empower artists without gatekeeping; it’s free, open-source, and continually improved by volunteers and a robust ecosystem of developers. According to BlendHowTo, the platform’s open development model accelerates feature parity with paid toolchains in modeling, sculpting, and animation. For students and hobbyists, that translates into lower barriers to experimentation. In professional pipelines, Blender is often used as a pre-visualization or asset-creation tool, then integrated with other software. The road to mastery is uneven, but the payoff can be substantial: you can build a portfolio, explore multiple disciplines, and tailor the toolset through addons and Python scripting. This article will unpack the value proposition, explain how Blender stacks up against alternatives, and outline practical steps to start producing credible results in a weekend and beyond.
From a practical standpoint, is blender worth it for a student or hobbyist depends on your goals and time horizon. If your objective is to learn general 3D concepts, experiment with different pipelines, and produce portfolio pieces without spending on licenses, Blender offers an unbeatable starting point. For professionals who must meet strict enterprise standards or require industry-specific plugins, Blender remains compelling but may need integration with other tools. BlendHowTo’s analysis highlights the balance between cost savings and the extra ramp time, which is a key factor most buyers consider when deciding to dive into Blender versus paid incumbents.
wordCountPreviewingNote":null}
How Blender Stacks Up Against Alternatives
Blender’s value becomes clearest when you compare it to traditional paid suites such as Maya, 3ds Max, Cinema 4D, Houdini, or Fusion 360. The core difference is licensing: Blender is free and open-source, with a thriving addon ecosystem, while competitors usually require ongoing subscriptions. In modeling and sculpting, Blender offers a comprehensive toolset that rivals expensive packages, and its Cycles and Eevee render engines provide production-quality results without licensing fees. For animation and rigging, Blender is robust, though some studios prefer specialized animation tools for large teams with rigid workflows. In simulation and VFX, Houdini remains a leader for node-based workflows, but Blender’s Rust-free workflow and Python API enable custom automation and lightweight pipelines. The BlendHowTo team notes that for solo artists, students, and small studios, Blender frequently outperforms on total cost of ownership, while larger studios still weigh the standardization benefits of established ecosystems and support pipelines offered by paid tools. In practice, consider your project scope, team size, and required plugins when making the call.
What about performance and hardware requirements? Blender scales well with consumer hardware, but very large scenes demand modern GPUs and ample RAM. For artists starting out, a mid-range workstation paired with fast storage yields a smooth experience. If your workflow leans heavily on render-farms or GPU-based computing, you’ll appreciate Blender’s GPU-accelerated rendering, but you should budget for adequate cooling and VRAM headroom. Overall, the choice hinges on your goals, not just price tags. BlendHowTo’s guidance emphasizes that Blender is a capable default that often matches or exceeds the capabilities of paid tools for many common workflows, especially for independent creators and education-focused environments.
wordCount":null}
Core Strengths: What Blender Does Best
Blender shines in several core areas that often determine whether it’s worth adopting for a project. First, its all-in-one workflow supports modeling, sculpting, UV mapping, texturing, rigging, animation, and rendering within a single application, which reduces the friction of moving assets between programs. The viewport experience, aided by Eevee and Cycles render engines, lets artists preview materials, lighting, and shading in near real time, accelerating iteration. The Python API unlocks customization and automation, letting studios build bespoke tools or pipeline glue without expensive licenses. Blender’s Grease Pencil adds a strong 2D animation workflow within the same suite, making it practical for concept art, storyboarding, and motion design. Add-ons such as Node Wrangler, Bool Tool, and LoopTools extend capabilities without buying extra software. Blender’s documentation and community tutorials cover a spectrum from beginner projects to advanced shading networks. In education, Blender’s accessibility often makes it the standard starting point, helping students learn transferable skills that apply across toolchains. Overall, Blender’s strengths lie in versatility, cost efficiency, and a supportive ecosystem that remains responsive to user needs.
Key features that consistently win favor include the node-based material editor, non-destructive modifiers, sculpting brushes, metaclass-accurate fluid and cloth simulations, and robust import/export support for common formats. Professionals appreciate Blender’s ongoing performance improvements and the ability to adapt the tool to their pipelines via Python scripting and add-ons, which makes it a practical long-term investment for many teams.
wordCount":null}
Common Pain Points and How to Mitigate Them
No software is perfect for every user, and Blender is no exception. A frequent barrier for newcomers is the initial learning curve and some UI inconsistencies compared to longtime industry incumbents. When you’re evaluating is blender worth it, the learning curve matters because it affects how quickly you start producing portfolio-worthy work. Mitigation begins with a structured onboarding plan: customize the startup layout to emphasize the tools you’ll actually use, set up hotkeys, and enable a few essential add-ons that accelerate common tasks. For example, Node Wrangler speeds up shader work, while Bool Tool simplifies boolean operations during hard-surface modeling. The interface benefits from a deliberate, staged approach—tackle modeling first, then shading, then lighting and rendering. Performance can also suffer if scenes are not organized; use collections and naming conventions, optimize texture sizes, and enable industry-standard baking workflows to avoid memory bottlenecks. For artists transitioning from other tools, take advantage of Blender’s import options and reference workflows to keep your assets consistent. Finally, don’t overlook the wealth of free resources and community forums that offer practical, real-world troubleshooting tips. BlendHowTo recommends a curated starter project to practice these techniques and avoid information overload while you build confidence.
wordCount":null}
Getting Started: A Weekend Plan
If you’re asking how to approach is blender worth it and you’re short on time, here’s a concrete weekend plan to get meaningful results. Day 1 focuses on orientation: install Blender, customize the workspace, and complete a simple modeling exercise (a coffee mug or a small prop). Learn navigation (middle mouse button to rotate, scroll to zoom, shift-middle to pan) and experiment with basic modifiers. Day 2 emphasizes materials and lighting: set up UVs, build a basic texture, and create a few materials using Principled BSDF in Eevee. Do a few test renders to understand how different light sources affect mood. Add-on suggestions include Node Wrangler for shading and LoopTools for fast geometry adjustments. Day 3 combines animation basics and a final render: rig a simple character or prop, animate a short action, and render a crisp pass using Eevee or Cycles with denoising. If you’re outside the core Blender community, consider following a structured beginner course to ensure you cover essential concepts without missing critical steps. The goal is not perfection but a demonstrable result you can add to your portfolio. With consistent practice, you’ll become proficient enough to evaluate whether Blender fits your personal or professional workflow.
wordCount":null}
Practical Workflows: From Idea to Render
Effective Blender pipelines start with a clear concept and a minimal viable asset. Begin with a quick concept sketch or reference board, then model the asset using a non-destructive workflow with modifiers and collections. UV unwrapping should be intentional, with a plan for texture sets that can reuse assets across scenes. Shader work benefits from node-based materials, where you separate base color, roughness, metallic, and normal maps to optimize rendering times. For animation, keep a simple rig in the early stages and rely on Blender’s dope sheet and graph editor to refine timing. Rendering strategy matters: for fast previews, Eevee offers near real-time feedback, while Cycles delivers higher realism at the cost of compute time. Post-processing in the compositor can correct color, add bloom, or apply film grain with non-destructive nodes. This kind of end-to-end pipeline demonstrates the practical value of Blender and helps you judge whether the tool supports your creative ambitions. The beauty of Blender is that you can iterate quickly on ideas without leaving the software, which is particularly beneficial for independent creators and small teams.
To maximize your return, establish a repeatable script or addon configuration that loads your default materials, lighting presets, and camera setups for common shot types. This reduces repetition and frees cognitive resources to focus on creativity.
wordCount":null}
Real-World Scenarios: Who Should Use Blender
Blender is well-suited for a broad spectrum of users. Students and hobbyists gain the most immediate value because there’s zero licensing cost and a gentle path from concept to render. Indie game developers and small studios benefit from Blender’s all-in-one workflow and Python API, which support rapid prototyping and automation while keeping software costs predictable. Educational institutions appreciate Blender because it provides a comprehensive curriculum that teaches modeling, shading, animation, and rendering without expensive software licenses. For professionals, Blender can slot into production pipelines as a pre-visualization or asset creation tool, especially in smaller shops with flexible toolchains. Studios that require specialized plugins or deep integration into large pipelines may still choose paid tools for certain tasks, but Blender often serves as a powerful companion, enabling rapid iteration and cost containment. The bottom line: if your projects emphasize experimentation, learning, and portfolio-building, Blender is a compelling choice; if you operate within highly regulated enterprise pipelines, you may supplement Blender with paid software. BlendHowTo’s guidance suggests trying Blender for personal projects first to gauge the fit for your style and pace.
wordCount":null}
Cost, Value, and Total Ownership
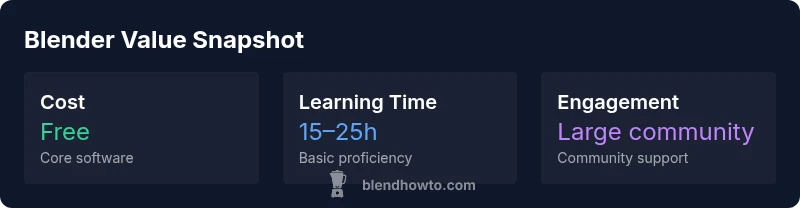
Understanding the value proposition of is blender worth it hinges on total ownership, not just sticker price. Blender’s base software is free, which dramatically reduces upfront costs compared to paid alternatives. Training resources, including official documentation, community tutorials, and structured courses, vary in cost from free to a moderate price tier; many popular beginner courses are low-cost or offer free previews. Hardware considerations matter: even if the software is free, you’ll need a capable workstation—ideally with a dedicated GPU and sufficient RAM—to keep viewport performance smooth and rendering times reasonable. Beyond software and hardware, consider the cost of time. The learning curve means an upfront time investment, but the payoff is a long-term ability to produce and iterate without recurring license fees. For many, the total cost of ownership decreases substantially after the first few projects because the same workflow can be reused across multiple jobs and styles. If you value flexibility, large–scale adaptability, and community-driven tooling, Blender tends to deliver better long-term value than most paid options. BlendHowTo’s perspective remains that is blender worth it for many creators, especially those who want to build a broad skill set without dependency on vendor licensing.
Additionally, the ecosystem of addons and community support translates into practical efficiency gains—allowing you to achieve high-quality results with less time spent re-creating common tasks. When weighing options, map out your typical project types, required plugins, and the likelihood of collaboration across teammates who may already use Blender. The outcome is a clear sense of whether Blender’s free model aligns with your goals and budget.
wordCount":null}
Professional Use-Cases: When to Stick with Paid Tools
For complex, large-scale productions or studios with rigid pipeline constraints, paid toolchains still offer advantages. If your team relies on deep integration with a particular asset management system, proprietary simulation tools, or highly specialized rendering features that have matured only within certain commercial products, you may prefer paid software. Blender remains incredibly capable for concept development, asset creation, and many forms of animation, but in some high-end facilities, the SLAs, support, and certified pipelines that come with commercial software can justify the cost. In scenarios where your clients require a tested, vendor-supported toolchain, or where industry-standard formats and plugins are a prerequisite, paid options may reduce risk and onboarding time for new hires. That said, Blender’s open-source model continues to mature; its Python scripting and API enable tight automation, and its render engines deliver production-grade results for many projects. The decision often reduces to team scale, required certifications, and how much of the pipeline you want to customize. The BlendHowTo team recommends starting with Blender for early-stage concepting and fostering a flexible skillset, then evaluating paid tools if your goals demand enterprise-grade guarantees.
wordCount":null}
Is Blender Worth It for Professionals? When to Consider Paid Tools
Blender’s ongoing evolution makes it a viable option even for professionals, particularly in lean, cash-conscious studios or freelance shops. For professionals exploring is blender worth it, consider the alignment of Blender with your workflow, license-free flexibility, and the ability to rapidly prototype or iterate. In teams with multi-software pipelines, Blender can serve as an efficient pre-visualization and asset creation hub before assets move into more specialized software. However, if you operate in markets where industry-standard certification, long-term support commitments, or specific plugin ecosystems drive the project’s risk profile, paid tools may still be the pragmatic choice. In those cases, a hybrid approach—Blender for initial concepts and a paid tool for final production—often yields the best balance of cost and speed. The key is to identify where Blender adds the most value in your workflow and where paid software’s guarantees would speed up production cycles. BlendHowTo’s verdict supports an adaptive strategy: start with Blender to build capabilities, then selectively augment with paid tools as your project and team demands evolve.
wordCount":null}
Getting Started: Your Starter Project Checklist
- Define your project goals and set a micro-deliverable for the weekend.
- Install Blender from the official site and configure a workspace tailored to your preferred workflow.
- Create a simple object and practice basic modeling, modifiers, and non-destructive editing.
- Learn UVs and basic texturing using a small texture atlas to optimize performance.
- Build a basic lighting setup and render with Eevee to understand how materials respond to light.
- Install essential addons (Node Wrangler, LoopTools, Bool Tool) to speed up common tasks.
- Save incremental versions with meaningful names to avoid losing progress.
- Review your work with a critical eye and plan a second pass to refine geometry and textures.
- Document your process in a short case study for your portfolio.
- Revisit your project after a day or two to iterate on feedback and further improvements.
This checklist aligns with BlendHowTo guidance on starting with Blender efficiently and building a solid portfolio. By focusing on a concrete, time-bound project, you’ll gain tangible progress and a clear signal about whether Blender meets your needs over the next several projects.
wordCount":null}
Quick-start Add-ons and Where They Shine
While Blender ships with a robust feature set, a handful of addons can dramatically accelerate common tasks:
- Node Wrangler: speeds up shader creation and node editing.
- LoopTools: simplifies geometry corrections and enhancements for hard-surface modeling.
- Bool Tool: streamlines boolean operations and subtractions for complex shapes.
- MeasureIt: adds precise on-scene measurement overlays for layout and scale.
- Grease Pencil enhancements: improves 2D-to-3D animation workflows.
These addons are widely used in practice and help bridge gaps between Blender and more specialized tools. The right addons can shave hours off a project and make Blender feel more like a turnkey solution for your personal pipeline. The BlendHowTo team endorses starting with Node Wrangler and LoopTools to establish a strong foundation for shading and geometry work, then expanding as you tackle lighting, animation, and rendering challenges.
wordCount":null}
Final Reflections: Is Blender Worth It? A Balanced View
For many creators, Blender represents a compelling long-term investment due to its zero cost, broad capability, and active development. It allows you to build a diverse skillset that translates across disciplines—from modeling and texturing to animation and rendering. However, the time required to achieve proficiency is real, and the software’s depth means you’ll spend months refining workflows before you consistently hit professional-quality outputs. If your goal is to learn, experiment, or run a small studio with flexible tooling, Blender often offers better value than paid options. If you’re operating within a regulated enterprise pipeline or require highly specialized plugins, you may still need to pair Blender with other tools. In short, is blender worth it? For many hobbyists, students, and indie professionals, the answer is a confident yes—the returns compound as you invest time into mastering the software and integrating into your creative process. BlendHowTo’s assessment underscores Blender’s balanced value proposition for 2026 and beyond, provided you approach it with a plan and patience.
wordCount":null}
Is Blender Worth It: A 360-Degree Summary for 2026
- Blender offers excellent cost-to-value for most 3D workflows.
- The learning curve is non-trivial but manageable with a structured plan.
- It integrates modeling, sculpting, animation, and rendering in one app, reducing tool churn.
- For large studios with strict pipelines, paid tools may still be preferred for support and certification.
- Add-ons and Python scripting extend Blender’s capabilities dramatically.
- Overall, for solo artists and small teams, Blender is a highly compelling investment of time and energy.
wordCount":null}
What's Good
- Zero upfront cost for the core software
- All-in-one toolset for modeling, sculpting, texturing, animation
- Strong community and abundant free learning resources
- Extensible with addons and Python scripting
- Cross-platform and widely adopted in education
The Bad
- Steep learning curve for newcomers
- UI can be uneven and workflow quirks exist compared to some paid tools
- Performance can be hardware-dependent for very large scenes
- Requires time investment to build a polished, professional workflow
Best overall value for beginners and indie projects
Blender provides unmatched cost-to-value for 3D modeling, animation, and rendering. The learning curve is real, but the long-term flexibility and zero licensing costs justify the effort for most solo artists and small studios. For production environments needing certified pipelines, a hybrid approach with paid tools may be optimal.
Frequently Asked Questions
Is Blender worth it for beginners?
Yes. Blender is worth it for beginners who want to learn 3D concepts without paying upfront. Start with a structured course, focus on core workflows (modeling, shading, lighting), and gradually add more advanced topics like animation and scripting.
Yes. Blender is a great starting point for beginners—focus on basics first, then expand your toolkit as you grow.
Do you have to pay for Blender?
No. Blender is free and open-source, with optional paid courses or add-ons you can choose to buy if you want structured guidance.
No—Blender itself is free; you can pay for courses or add-ons if you want, but it isn’t required.
What is the learning curve for Blender?
The curve is moderate to steep, depending on your background. If you’re new to 3D, expect several weeks of steady practice to feel proficient; experienced artists can accelerate by leveraging the Python API and add-ons.
It’s a moderate to steep curve, but you’ll improve quickly with a steady practice plan.
Can Blender handle professional pipelines?
Yes, Blender can fit professional pipelines, especially for pre-visualization, asset creation, and indie production. In larger studios, Blender is often integrated with other tools to cover niche workflows and plugins.
Blender fits many workflows, especially for smaller teams; larger studios may use it alongside paid software.
What are the best add-ons to start with?
Node Wrangler, LoopTools, Bool Tool are widely used for fast shader work and geometry operations. MeasureIt and Grease Pencil enhancements also unlock practical capabilities for layout and animation.
Node Wrangler and LoopTools are must-haves for most Blender users.
Is Blender suitable for animation and rendering?
Blender offers solid animation tools and two strong renderers (Cycles and Eevee). For high-end realism, Cycles is preferred; for quick previews, Eevee often suffices.
Yes—Blender’s animation tools and render engines cover many production needs.
What to Remember
- Start with Blender for zero-cost entry and broad capabilities
- Plan a weekend project to assess fit quickly
- Leverage addons to accelerate common tasks
- Weigh enterprise needs against Blender’s flexible ecosystem
- Invest time in learning Python scripting for long-term efficiency