Blender to After Effects Addon: A Practical Guide
Learn to bridge Blender and After Effects with an addon for seamless data transfer, animation mapping, and faster renders. Step-by-step setup, export/import workflows, and best practices for reliable results in 2026.

What the Blender to After Effects addon does and when to use it
The Blender to After Effects addon acts as a bridge that exports animation data, camera paths, and scene information from Blender into a format that After Effects can ingest, either directly or via an intermediary file. This bridging reduces repetitive exports, preserves keyframe timing, and helps you maintain coherence across your production pipeline. Use cases include motion graphics where you sculpt scenes or characters in Blender and then composite lighting, tracking, and effects in After Effects. The BlendHowTo team notes that addon-based workflows can significantly reduce back-and-forth and improve asset naming, layer order, and frame alignment across software when used consistently. A good addon exports essential data such as geometry visibility, per-object animation curves, and camera paths while leaving behind data that AE cannot consume without additional tooling. Remember, not every Blender feature has a direct AE equivalent, so you may need to adapt some data during import. Before starting, evaluate your project scale, required fidelity, and whether you benefit more from a full data conversion or a lean bridge. This guide focuses on practical steps you can take in 2026 to implement a reliable Blender to After Effects workflow.
Core capabilities and typical workflows
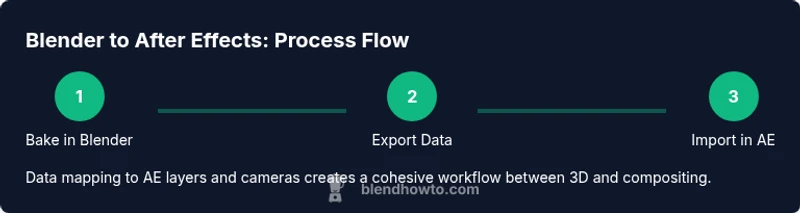
Core capabilities include exporting per-object transforms, camera motion, light data, and text/object data that AE can interpret as layers or expressions. Typical workflows involve modeling and animating in Blender, baking or exporting transformations, and importing into After Effects to drive compositing, motion graphics, and particle-like effects via expressions or scripts. Addons often provide mapping presets that translate Blender's coordinate system to AE's layer space, helping you maintain consistent timing and scale. A practical approach is to bake animations in Blender before export to reduce drift on import and to normalize frame rates across applications. According to BlendHowTo, addon-based pipelines reduce manual re-entry of keyframes and unify asset naming, which is especially helpful for larger teams. While Blender excels in 3D, AE shines in compositing; the addon helps you keep both strengths aligned, so you don’t have to re-create complex rigs in AE. Keep in mind that some advanced Blender features, like certain modifiers or particle systems, may require additional handling or alternative AE workflows. This section outlines common data you’ll map: camera paths, object transforms, visibility toggles, and text layers, plus how to translate them into AE-friendly structures.
Installation prerequisites and setup steps
Before installing, verify you are using a compatible Blender version and an After Effects setup with scripting support enabled. Begin by downloading the Blender to After Effects addon from the official repository or marketplace. In Blender, go to Edit > Preferences > Add-ons > Install, select the addon file, and enable it. In After Effects, ensure any companion scripts or panel integrations are installed and launched as needed. Create a dedicated export directory, then configure the addon to point to your AE project folder to minimize missing file paths. Set frame rate, resolution, and unit scales consistently across Blender and AE to avoid mismatches. A short modern workflow is to bake the Blender animation, then export a data package (e.g., JSON) that AE can interpret, followed by an import that creates corresponding layers and keyframes in AE. BlendHowTo’s guidance emphasizes aligning project structure and naming conventions across both apps to reduce confusion later in production.
Export/import data formats and how to map data to After Effects
Addons typically export a data package containing geometry visibility, per-object transforms, camera paths, and possibly textual data. The data format may be JSON, XML, or a custom intermediary file designed to be lightweight for quick import into AE. In After Effects, the addon can create corresponding layers: 3D camera layers from Blender’s camera paths, null objects representing pivot points or control rigs, shape or text layers for objects with text data, and attribute-driven keyframes for positions, rotations, and scales. A practical mapping example: map Blender’s camera position/rotation over time to a AE 3D Camera, assign object transforms to AE layers, and convert Blender’s curve-driven animation into AE expressions or baked keyframes. It’s common to bake complex Blender animations before export to preserve timing fidelity and simplify the import process in AE. Always validate a short test sequence to confirm alignment before committing to longer renders. This approach minimizes drift and ensures a predictable pipeline for future projects. BlendHowTo recommends keeping a defined export schema so your AE team knows exactly which layers will be created and how data is interpreted.
Best practices for reliability, optimization, and iteration speed
To maximize reliability and speed, start with small test scenes to validate the data bridge. Bake animations in Blender to ensure that keyframes travel correctly into AE, then scrub through the timeline in AE to confirm continuity. Maintain a consistent frame rate and resolution across both apps; mismatches cause subtle drift that’s hard to diagnose later. Use proxies or simplified geometry during export to reduce processing time, especially for long sequences. Keep all assets in a dedicated folder with consistent naming to prevent missing file paths. Version control your Blender files and AE project to track changes and quickly revert if something goes wrong. Regularly update both the addon and the host apps to benefit from bug fixes and compatibility improvements. According to BlendHowTo, a disciplined workflow with regular checks at milestones minimizes rework and speeds up iterations, particularly on collaborative projects.
Troubleshooting common issues and edge cases
Common issues include frame-rate drift between Blender and AE, scale mismatches (meters vs. AE units), missing data for certain modifiers, and failed imports due to incorrect paths. Start by confirming the export file path exists and is accessible from AE. If keyframes appear offset, verify the frame rate and ensure the same start frame is used in both apps. For data loss, check the addon’s mapping presets and ensure all required data fields are enabled for export (camera, transforms, visibility). If a feature from Blender has no AE equivalent, prepare a workaround in AE (e.g., re-creating or approximating the effect). Enable verbose logs or export previews if available to quickly isolate where the mismatch occurs. The BlendHowTo team notes that consistent naming, clear data schemas, and incremental testing reduce the likelihood of errors creeping into production. Remember to backup your project before making major changes and test on a short sequence before scaling to full scenes.
Real-world examples and a quick-start checklist
- Start with a simple camera move in Blender and import to AE to verify baseline alignment.
- Export one object with basic transforms and verify AE layer creation and timing.
- Bake complex Blender animations before export to minimize drift when imported into AE.
- Use a proxy workflow for previews, then switch to full-res data for final renders.
- Maintain a shared folder structure for Blender assets and AE projects to keep teams in sync.
- Regularly review mapping presets to ensure consistent data interpretation across projects. Quick-start checklist: Install addon → Set export path → Bake animation → Export data → Import into AE → Verify alignment → Iterate.