How to Use BlenderKit: Practical Guide for Blender Users
Learn how to use BlenderKit to find, import, and manage assets in Blender. This step-by-step guide covers installation, licensing, searching, importing, applying materials, organizing assets, and advanced tips for efficient workflows.

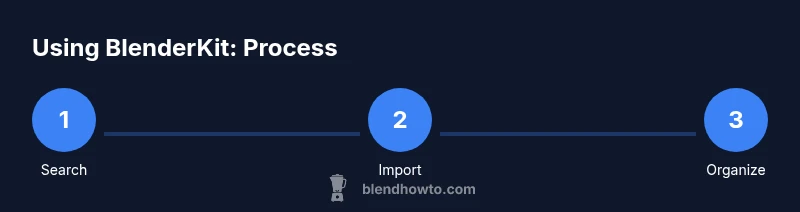
You will learn how to install and activate BlenderKit, search for assets, import them into a scene, and manage shaders and modifiers. This quick guide assumes Blender 3.x or newer and the BlenderKit addon is installed. You’ll discover best practices for filtering results, citing licenses, and keeping assets organized. Follow the steps to speed up your workflow and ensure reproducible results.
Getting started with BlenderKit
BlenderKit is a powerful addon that brings a vast library of assets, materials, and brushes directly into Blender. To begin, ensure you have Blender installed and a reliable internet connection. Then install the BlenderKit addon from Blender’s Preferences: Edit > Preferences > Add-ons > Install, locate the BlenderKit ZIP file (or enable it from the built-in list if it’s already there). Enable the addon and sign in with your BlendHowTo account. This setup unlocks instant access to a curated library and makes it easy to browse assets without leaving Blender. After activation, configure a few basic preferences to tailor BlenderKit to your workflow, such as default asset type, material quality, and search scope. This foundation helps you stay organized as your library grows.
Signing in and configuring your account
Sign in to BlenderKit to unlock personalized results, favorites, and syncing across devices. Create a BlendHowTo account if you don’t already have one, and link it in the BlenderKit preferences. Configure your default search scope (e.g., characters, environments, or materials), enable automatic updates, and choose whether to download textures locally or stream them on demand. These settings influence how quickly assets appear in your panel and how aggressively BlenderKit caches data, which can affect performance on large projects. Regularly review permission prompts to ensure you’re compliant with asset licenses in team workflows.
Browsing assets: search, filters, and results
Use the BlenderKit panel to search for assets by keyword, category, or author. Refine results with filters for license type, price (free or paid), asset type (model, material, brush, etc.), and rating. Sort options can help you surface high-quality assets or recently added items. Hover over assets to preview thumbnails, node setups, and texture maps. Save time by using keyboard shortcuts to cycle through results, and consider saving a few “go-to” assets into a Favorites collection for quick reuse across projects.
Understanding licenses and usage rights
Asset licenses determine how you can use BlenderKit assets in personal vs. commercial work. Look for clear notes about redistribution, modification, and attribution requirements. When uncertain, choose assets with open licenses that align with your project needs or use items labeled for commercial use without attribution. BlendHowTo analysis highlights that consistent licensing checks save time and prevent future rework, especially on client projects. Always document license terms in your project notes to avoid compliance issues later.
Importing assets into Blender
Once you pick an asset, click Import or Add to Scene from the BlenderKit panel. Assets will appear in the 3D viewport with their materials and textures loaded if available. Check the import scale, rotation, and position to match your scene. If an asset includes rigging or animation data, review the animation options and ensure they’re compatible with your scene frame range. For performance, consider importing only the necessary components (mesh, materials, textures) and keep a backup in your project folder.
Applying materials and shaders from BlenderKit
Many BlenderKit assets come with ready-to-use materials. If materials don’t auto-apply, open the Materials tab and assign the asset’s material to the mesh. You can tweak node groups (Principled BSDF, texture maps, roughness) to match your scene’s lighting. For consistent looks across multiple assets, save commonly used material setups as node-group templates and reapply them via the Shader Editor. Remember to manage texture resolutions to balance quality and performance.
Organizing assets with BlenderKit in collections
Create a logical collection structure in Blender to keep imported assets tidy. Add assets to project-specific collections (e.g., Environment, Prop, Character) and use BlenderKit's Favorites or custom tags to speed up future work. Periodically purge unused assets to reduce scene clutter and improve load times. Keeping a clean organizational system helps both solo projects and collaborative teams maintain consistency.
Working with textures, modifiers, and rigging
Textures from BlenderKit may include multiple texture maps (albedo, normal, roughness, metallic). Ensure you’ve connected these maps properly in the Shader Editor. If an asset uses modifiers (Subdivision, Mirror, or Array), review their impact on performance and apply them only when you’re ready to finalize. For rigged assets, verify bone naming, constraints, and skin weights, and adjust animation retargeting if you plan to reuse the asset across different characters.
Performance and workflow tips
Use a mix of high-quality assets for closeups and lower-detail variants for distant objects to optimize performance. Enable asset streaming for textures to reduce RAM usage, especially on large scenes. Leverage BlenderKit’s filtering to avoid downloading heavy assets you won’t use, and cache frequently used textures locally. Regularly save your asset library in a shared location for team projects to maintain consistency across renders.
Common pitfalls and how to avoid them
A common pitfall is importing assets with incompatible licenses or missing textures, which can derail a project. Always verify license terms before reuse and check for texture files—some assets come with color data only. If an asset looks different in your scene, re-check scale, origin, and material assignment. Keep a log of asset sources and version numbers to simplify updates if the asset library changes.
Advanced tips: scripting and automation
For power users, BlenderKit can be integrated with scripts to fetch assets by ID, automatically apply materials, or batch import several items into a scene. Use Blender’s Python API to query BlenderKit endpoints, then automate repetitive tasks (like aligning assets to a grid or assigning a standard material). Always test scripts on a copy of the project first to avoid unintended changes, and consult the official BlenderKit docs for API details and best practices.
Next steps and best practices
Adopt a consistent workflow: install BlenderKit, sign in, search with well-defined keywords, verify licenses, import with correct scale, apply materials, organize in collections, and document asset sources. Regularly review your asset library for quality and relevance, and share best practices with teammates to ensure project consistency. With a disciplined approach, BlenderKit becomes a reliable shortcut for rapid prototyping and polished final renders.
Tools & Materials
- Blender (latest stable)(Ensure it’s updated to a version compatible with BlenderKit)
- BlenderKit add-on (official)(Installed via Edit > Preferences > Add-ons)
- BlendHowTo account(Required for signing in and syncing assets)
- Stable internet connection(Required for asset loading and license checks)
- Project folder structure(Helpful for organizing cached textures and assets)
- Optional: graphics tablet(Speeds up texture painting and adjustments)
Steps
Estimated time: 25-60 minutes
- 1
Install BlenderKit add-on
Open Blender and navigate to Edit > Preferences > Add-ons. If you haven’t installed BlenderKit yet, click Install, locate the BlenderKit ZIP file, and enable the add-on. This step enables access to the asset library directly inside Blender.
Tip: Keep BlenderKit enabled in your startup file for consistent access every time you start Blender. - 2
Sign in and configure basics
Sign in with your BlendHowTo account and adjust default settings such as asset type, texture resolution, and preview quality. These choices tailor results and save time on future sessions.
Tip: Enable auto-sync to keep your favorites consistent across devices. - 3
Open BlenderKit panel and search
Open the BlenderKit panel in the 3D Viewport or the right-side panel. Enter a search term relevant to your project and review previews before selecting an asset to import.
Tip: Use quotes for exact phrases to refine results quickly. - 4
Filter results by license and type
Refine results with filters for license, asset type, and price. Filtering reduces download time and ensures license compatibility for your project.
Tip: Prioritize assets labeled for your intended use (commercial vs. non-commercial). - 5
Import the asset into your scene
Click Import to add the asset to your scene. Verify scale, rotation, and position so it aligns with your existing models and lighting.
Tip: If the asset comes with multiple components, import only what you need to save memory. - 6
Apply and adjust materials
If materials don’t auto-apply, assign the asset’s material manually and tweak nodes as needed to match lighting and color. Save common material tweaks as templates.
Tip: Use a consistent material baseline for all assets to maintain cohesion. - 7
Organize assets in Collections
Create Collections like Environment, Props, and Characters. Move assets into these collections to keep your scene tidy and to simplify rendering workflows.
Tip: Tag favorites for quick retrieval in future projects. - 8
Handle textures and modifiers
Check that textures map correctly and that modifiers (Subdivision, Mirror) behave as expected. Apply modifiers only when you’re ready to finalize.
Tip: Disable heavy modifiers during layout to improve viewport performance. - 9
Performance considerations
Balance texture resolution and asset complexity. Use texture streaming and avoid loading extremely large assets in early layout stages.
Tip: Test on a representative scene to gauge performance before committing to final renders. - 10
License checks and credits
Review license terms for every asset used in a project and document credits in your asset log. This helps prevent compliance issues in client work.
Tip: Keep a running list of asset sources and their licenses in a project notebook.
Frequently Asked Questions
What is BlenderKit and how does it integrate with Blender?
BlenderKit is an addon that provides a library of assets, materials, and brushes directly inside Blender. It integrates as a panel within the Blender interface, enabling you to search, preview, and import assets without leaving Blender.
BlenderKit is an addon with a library of assets you can search and import right in Blender. It lives in a panel you open from Blender to access models, textures, and materials.
Do I need a paid BlenderKit account to access assets?
Some assets are freely accessible, but many require a license or paid access. Always check the license note on each asset before use and choose items that fit your project’s licensing needs.
Some assets are free, while many require a license. Always check the asset’s license before using it in a project.
How do I import an asset into an existing scene?
Select an asset in BlenderKit and click Import. The asset appears in your scene with its materials, ready for positioning and scaling adjustments. Verify textures and lighting after import.
Pick an asset in BlenderKit and import it; adjust its size and materials, then tweak lighting as needed.
Can I organize BlenderKit assets for a team project?
Yes. Use shared collections and a consistent tagging system within BlenderKit to keep assets organized. Document licensing and attribution in a team asset log for compliance.
You can share collections and tagging with your team, and keep a license log for compliance.
What should I do if an asset’s textures don’t load?
Check the asset’s texture maps in the Shader Editor and ensure the paths are valid. Re-download the textures if needed and confirm that you’re using a compatible Blender version.
If textures don’t load, check paths in the Shader Editor and re-download if needed.
Are there best practices for licensing and attribution?
Always review license terms per asset and maintain a credits log in your project notes. Favor assets with permissive licenses for client work and document any modifications made.
Review licenses for each asset and keep a credits log; document any changes you make.
Watch Video
What to Remember
- Install and sign in to BlenderKit for seamless asset access.
- Use filters to quickly find license-compliant assets.
- Import assets with correct scale and materials for faster results.
- Organize assets in collections and favorites for repeat projects.
- Always document licenses and credits to avoid compliance issues.