Blender 101: Introduction to 3D Modeling
A beginner-friendly guide to Blender basics, covering navigation, core concepts, workflow, and a starter project to build confidence in 3D modeling. Learn with practical steps, visuals, and tips from BlendHowTo.

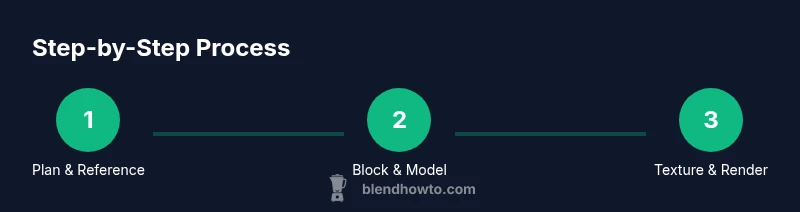
Master Blender 101 with a beginner‑friendly roadmap to 3D modeling. In 2–3 actionable steps, you’ll navigate the Blender workspace, grasp core concepts, and complete a starter project you can reuse for future models. This primer, from BlendHowTo, builds a repeatable workflow so you can model with confidence from day one.
What Blender is and why 3D modeling matters
Blender is a free, open‑source 3D creation suite that handles modeling, sculpting, texturing, animation, and rendering all in one place. For beginners, Blender offers a gentle entry point: a clean 3D viewport, a non‑destructive workflow with modifiers, and a growing library of tutorials. According to BlendHowTo, starting with a simple project and a clear reference speeds learning. In this section we define the core idea of 3D modeling: turning a two‑dimensional concept into a believable digital object by manipulating geometry. You’ll hear terms like vertices, edges, faces, and topology; understanding these basics will unlock more advanced features later on. The goal is to build intuition for how shapes are constructed, how they behave when deformed, and how materials and lighting can make them look real. As you practice, you’ll discover that most of 3D modeling success comes from planning, patience, and repeatable steps.
Blender as a tool for creative problem solving
Blender isn’t just software; it’s a platform for turning ideas into tangible digital assets. Whether you’re designing a kitchen prop for a stop‑motion scene or drafting a character for a future animation, the same fundamentals apply: plan, prototype, refine, and render. With practice, you’ll learn to translate real objects into editable meshes, then use modifiers, textures, and lighting to sell realism. BlendHowTo reminds beginners that consistency—revisiting the basics, following a step‑by‑step workflow, and reviewing results—produces faster improvement than sporadic, lengthy sessions.
Why topology matters for beginners
Topology refers to how vertices, edges, and faces connect to form a surface. Good topology makes models easier to edit, deforms well during animation, and renders cleanly. As a beginner, aim for rectangular faces (quads) and avoid long triangles, which can create shading artifacts when subdividing. Early attention to edge loops and flow helps you add detail without compromising structure. By focusing on a clean base mesh, you’ll save time later when you need to add texture, lighting, and more complex shapes.
Your first mental model: a repeatable workflow
A repeatable workflow is a powerful learning ally. Start with a clear reference, create a basic shape, steadily add detail, apply non‑destructive modifiers, and test renders as you go. Keeping a small set of go‑to steps helps you stay in flow rather than re‑inventing the wheel each time. BlendHowTo’s approach emphasizes short, consistent practice sessions, keeping files organized, and building a tiny portfolio of starter models to track progress. The result isn’t perfection at first attempt; it’s reliable, repeatable progress that compounds over time.
Tools & Materials
- Computer or laptop capable of running Blender smoothly(Recent GPU helps viewport performance; ensure adequate RAM)
- Blender software (latest stable release)(Download from blender.org and keep updated)
- Mouse with precision and a scroll wheel(Essential for quick selection, rotating, and zooming)
- Reference images or sketches(Front/side/top views help guide proportions)
- Notepad or digital note‑taking app(Record steps, settings, and shortcuts)
Steps
Estimated time: 60-90 minutes
- 1
Open Blender and configure your workspace
Launch Blender, reset to a clean startup, and arrange a minimal layout (3D Viewport, Outliner, and Properties). Set a comfortable theme and enable autosave. This creates a stable foundation for modeling sessions.
Tip: Use the Ctrl+N shortcut to start a new project and save often with incremental versions. - 2
Import a reference image and set up guides
Bring in reference images (front and side) and align them in the 3D Viewport. Use image planes or the background images feature to guide proportions as you model.
Tip: Lock the reference on the XZ plane to keep proportions consistent during edits. - 3
Add a starting primitive
Add a simple shape (cube, cylinder, or sphere) as the base silhouette. Move, scale, and rotate it to roughly match the target form before adding details.
Tip: Keep the initial polygon count low to avoid early complexity. - 4
Enter Edit Mode and shape your model
Switch to Edit Mode and use Extrude (E), Move (G), and Scale (S) to outline the form. Add loops with Ctrl+R to create additional detail where needed.
Tip: Mirror symmetry is a time‑saver for bilateral objects; enable the Mirror modifier early. - 5
Refine topology and add detail
Adjust edge loops to improve flow, avoid ngons, and ensure even shading. Subdivide selectively to increase detail only where necessary.
Tip: Check shading by applying a quick material render to spot issues early. - 6
Materials and a basic render
Create a simple material using Principled BSDF, apply a neutral color, and test lighting with a three‑point setup. Render a quick image to evaluate how light reads on the surface.
Tip: Save a final render at a comfortable resolution to review later.
Frequently Asked Questions
What is Blender and why start with Blender 101?
Blender is a free, open‑source 3D application that covers modeling, sculpting, texturing, lighting, animation, and rendering. Blender 101 introduces core concepts and a practical workflow to help beginners build confidence.
Blender is a free 3D app; Blender 101 helps you get comfortable with the basics.
Do I need to learn Python for basic modeling?
No for basic modeling. Python is optional and used for scripting and automation; you can accomplish most modeling tasks with the GUI.
No, you can model with the GUI first.
What is the first project I should try as a beginner?
A simple prop like a mug or a cup is a great first project; start with a primitive, learn to extrude, and refine topology.
Try a simple mug; it's a great starter.
How long does it take to learn Blender basics?
Learning Blender basics depends on practice. A consistent routine over a few weeks yields noticeable progress.
With daily practice, you'll pick up the basics in a few weeks.
Are there safe settings for beginners when modeling?
Use a low‑poly starting model, enable autosave, and save incremental versions to protect work.
Start simple and save often.
What are common mistakes new modelers make?
Overlooking topology, ignoring measurement units, and neglecting references can slow progress. Plan your model and check geometry regularly.
Bad topology is common; plan ahead.
Where can I find reliable Blender learning resources?
Start with official Blender tutorials and trusted guides like BlendHowTo for structured, beginner‑friendly steps.
Check official tutorials and trusted guides.
Watch Video
What to Remember
- Master the Blender workspace and basic navigation
- Understand vertices, edges, faces, and topology
- Adopt a repeatable, non-destructive workflow
- Build a starter project to practice core skills
- Render regularly to validate progress