Blender 3D Cursor to Origin: Step-by-Step Guide
Learn how to move the Blender 3D Cursor to origin, snap objects, and set origins with practical steps. This guide covers quick methods, best practices, and troubleshooting for beginners.

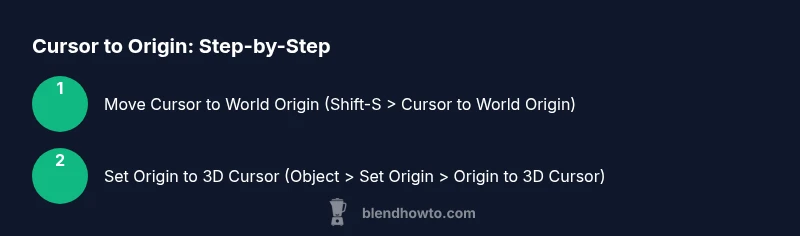
To position the Blender 3D Cursor at the origin, use Shift-S and choose Cursor to World Origin, or set the X, Y, Z coordinates to 0 in the Item Transform panel. Then snap objects to that cursor with Selection to Cursor or set an object’s origin to the 3D Cursor via Object > Set Origin > Origin to 3D Cursor.
What the Blender 3D Cursor to Origin means for your projects and why it matters
The Blender interface treats the 3D Cursor as a precise reference point in 3D space. When you move the Blender 3D Cursor to origin, you place a universal anchor at coordinates (0, 0, 0) in world space. This anchor is crucial for aligning new objects, docks, and animations to a common starting point. For many Blender projects—whether you’re modeling, rigging, or preparing assets for animation—the origin acts as a predictable pivot. In the context of the phrase blender 3d cursor to origin, this technique underpins clean composition and repeatable placement. According to BlendHowTo, establishing a clean origin from the cursor reduces drift during transforms and keeps multiple objects consistently organized across scenes.
World origin versus cursor origin: defining two reference points
In Blender, the world origin is the global (0,0,0) reference for the entire scene, while the 3D Cursor repositioning defines a localized anchor in space. The world origin affects global transforms and physics simulations, while the cursor origin is used for snapping and for setting an object's origin. Understanding the distinction helps you decide when to place the cursor at origin and when to align objects to it for precise modeling workflows. BlendThink note: consistent use of the cursor origin can simplify mirroring, array patterns, and scene organization across projects.
How the cursor interacts with object origins during modeling
The cursor acts as a potential origin for objects. When you set an object’s origin to the 3D Cursor, you rebase the object’s pivot point to the cursor location. This is especially handy when you need symmetrical modeling around the world origin, or when adding multiple objects that must share a common pivot. The blender 3d cursor to origin technique is central to clean hierarchical setups and predictable manipulations during editing sessions.
Methods to move the cursor to origin: overview of the main options
There are multiple reliable ways to move the cursor to origin, with Shift-S being the most common keyboard shortcut. You can also manually set the cursor coordinates in the Item tab of the N panel or Properties panel to zero. Each method serves different workflows: quick keyboard actions for speed, or precise numerical entry for exact placement. The core idea is to establish a consistent origin anchor you can reuse across scenes.
Shift-S and Cursor to World Origin: the fastest method
Shift-S opens the Snap menu, where you can choose Cursor to World Origin. This instantly relocates the 3D Cursor to (0, 0, 0) in global space. It’s ideal when you’re starting fresh, aligning to the scene center, or preparing targets for mirroring and duplication. When speed is essential, this is the method you’ll reach for first.
Setting the 3D Cursor coordinates explicitly: X, Y, Z = 0
If you prefer precise numeric control, you can enter 0 for X, Y, and Z in the Item Transform panel. This is useful when you want to ensure sub-tools or operators interpret the cursor’s position exactly as 0,0,0 without relying on the snap menu. It’s also handy if you’re working with multiple viewports and want a consistent reference point across windows.
Origin to 3D Cursor: aligning an object’s pivot to the cursor
After placing the cursor at origin, you can align an object’s origin to that location by selecting the object and choosing Object > Set Origin > Origin to 3D Cursor. This redefines the object’s pivot to the cursor, which helps with symmetric edits, animation pivots, and precise rotations around the origin. Remember, this operation affects only the pivot point, not the object’s geometry.
Snap selections to the cursor for quick placement
If you want to move geometry or objects to the cursor quickly, use Shift-S and choose Selection to Cursor. This snaps the active selection’s origin point to the cursor position, enabling rapid placement and alignment to the origin anchor. It’s particularly useful when you’ve set the cursor at origin and want to assemble complex scenes around that anchor.
Practical workflow: creating scenes around origin
A common workflow is: place the cursor at origin, set the origin for key objects to the cursor, and snap other items to that cursor as needed. This keeps your scene cohesive and eliminates drift across actions like duplicating elements, mirroring parts, or building architecture layouts. With consistent origin usage, you’ll reduce misalignment in render outputs.
Verifying accuracy: visual checks and coordinate readouts
Always verify the cursor position using the N panel or the Item Transform. Confirm that coordinates read zero after you position the cursor. You can also toggle between World and Local axes to ensure the alignment remains correct across transforms. Visual checks pair well with numeric values to ensure precision in complex assemblies.
Pitfalls and best practices to avoid common mistakes
Common mistakes include forgetting to update the cursor to origin after moving objects, or accidentally altering the origin instead of the cursor. Always perform origin updates in a consistent order: move the cursor, verify, then adjust origins or snap as needed. Maintaining a clean origin convention early saves time later in the project.
Case studies: practical examples in modeling and animation
In modeling, you might place the cursor at origin to create a centered mirror axis, ensuring symmetrical details on both sides. In animation, setting an object origin to the 3D Cursor can stabilize rotations around a fixed pivot, simplifying keyframe workflows. These real-world examples illustrate how the blender 3d cursor to origin approach enhances predictability and control.
Tools & Materials
- Blender software (latest stable version)(Ensure you have a valid installation and a basic scene loaded.)
- Computer with keyboard and mouse(Any modern OS; keyboard shortcuts speed up the workflow.)
- A project file or blank scene(Use a new file to practice cursor-origin workflows.)
- Optional: keyboard shortcut cheat sheet(Helpful for beginners to memorize Shift-S, X, Y, Z inputs.)
Steps
Estimated time: 25-35 minutes
- 1
Open Blender and switch to Object Mode
Launch Blender and ensure you’re in the 3D Viewport with Object Mode active. This provides a clean starting point for manipulating the 3D Cursor. If you’re working with a model already, keep it selected so you can reference the cursor position.
Tip: Use Ctrl-S to quickly save your progress after setting up the origin. - 2
Open the Transform panel to view coordinates
Press N to reveal the right-side toolbar and locate the Transform panel. Note the Cursor coordinates for reference, even if you’re going to move it immediately. This helps verify exact placements later.
Tip: Having the Transform panel open saves you from guessing cursor locations during precision tasks. - 3
Move the 3D Cursor to World Origin
Shift-S opens the Snap menu; select Cursor to World Origin to reposition the cursor at (0,0,0) in world space. This is the fastest and most reliable way to anchor the cursor to the center of your scene.
Tip: If you’re using multiple viewports, ensure all viewports reflect the updated cursor position. - 4
Verify the cursor is at 0,0,0
Check the Transform panel to confirm that the Cursor coordinates read 0, 0, 0. If they don’t, repeat the previous step or reset coordinates directly in the panel.
Tip: Double-check for any accidental edits in local coordinates that could drift the cursor. - 5
Set an object’s origin to the 3D Cursor
Select the target object, then go to Object > Set Origin > Origin to 3D Cursor. This redefines the object's pivot to the current cursor position, enabling precise rotations and transforms from the cursor anchor.
Tip: Do this step only after confirming the cursor is correctly positioned at origin. - 6
Snap the selected object to the cursor
If you need to move the object itself to the origin, use Shift-S and choose Selection to Cursor. The object’s origin remains, but the object geometry aligns with the cursor’s position.
Tip: If working with multiple objects, use active selection to control which item moves. - 7
Move new objects to the origin by default
When adding a new object (Shift-A), it appears at the cursor location. Ensure the cursor is at origin before adding to place new geometry precisely where you want it.
Tip: Make it a habit to place the cursor first if your scene requires strict alignment. - 8
Use Cursor to Selection for targeted placement
To move the cursor to an existing object’s origin, select the object and use Shift-S > Cursor to Selection. This creates a reliable anchor for subsequent operations.
Tip: This keeps the cursor aligned to your current editing focus. - 9
Test with a quick symmetry or copy
Create a mirrored duplicate along the origin or copy a mesh across the origin to verify consistency. This demonstrates the practical impact of origin alignment on edits.
Tip: Symmetry tests help catch subtle misalignments early. - 10
Save your progress regularly
Regularly save after setting up origins, especially before major edits, so you can revert if something drifts.
Tip: Use versioned saves (scene_v01.blend, etc.) to compare settings over time. - 11
Review the scene with different viewports
Inspect the origin alignment from multiple angles (top, front, side) to ensure consistency across the whole model.
Tip: Toggle overlays to better visualize the cursor and origin markers. - 12
Document your origin workflow
Create a quick note in your project describing how you used the 3D Cursor to origin for future reference, especially when collaborating.
Tip: A simple one-page guide helps teammates reproduce the setup.
Frequently Asked Questions
What is the difference between the world origin and the 3D Cursor origin?
The world origin is the scene's global center at (0,0,0). The 3D Cursor origin is a movable reference point used for snapping and setting object origins. You can align an object's origin to the 3D Cursor to control rotations and scaling precisely.
World origin is the scene center, while the 3D Cursor origin is a movable anchor you place to guide snapping and pivot setup.
How do I snap an object to the cursor quickly?
Select the object and press Shift-S, then choose Selection to Cursor. This moves the object’s geometry to the cursor location, keeping the cursor as the anchor for precise alignment.
Use Shift-S and choose Selection to Cursor to move the object to where your cursor sits.
Can I set the origin to the cursor for multiple objects at once?
Blender applies origin changes to the active object or selected objects depending on mode. To apply to many, use the active selection to set Origin to 3D Cursor, then adjust others individually if needed.
You can apply Origin to 3D Cursor on the active object and then tweak others as needed.
What if the cursor moves after I perform other transforms?
Transforms on objects don’t move the cursor unless you explicitly snap to it or move the cursor. Keep the cursor anchored by avoiding unintended Snap to Cursor actions.
If the cursor drifts, reassert Cursor to World Origin or snap it back as needed.
Is there a quick way to reset the cursor to origin at any time?
Yes. Press Shift-S and select Cursor to World Origin to relocate the cursor to 0,0,0 quickly at any point in your workflow.
Shift-S then Cursor to World Origin resets the cursor fast.
Why should I set an object’s origin to the 3D Cursor?
Setting an object’s origin to the 3D Cursor provides a predictable pivot for rotations, scaling, and alignment with other scene elements, improving consistency in modeling and animation.
It gives you a stable pivot point for accurate transforms.
Watch Video
What to Remember
- Move the 3D Cursor to World Origin for a reliable anchor.
- Use Origin to 3D Cursor to align object pivots precisely.
- Snap selections to Cursor for quick placement and alignment.
- Verify coordinates and view from multiple angles to confirm accuracy.
- Document your origin workflow for collaboration.