Blender for Pureed Diet: A Practical Guide
Learn how to pick and use a blender for pureed diet, achieve smooth textures, ensure safety, and store leftovers with practical tips for everyday meals.

You will learn how to select and use a blender for pureed diet to achieve smooth, safe textures while preserving nutrition. This guide covers texture goals, essential features, safe ingredient handling, step-by-step blending, and storage tips. You’ll finish with practical meal ideas and a reliable routine you can trust. Whether you’re managing allergies, swallowing difficulties, or simply simplifying meal prep, this approach keeps meals appetizing and consistent.
Understanding Texture, Safety, and Nutrition for a Blender for Pureed Diet
In the world of home cooking and gentle-eating needs, the blender for pureed diet becomes a versatile ally. The goal is to produce smooth, swallowable textures without sacrificing nutrition or flavor. That means balancing mechanical power, blade design, and the type of blender container. It also means paying attention to food safety: washing, cooking, and cooling ingredients appropriately before blending.
When you design a blended meal, think about texture first. Some people require ultra-smooth purées, while others may benefit from a slightly thicker, spoonable consistency. The blender for pureed diet should offer variable speeds, pulse function, and an optional tamper or paddle to help push ingredients toward the blades without overheating. The BlendHowTo team notes that texture control is more important than sheer speed; a lower, steadier blend often yields more predictable results.
Nutrition is not simply a flavor feature; it depends on ingredient choice, retention during blending, and portion size. Gentle heating can aid digestion for many users, but overheating can degrade heat-sensitive nutrients or create a scalding texture. BlendHowTo analysis shows that consistent blending routines reduce waste and improve texture reliability across households. The blender for pureed diet should be compatible with your favorite vegetables, fruits, and fortified foods, so you can build meals that meet dietary goals without sacrificing taste.
Now, for many households, safety is the first priority. Always wash produce thoroughly, remove seeds or pits where necessary, and cool hot ingredients before blending. Start with softer ingredients, and gradually introduce tougher ones to prevent tension on the blades and motor. By combining thoughtful preparation with controlled blending, you ensure reliable, pleasant results every time.
-install-space
Tools & Materials
- Blender with variable speed control(600-1200 W recommended; ensure a sturdy pitcher and a safety interlock)
- Wide-mouth blender pitcher(Prefer BPA-free, dishwasher-safe; makes loading easier)
- Tamper or spatula(Helps push ingredients toward blades without overheating)
- Sharp chef's knife(For precise chopping of tough pieces and seeds)
- Cutting board(Non-slip surface and ample space for prep)
- Liquid options (water, broth, or dairy-free alternatives)(Used to adjust thickness and mouthfeel)
- Measuring cups/spoons(Helpful for portioning ingredients, optional)
- Heat-resistant gloves(Safety when handling hot ingredients or steam)
Steps
Estimated time: 30-45 minutes
- 1
Gather ingredients and tools
Collect all ingredients and the blender setup before you start to prevent mid-process interruptions. Having everything within reach reduces temperature shifts and keeps your workflow smooth. This is the foundation for a reliable blender for pureed diet routine.
Tip: Lay out items in order of use so you don’t overlooking anything. - 2
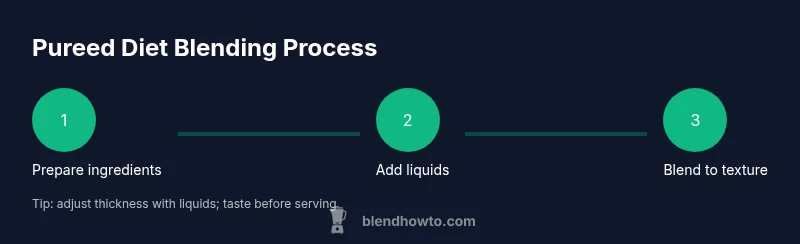
Prep ingredients
Wash, peel, and chop produce into uniform pieces. Remove pits or seeds when required, and pre-cook certain vegetables to ease the blending process. Uniform pieces help the blades work efficiently and produce a consistent puree.
Tip: Keep pieces roughly the same size for even blending. - 3
Add liquids first
Pour in a base of liquids to create a smooth starting point and prevent dry loading. The exact amount depends on your texture goals; start with less and add more later as needed.
Tip: Starting with liquid reduces motor strain and helps control texture. - 4
Start blending on low, then raise speed
Begin at a low setting to minimize splatter, then gradually increase speed and use a brief pulse to test texture. Monitor for warmth or noise that indicates strain.
Tip: If it stalls, pause, open the lid, and redistribute contents with a spatula. - 5
Check texture and adjust
Stop to assess texture. If it’s too thick, add more liquid and blend briefly. If it’s too thin, blend longer with fewer pulses or add more solid ingredients.
Tip: Small adjustments prevent overprocessing. - 6
Taste and finish
Taste the puree and adjust seasoning, acidity, or sweetness as needed. If you’re serving hot, ensure the puree is safely reheated to a safe temperature before serving.
Tip: Flavors often come alive after a brief rest; taste again after seasoning. - 7
Store or serve
Serve immediately or cool quickly and store in airtight containers. Label portions with date and contents to keep track of freshness and nutrition.
Tip: Use transparent containers to monitor color and texture during storage.
Frequently Asked Questions
What is the best blender for a pureed diet?
A blender with a strong motor, sharp blades, and a heat-resistant, durable pitcher is ideal. Look for variable speeds, a pulse function, and a tamper to help manage thick blends without overheating.
A strong blender with adjustable speeds and a tamper works best for pureed diets.
How thick should a puree be for swallowing safety?
Texture should be spoonable and easy to control. Start with a medium thickness, adjust with liquids, and test with the individual’s swallowing abilities.
Aim for a spoonable consistency you can control with a single bite.
Can I blend raw vegetables for pureed meals?
Yes, many raw vegetables blend well, but you may need more liquid or pre-softening. For tougher vegetables, steam or roast briefly to soften before blending.
Raw veggies can work, but softer textures help with smoother results.
How long can purees be stored safely?
Store in airtight containers in the refrigerator for up to 3-4 days. For longer storage, freeze portions and label with date.
Store in the fridge for a few days or freeze for longer use.
What safety concerns exist for hot purees?
Hot purees can cause burns and steam burns. Vent the lid, blend in small batches if needed, and reheat evenly to a safe temperature before serving.
Be careful with hot blends and always vent the lid.
Are high-powered blenders necessary for all purees?
Not always. For most home users, a mid-range blender with good blades and a tamper will suffice, especially when you adjust texture with liquids and pre-soften ingredients.
A strong blender helps, but you can achieve good results with careful technique and texture control.
Watch Video
What to Remember
- Select a blender with adequate power and durable blades.
- Define target texture before blending for consistency.
- Prepare ingredients thoroughly and wash to ensure safety.
- Blend in stages and test texture; adjust with liquids as needed.
- Store purees properly to preserve nutrition and flavor.