How to Apply Scale in Blender: A Step-by-Step Guide
Learn how to apply scale in Blender to lock object dimensions, prevent modifier issues, and ensure clean exports. This step-by-step guide covers Object vs Edit mode, common pitfalls, and practical workflows for characters, props, and architectural models.

In this guide, you will learn how to apply scale in Blender to objects, meshes, and groups so transformations don’t distort geometry or modifiers. You’ll cover Object and Edit modes, when to apply scale, and how it affects parenting, modifiers, and exporting. This practical method reduces surprises in workflows and exports. See the full steps below.
What applying scale means in Blender
Applying scale in Blender records the current size of an object as its new base size, while leaving the object's visual dimensions unchanged. In practice, Blender stores the scale as a separate 3D vector (X, Y, Z) and then resets those values to 1.0 for all axes. This matters because many operations—texturing, modifiers, physics simulations, and exporting—rely on the internal scale being 1.0. If an object has been scaled up or down and you perform a boolean operation, a modifier, or export, you may encounter unexpected results or distortions. The BlendHowTo team emphasizes that applying scale is not about resizing again; it’s about baking the current size into the data so subsequent actions behave predictably. When you apply scale, you keep the visual size the same, but the underlying transform values change, which helps ensure consistent shading, modifier influence, and export compatibility. In short: applying scale stabilizes the model for downstream work such as UV mapping, applying modifiers, or exporting to game engines. This distinction between appearance and data is fundamental for clean modeling workflows. According to BlendHowTo, adopting disciplined scale management early in a project reduces debugging time and helps maintain consistent results across software pipelines.
Why Blender uses an explicit scale state
Blender separates the visual transformation from the underlying data so that modifiers, modifiers’ fit to geometry, textures, and physics simulations can operate on a predictable data representation. When you resize an object visually, you are changing its transform matrix, not the stored mesh data. Applying scale copies the current transform into the mesh data and resets the scale to 1, ensuring that future operations work from a standard baseline. This makes later steps—like UV unwrapping, texture painting, and exporting to engines—much more reliable. It also prevents non-uniform scale from compounding errors in simulations or instances. For anyone who models for multiple targets (game engines, animation pipelines, or 3D printing), this is a foundational habit that saves time and prevents subtle errors that are hard to trace later in the workflow.
When you should apply scale during a project
There are several common triggers to apply scale: after you’ve finished resizing an object for fit, before you start UV mapping, before you set up a texture or material that relies on stable coordinates, and prior to exporting to another platform. If you scale an object after adding modifiers like Mirror or Array, applying scale helps ensure the modifier geometry remains consistent. If you copy or instance objects, applying scale helps maintain consistent world space size across copies. The BlendHowTo team recommends building scale discipline into the early stages of modeling to avoid chasing scale inconsistencies later. Remember, applying scale is about stabilizing data, not changing how things look in the viewport.
Step-by-step overview: core concepts and terminology
To master applying scale, you must distinguish between object-level and mesh-level operations, understand how modifiers react to scale, and know where to look for scale data in the interface. Object Mode applies to the entire object; Edit Mode affects the mesh data itself. When you apply scale in Object Mode, you bake the current dimensions into the object’s data and reset the scale values to 1.0. In Edit Mode, applying scale bakes the vertex coordinates as they currently exist. The key is to decide which level you need for your task—texture mapping, modifier setup, or export preparation—before applying scale. This section builds the mental model you’ll use throughout the rest of the guide.
How scale interacts with modifiers and parenting
Modifiers rely on a predictable base size. If you resize an object with the Scale tool and then apply scale, modifiers like Subdivision, Boolean, or Array behave consistently because they receive mesh data that matches the visual dimensions. Parenting relationships can also be affected if scale is inconsistent among parent and child objects—applying scale to the parent helps keep children aligned. When dealing with constraints or drivers, ensure the scale state is consistent across all related objects. If you keep non-uniform scale on an object, some modifiers or textures may stretch, skew, or align incorrectly after export. Applying scale is a preventative measure that keeps downstream steps predictable and repeatable.
Practical workflow for characters and hard-surface models
For character rigs, apply scale after major adjustments to the base mesh, then bind or parent to a skeleton. For hard-surface models such as buildings or vehicles, apply scale after final dimension checks and before UV mapping or texturing. In both cases, verify that the export target expects unit scale and that the importer will interpret scale consistently. If you work with multiple assets, consider applying scale to each object before grouping or instancing to avoid propagating scale offsets through the scene. This approach reduces surprises during animation, texturing, and engine integration. The core rule is simple: apply scale when your current size is final and you need a stable data representation for the next stage of production.
Common pitfalls and how to avoid them
Key pitfalls include applying scale only to part of a complex object, forgetting to apply to child objects, and assuming textures will auto-adjust after scaling. Always check the scale state in the N-panel (Item tab) and in the Outliner; ensure all related objects share consistent scale states if they are grouped or instanced. Before exporting to a game engine, double-check that the target platform’s unit scale matches Blender’s unit system. If you detect subtle texture stretching or shading anomalies after an operation, revisit scale and re-apply if necessary. Finally, keep backups—one scale state can be revisited with a few clicks and saves time when multiple iterations are needed.
Tips for beginners: speed up the habit of applying scale
- Create a quick-access shortcut or a small script to apply scale on demand.
- Use a clear naming convention to indicate which objects have had scale applied.
- Regularly save versions before major edits to minimize risk when experimenting with scale changes.
- After applying scale, re-check lighting and shadows, since geometry data has changed its baseline.
- Practice with a mix of objects (spheres, boxes, organic shapes) to see how different geometries respond to scale changes.
Tools & Materials
- Blender (latest stable version)(Download from blender.org and keep up to date with stable releases)
- Computer with adequate RAM(At least 8 GB RAM; faster GPU improves viewport performance)
- Mouse with scroll wheel(Helpful for zooming and viewport navigation)
- Internet connection(For updates, reference materials, and assets)
Steps
Estimated time: 40-60 minutes
- 1
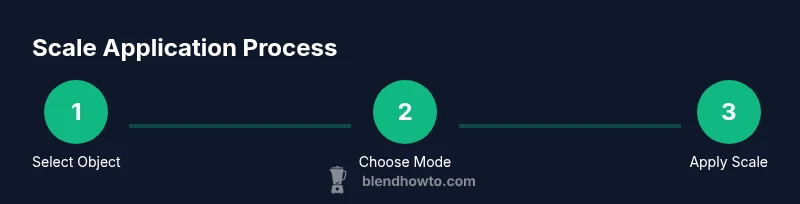
Open Blender and select the target object
Launch Blender and click the object you want to work with so it is highlighted in orange. Confirm you are in Object Mode if you plan to apply scale to the entire object, or switch to Edit Mode if you intend to adjust the mesh data directly. This initial selection ensures that subsequent steps affect the correct item. (Visual cue: highlighted outline around the object.)
Tip: Tip: Use the Outliner to confirm exactly which object is active before applying scale. - 2
Decide where you’ll apply the scale
Determine whether you need Object Mode for the whole object or Edit Mode to bake the mesh data. Object Mode is best for scene-wide adjustments; Edit Mode is ideal when you require precise vertex-level changes to the mesh. The choice affects whether you bake the current transform to the data or adjust geometry directly.
Tip: Tip: If unsure, start in Object Mode and switch to Edit Mode later if needed. - 3
Apply the scale using Ctrl-A
In Object Mode, press Ctrl-A and choose Apply Scale. Blender will bake the current size into the data and reset the Scale values to 1.0 on all axes. This preserves the visible size while stabilizing the object’s data for modifiers, physics, and export.
Tip: Tip: If you have non-uniform scale across axes, consider applying in smaller groups to observe effects step-by-step. - 4
Check modifiers and dependent systems
After applying scale, review all active modifiers to ensure they still generate expected geometry. Some modifiers rely on the mesh data's baseline state; applying scale helps prevent unexpected deformations. Also verify parenting relationships and any constraints attached to the object.
Tip: Tip: Re-run any Bake or Simulation steps that reference object dimensions after applying scale. - 5
Validate the result in multiple modes
Switch to Edit Mode to confirm the mesh looks correct, then return to Object Mode to recheck the overall size. If you rely on UV mapping, texture coordinates, or shading, re-open those workflows to ensure there is no stretching or misalignment after applying scale.
Tip: Tip: Do a quick render test to catch shading or texture issues early. - 6
Document and save your progress
Save a labeled version of the project after applying scale, and consider adding a note in the file about the exact scale state. This helps teammates or future you remember the baseline that the scene uses for export or further edits.
Tip: Tip: Use incremental saves (e.g., scene_v2.blend) to maintain a history of changes.
Frequently Asked Questions
What does applying scale do in Blender?
Applying scale bakes the current size into the object’s data and resets the scale to 1.0, giving you a stable baseline for textures, modifiers, and export. It does not visually resize the object; it just changes how Blender stores the size information.
Applying scale bakes the size into the data, resetting the scale to one, which gives you a stable baseline for textures and modifiers.
Will applying scale affect animation data?
Applying scale can affect animation if the animation depends on the object's scale or if drivers reference the scale. In most cases, applying scale prevents misalignment between visual size and animation data by syncing the data baseline.
It can affect animations tied to scale, so review dependent actions after applying scale.
Can I apply scale to multiple objects at once?
Yes. Select all objects in Object Mode and use Ctrl-A > Apply Scale to bake the current sizes into each object’s data. Check each object to ensure there are no unintended changes in modifiers or parenting.
You can apply scale to several objects together, but verify each object's modifiers afterward.
Do I need to apply scale before exporting to game engines?
Applying scale before exporting is recommended for consistent unit interpretation across engines. Always verify the engine’s import settings and unit scale to ensure the object retains its intended size.
Applying scale helps exporters read the object size consistently.
What is the difference between applying scale and simply resizing?
Resizing changes the transform values but not the mesh data. Applying scale bakes the current size into the mesh data and resets the scale to 1.0, ensuring future operations use a consistent baseline.
Resizing changes how the size looks; applying scale changes the data behind the size.
Is there a shortcut to quick-apply scale?
The common shortcut is Ctrl-A followed by Apply Scale in Object Mode. For mesh-level data in Edit Mode, use the same command to bake the current vertex positions into the mesh data.
Use Ctrl-A, then Apply Scale to bake the size into data.
What should I check after applying scale?
Verify normals, UVs, texture coordinates, and modifier results. Recalculate normals if shading looks odd, and ensure the object’s size matches expectations in both viewport and render previews.
Check normals, UVs, and modifiers to ensure everything still lines up.
Watch Video
What to Remember
- Apply scale to lock dimensions and stabilize data
- Use Object Mode for whole-object scaling, Edit Mode for mesh data
- Always check modifiers after applying scale
- Verify textures and UVs post-apply
- Document scale state with a clear filename and notes