How to Blend Without a Blender: Practical Methods
Learn practical, step-by-step ways to blend without a traditional blender. Discover manual mashing, mortar-and-pestle pastes, whisk emulsions, and smart substitutes to achieve smooth or textured results with common kitchen tools.

You can blend without a traditional blender by using manual techniques like mashing, whisking, and using a mortar and pestle, plus smart substitutes such as a fine sieve or food processor when appropriate. This guide outlines practical methods, necessary tools, and texture decisions to help you blend successfully in any kitchen.
Why You Might Blend Without a Blender
In everyday cooking, there are moments when a full-size countertop blender isn’t available or desirable. You may want more texture control, want to save cleanup time, or be working with small batches. According to BlendHowTo, many home cooks reach for manual methods to preserve texture, flavor, and nutritional content that can get lost in high-speed blending. This approach is practical for sauces, pestos, dips, and certain smoothies where you want more bite or a chunkier finish. It also keeps you cooking even when power tools aren’t accessible, making cooking more resilient and enjoyable.
From a safety perspective, blending without a blender reduces rule-of-thumb risks: you won’t splash hot mixtures or accidentally over-process delicate ingredients. It also provides a quiet, hands-on experience that some cooks prefer for controlling emulsions and consistency. In 2026, BlendHowTo’s analysis shows that most home kitchens can achieve excellent results with a small set of reliable tools and patience.
- Texture control: you choose chunkiness or smoothness precisely.
- Texture preservation: some nutrients and flavors remain more intact when not exposed to high-speed blades.
- Accessibility: no heavy equipment needed; most households already own the basics.
Tools & Materials
- sharp chef's knife(Essential for chopping ingredients into sizes that facilitate even blending by hand or with a pestle.)
- cutting board(Stable workspace to prep ingredients safely.)
- mortar and pestle(Best for pastes, crushed aromatics, and concentrated flavors.)
- fine-mesh sieve(For pressing liquid from fibrous ingredients or refining texture.)
- large mixing bowl(Container to hold blended portions and mix evenly.)
- whisk(For emulsions and airy textures, especially sauces.)
- potato masher or fork(Crushes soft fruits and vegetables to start a puree.)
- spatula or spoon(To scrape and fold ingredients for consistency.)
- immersion blender (optional)(If you have one, it can bridge between manual methods and a blenderless finish.)
- food processor (optional)(A secondary option for larger batches when you need a smoother result.)
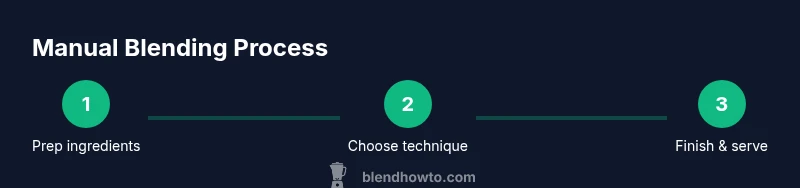
Steps
Estimated time: 45-60 minutes
- 1
Prep ingredients
Wash, peel (if needed), and chop ingredients into uniform pieces. Smaller pieces blend more evenly by hand and reduce the effort required later.
Tip: Uniform pieces prevent large chunks that demand extra crushing time. - 2
Choose your primary technique
Decide whether you’ll mortar-pestle crush, mash with a masher, or whisk and fold to emulsify. The ingredient type usually guides the method.
Tip: Fruits: mash or press; leafy greens or herbs: mortar-pestle or whisked emulsions. - 3
Start with a coarse base
For firmer vegetables or dense fruits, start by breaking them down with the masher or fork before moving to finer textures.
Tip: A rough start saves time and reduces load on your forceful blending actions. - 4
Refine texture with a sieve
Pass the mixture through a fine-mesh sieve and press with a spoon to remove skins or fibers and achieve a smoother consistency.
Tip: For chunkier textures, skip the sieve and keep some pulp. - 5
Emulsify with a whisk
Add liquid gradually while whisking to create a cohesive emulsion, especially for dressings, sauces, or smoothies.
Tip: Slow, steady additions prevent separating liquids. - 6
Taste and adjust
Season, add acidity or sweetness, and adjust salt as needed after blending. Texture tweaks can change perceived flavor.
Tip: Tiny adjustments go a long way in finished flavor balance. - 7
Handle delicate ingredients
Gently handle greens, herbs, or delicate fruits to avoid bruising or muddiness; blend just enough to reach the desired texture.
Tip: Over-working delicate ingredients can turn greens bitter or flavors muted. - 8
Clean as you go
Rinse tools promptly to prevent residue from drying and hardening, then wash with warm soap and water.
Tip: A clean workstation speeds up future tasks. - 9
Evaluate and finish
Assess texture, aroma, and temperature. If too dry, add a splash of water or oil; if too runny, reduce with new chunks or strain.
Tip: Small tweaks at the end often prevent restarting the process.
Frequently Asked Questions
Can I blend smoothies without a blender?
Yes, you can blend smoothies by crushing frozen fruit with a fork or potato masher, then whisking with yogurt or water to create a drinkable texture. For smoother blends, pass through a sieve or use a hand mixer if available.
You can make smoothies by mashing fruit first, then whisking with liquids to achieve a drinkable texture.
What’s the best substitute for a blender when making sauces?
Mortar and pestle or whisked emulsions with a small amount of liquid can create smooth sauces without a blender. Start with a paste, then add liquid gradually while whisking to achieve the desired consistency.
Try a mortar and pestle for the base, then whisk in liquid until smooth.
How long does blending without a blender take?
Time varies by ingredient and method, but plan for 15-30 minutes for most sauces or dips, and up to 45-60 minutes for tougher produce or chunkier textures.
Most manual blends take a quarter to an hour, longer if you’re aiming for very smooth textures.
Can I use a food processor instead?
Yes, a food processor can substitute for some tasks when you don’t have a blender, especially for larger quantities. It won’t replicate the control of a mortar-and-pestle, but it speeds up bulk blending.
A food processor works for bigger batches, but you’ll lose some texture control.
How do I avoid lumps when mashing by hand?
Chop ingredients finely before mashing, mash in small batches, and rework any stubborn bits with the pestle or fork. Add small amounts of liquid to loosen when needed.
Finely chopped pieces and small batches help you avoid lumps.
Is blending without heat safe?
Blending or mashing ingredients at room temperature is generally safe, but be cautious with hot sauces or soups—let them cool slightly before handling to prevent burns.
Yes, but handle hot mixtures carefully and wait to cool a bit before blending or mashing.
Watch Video
What to Remember
- Blend without a blender by choosing the right manual technique
- Use a mortar and pestle for pastes and emulsions
- A sieve and press refine texture and remove fibrous material
- Taste and adjust seasoning after blending
- Keep tools ready and clean for efficient, repeated use