How to Make a Smoothie Without a Blender: Practical Guide
Learn blender-free methods to craft creamy smoothies with simple tools and common ingredients. This step-by-step guide covers technique, texture, safety tips, and practical variations for delicious results.

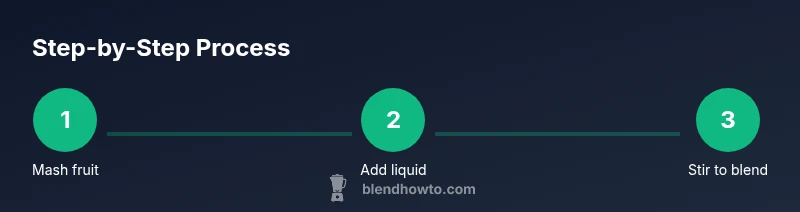
You can make a smoothie without a blender by using a jar or bowl to mash ingredients, then stir or whisk until smooth, and seal and shake to finish. This method uses common kitchen tools and yields a thick, drinkable puree. According to BlendHowTo, start with soft fruit, add liquid, then adjust with time and texture.
Why you might want to make a smoothie without a blender
People often ask how do you make a smoothie without a blender, whether traveling, camping, or when your appliance is out of reach. Blender-free methods empower you to enjoy fruit and dairy textures with simple tools. In this section we explain why this approach can be practical, how texture is achieved with manual mixing, and when to choose this method over options that rely on electricity.
According to BlendHowTo, blender-free smoothies rely on breaking down fruit into mashable pieces early, then combining with liquids to form a cohesive drink. The idea is not to achieve a perfectly smooth purée every time, but to reach a balanced texture that satisfies as a quick breakfast, post-workout snack, or a refreshing afternoon treat.
The BlendHowTo Team also highlights that practice matters: the more you mash and mix, the smoother the result, even without a motor. If you’re wondering how do you make a smoothie without a blender, this approach emphasizes tactile control and quick results for busy mornings.
Essential tools and ingredients
To pull off blender-free smoothies, assemble a few simple tools and ingredients. This keeps the process quick and flexible, whether you’re at home or on the go.
Tools: A wide-mouth mason jar or tall cup with a tight lid; a sturdy fork or whisk; a spoon for stirring; a fine mesh strainer if you want extra-smooth texture.
Ingredients: Ripe or frozen fruit, a liquid (water, milk, yogurt, or plant-based alternative), and optional add-ins like oats, peanut butter, seeds, or spices. The right balance of fruit and liquid will determine thickness without needing a machine.
Texture and outcomes without a blender
Blender-free smoothies rely on careful mashing and steady mixing to create a drinkable texture. You’ll want to break down fruit into smaller pieces, then gradually introduce liquid while stirring or whisking. For thicker textures, use less liquid or add a few gentle mashes; for thinner textures, add more liquid and give it another stir. The goal is a balance that feels smooth enough to sip but still satisfying without a true purée. As you experiment, you’ll notice that overripe fruit blends more easily, and warmer liquids can help with blending by hand. If you’re wondering how do you make a smoothie without a blender, this method keeps things approachable and fast for a busy day.
Variations and flavor boosters
Even without a blender, you can craft a wide variety of smoothies. Try adding yogurt or plant-based alternatives for creaminess, oats for body, nut butters for richness, and a pinch of cinnamon or vanilla for depth. Fresh herbs like mint or basil can brighten the flavor, while a splash of citrus juice can sharpen it. By rotating ingredients, you’ll discover dozens of blender-free possibilities that mimic your favorite café drinks or breakfast bowls.
Safety, cleanup, and best practices
Safety matters when mashing ingredients by hand. Wash fruit thoroughly and handle knives carefully when cutting into pieces. Use a stable surface and keep the jar upright to avoid spills. After you’re done, rinse the jar and utensils promptly to prevent sticky residue. If you’re using dairy or yogurt, refrigerate leftovers promptly and don’t store in the jar for long. A quick wipe-down followed by a thorough wash keeps your blender-free kit ready for next time.
Common mistakes and quick fixes
Common missteps include using fruit that’s too large to mash, adding too much liquid too early, or not giving the mixture enough time to rest before serving. If you end up with chunks, give the mixture a few extra stirs and let it sit for a minute; if it’s too thick, add a splash of liquid gradually and stir again. Remember: texture improves with practice, and small adjustments can yield big differences.
Tools & Materials
- Mason jar or tall cup with lid(Wide-mouth preferred for easier access)
- Fork or whisk(Choose sturdy tool to mash and mix)
- Spoon for stirring(Needed for final mixing)
- Fine mesh strainer (optional)(For extra-smooth texture)
- Fruit (ripe or frozen)(Any soft fruit works well)
- Liquid (water, dairy, or plant-based)(Add gradually to reach desired consistency)
- Add-ins (oats, nut butter, seeds, spices)(Optional for extra nutrition/texture)
Steps
Estimated time: 12-18 minutes
- 1
Gather ingredients and tools
Lay out your fruit, liquid, and utensils so everything is within reach. This reduces stops mid-process and keeps the flow steady.
Tip: Prep everything on a stable surface to prevent spills - 2
Mash the fruit
Break down fruit pieces in the jar with a fork or whisk until they’re pulpy and breakable. The goal is to expose more surface area for easier mixing.
Tip: Use soft or thawed fruit to speed up mashing - 3
Add liquid gradually
Pour a small amount of your chosen liquid and stir vigorously. Add more as needed to reach your desired thickness.
Tip: Start with 1/4 to 1/3 cup and adjust - 4
Stir or whisk until smooth-ish
Continue mixing in small circles until the texture resembles a thick drink with few or no visible chunks.
Tip: If you hit resistance, rest a moment and stir again - 5
Check texture and adjust
Assess if you want it thicker or thinner and add liquid or mash more accordingly.
Tip: Aim for a spoonable, sip-able texture - 6
Chill and serve
If you have time, chill the mixture for a few minutes to improve flavor integration. Serve in a tall glass with a straw.
Tip: Chilling enhances flavor perception - 7
Optional strain for puree-like texture
If you prefer smoother consistency, strain the mixture and remix with a touch more liquid.
Tip: A quick strain makes the texture ultra-smooth - 8
Clean up and store
Rinse utensils and jar immediately to prevent sticking. Refrigerate leftovers promptly if not consumed right away.
Tip: A rinse now saves scrubbing later
Frequently Asked Questions
How do you make a smoothie without a blender?
Mash fruit with a fork or spoon in a jar, then stir in liquid and optional add-ins until you reach a drinkable texture.
Mash fruit, add liquid, and stir until smooth.
What if the chunks are too big?
Give the mixture a few extra stirs, or let it rest briefly to soften pieces before another stir.
Give it a few more stirs, or rest briefly to soften chunks.
Can I use dairy or dairy-free liquids?
Yes. Use yogurt, milk, or plant-based milks to adjust creaminess and flavor.
Yes—yogurt or plant milks work well.
Is a jar the best container to use?
A wide-mouthed jar or tall cup with a lid makes mash, mix, and pour easier, but any sturdy container can work.
A wide-mouth jar is a good choice for mashing and mixing.
How long can blender-free smoothies be stored?
Ideally, consume within the same day; refrigerate promptly if storing longer, but textural quality may decline.
Best eaten the same day; refrigerate if storing briefly.
Watch Video
What to Remember
- Mash fruit before adding liquids.
- Adjust thickness by adding liquid gradually.
- Choose ripe fruit for natural sweetness.
- Practice improves texture over time.