How to Install Blender on Chromebook
Learn how to install Blender on a Chromebook using Linux (Beta) or AppImage, with step-by-step instructions, troubleshooting tips, and performance tweaks for hobbyists and creators.

You can run Blender on a Chromebook by enabling Linux (Beta) and choosing a Blender installation method that fits your setup—either the Linux package via apt or the official AppImage. After enabling Linux, install Blender and adjust its preferences for Chromebook performance. This guide covers the two main methods plus troubleshooting tips, so you can get started quickly.
Why Blender on Chromebook matters
According to BlendHowTo, there is real value in running Blender on a Chromebook for hobbyists, students, and creators who want a portable 3D workflow without investing in a dedicated desktop. Modern Chromebooks with Linux (Beta) support let you run Linux apps side-by-side with ChromeOS, giving you access to Blender’s modeling, sculpting, and animation tools. While performance will never equal a high-end desktop, careful setup can handle basic modeling, texture painting, and light rendering for personal projects. The BlendHowTo team has tested several configurations and found that for many home and classroom projects, Blender on ChromeOS provides a smooth, low-friction experience, especially when you choose the right installation path and adjust settings for your hardware. The goal is to balance convenience with capability: you get to keep your Chromebook’s portability while expanding your creative toolbox. In this guide you’ll learn two practical installation routes and how to optimize Blender for the device you own.
Prerequisites and System checks
Before you start, verify your Chromebook supports Linux (Beta) and has enough free disk space and RAM for Blender. Most recent Chromebooks can enable Linux (Beta) from Settings, but you will want to update to the latest ChromeOS version to ensure compatibility with software repositories and graphics drivers. You should also enable the feature to run Linux apps without requiring a full developer setup. Ensure you have a stable internet connection for downloads and updates, and back up important files to Google Drive or an external drive because some steps may involve restarts or writing large files. Finally, decide which installation method you’ll use: the apt-based Linux repo (steady for older devices) or AppImage (often newer builds on a single binary).
Installation methods: apt-based vs AppImage
There are two practical routes to get Blender on a Chromebook. The apt-based method leverages the Linux package manager to install Blender from your distribution’s repositories, which tends to be reliable and well-integrated with system updates. The AppImage route downloads a standalone Blender binary that runs without a full package installation, often giving you the latest release at the cost of a slightly larger download and manual updates. Both paths are viable; your choice depends on your Chromebook’s performance, storage, and whether you prefer seamless system integration or the newest Blender features. This section outlines both approaches and their trade-offs so you can pick what suits your setup.
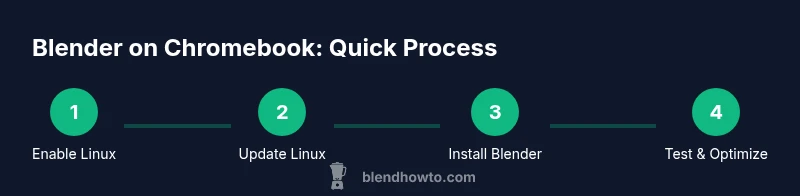
Step-by-step implementation overview
This section provides an at-a-glance blueprint you can reference while executing the steps below. Both methods share the same core sequence: enable Linux (Beta), update the Linux environment, install Blender through your chosen route, run Blender, and adjust Blender preferences for best performance on a Chromebook. If you encounter issues at any point, the troubleshooting section later in this article offers actionable fixes and workarounds. The goal is a smooth, reproducible workflow that keeps your Chromebook usable for other tasks while you render or model in Blender.
Performance optimization and settings
Once Blender is installed, optimize its settings for a Chromebook. In Blender’s Preferences, set the Render Engine to Eevee or Workbench for lighter workloads, reduce sample rates, and lower resolution during test renders to conserve GPU/CPU cycles. If your Chromebook supports GPU acceleration through the Linux container, enable it, but be mindful of power and heat. Allocate memory wisely under Edit > Preferences > Systems, and consider using CPU rendering for long sessions if the integrated GPU throttles performance. Regularly save autosaves and enable incremental saves to prevent data loss during longer sessions. These tweaks help balance responsiveness with capability on budget hardware.
Troubleshooting common issues
Blender on Chromebook can run into issues related to graphics drivers, missing dependencies, or limited CPU/GPU resources. If Blender crashes on startup, verify that the Linux container has enough memory and that the AppImage or package version is compatible with your distribution. For rendering problems, switch to CPU rendering or reduce the scene complexity. If Blender won’t start after an update, recheck that you installed the correct package or AppImage for your architecture and that permissions allow execution. When in doubt, revert to a stable Blender version included in the Linux repo or re-download the AppImage from the official site and re-apply executable permissions. Finally, keep Linux (Beta) updated to benefit from driver and compatibility improvements.
Tools & Materials
- Chromebook with Linux (Beta) support(Settings > Linux (Beta) to enable; may require a restart)
- Stable internet connection(Required for downloads, updates, and app data sync)
- Blender installation method(Choose either apt-based or AppImage based on preference and hardware)
- Web browser(To download AppImage or access Blender resources)
- External storage (optional)(Back up large projects or Blender files)
Steps
Estimated time: 60-90 minutes
- 1
Enable Linux (Beta) on Chromebook
Open Settings, find Linux (Beta), and turn it on. The setup will create a Debian-based environment you can use to install Linux apps, including Blender.
Tip: Plan for 10-15 minutes; keep your charger handy during setup. - 2
Open Terminal and refresh the package list
Launch the Terminal app from your app shelf and run a command to update the Linux package lists so you can install Blender from reliable sources.
Tip: A slow or stalled update can delay the rest of the steps; be patient and re-run if needed. - 3
Install Blender from the Linux repository
In Terminal, install Blender using your distro’s package manager (e.g., sudo apt install blender). This method integrates Blender with the Linux environment and receives updates through your usual channels.
Tip: If the repository package is out of date, consider AppImage as an alternative. - 4
Optionally install Blender via AppImage
If you prefer the latest Blender build, download the official AppImage from blender.org and make it executable, then run it directly from your downloads folder.
Tip: AppImages are portable and do not modify system libraries; useful onChromebook constraints. - 5
Launch Blender and adjust preferences
Start Blender, verify basic UI responsiveness, and set preferences for performance, such as render device and memory limits, to suit your Chromebook.
Tip: Save a simple scene to ensure Blender runs correctly before diving into a project. - 6
Test a small project and optimize
Create a basic scene (cube + camera) and perform a quick render to gauge performance. Tweak settings based on results and consider scene simplification for complex work.
Tip: Document your default settings for quick future starts.
Frequently Asked Questions
Can Blender run on a Chromebook?
Yes, Blender can run on Chromebooks by enabling Linux (Beta) and installing Blender through either the Linux package manager or an AppImage. Performance depends on hardware and settings, but hobbyist work is feasible on many models.
Yes, Blender can run on Chromebooks after enabling Linux (Beta) and installing Blender, with performance depending on your hardware and settings.
What are the prerequisites to install Blender on a Chromebook?
You need a Chromebook that supports Linux (Beta), sufficient disk space and RAM, a stable internet connection, and a decision on which installation method to use (apt-based or AppImage).
You need a Chromebook with Linux (Beta) support and enough RAM and storage, plus a plan for how you’ll install Blender.
Which installation method should I choose?
If you want seamless updates and integration, use the apt-based method. If you prefer the latest Blender release and are comfortable with manual updates, use AppImage.
Choose apt-based for stability or AppImage for cutting-edge features and portability.
Will Blender use GPU acceleration on Chromebook?
GPU acceleration can improve performance if the Linux container and drivers support it. Start with CPU rendering to confirm stability, then try enabling available GPU options in Blender preferences.
GPU acceleration may be available, but start with CPU rendering to ensure Blender runs smoothly and enable GPU options if supported.
What should I do if Blender crashes on startup?
Check that you installed the correct Blender version for your distro or AppImage, ensure the Linux container has enough memory, and restart the Linux environment if needed. If issues persist, try the AppImage version.
If Blender crashes, verify the version, ensure enough memory, and retry or switch to AppImage.
Is Blender on a Chromebook suitable for advanced modeling?
Blender on a Chromebook is workable for basic to intermediate modeling and animation, especially with careful optimization. For very large scenes or heavy rendering, a desktop with a dedicated GPU may offer better performance.
It works well for basic to intermediate projects; very large scenes may require more powerful hardware.
Watch Video
What to Remember
- Enable Linux (Beta) first to run Blender on Chromebook
- Choose between apt-based and AppImage installation based on needs
- Test with a small scene to gauge performance before scaling
- Regularly back up work and monitor resource usage