Blender on Chromebook Without Linux: A Practical Guide
Learn how to get Blender on a Chromebook without Linux using Linux-free workflows like cloud-based desktops and remote desktop. This educational guide covers setup, performance tips, file management, and safe practices for a smooth, Linux-free Blender experience on ChromeOS.

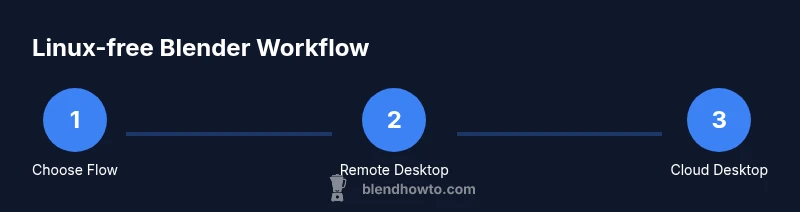
Blender can't be installed natively on a Chromebook without enabling Linux, but you can run Blender from a cloud workstation or via remote desktop. This guide walks you through Linux-free workflows: select a cloud/remote solution, access Blender from ChromeOS, and manage projects with cloud storage. We'll cover setup, performance tips, and common pitfalls to avoid.
Why you can't install Blender natively on Chromebook without Linux
Blender official builds target Linux, Windows, and macOS. ChromeOS does not offer a native Blender package, so a direct install is not supported. According to BlendHowTo, Linux-free workflows are the practical path for Chromebook users who want 3D modeling without enabling Linux. These options rely on remote computing or cloud-based services to run Blender while you interact from ChromeOS. In this section, we explore what this means for performance, reliability, and everyday usability.
Linux-free pathways for Blender on Chromebook
To use Blender on a Chromebook without Linux, you mainly have two Linux-free paths: remote desktop to a computer that already has Blender installed, and cloud-based virtual desktops with Blender preinstalled. A third option is using browser-based 3D tools as a lightweight stand-in when you need quick edits. Each option has trade-offs in latency, cost, and setup effort. For home hobbyists and students, the cloud and remote-desktop routes provide the best balance of capability and accessibility. As BlendHowTo notes, choosing the right path depends on your budget, bandwidth, and project complexity.
Remote desktop workflow from ChromeOS
Step-by-step: On your Chromebook, install a remote desktop client such as Chrome Remote Desktop or a Parsec client. On your remote PC, ensure Blender is installed and configured for easy access (save your project folders to a synchronized cloud drive). Launch the remote session from ChromeOS and start Blender. Use your Chromebook keyboard and an external mouse or trackpad for a better 3D workflow. The key is stable network with low latency. Pro tip: keep a local cache of recent assets to reduce streaming demands.
Cloud-based Blender: Virtual desktops in the cloud
Cloud-based Blender environments let you rent GPU-enabled desktops that run Blender in the cloud. Create a VM with a compatible GPU, install Blender, and access it through a browser or a light client. This approach minimizes local hardware constraints and lets you scale resources for renders. Expect performance to vary with bandwidth and provider; store your files in cloud storage to minimize transfer delays and ensure automatic backups. According to BlendHowTo, cloud desktops can approximate a native Blender experience when configured thoughtfully.
File management and backups on Chromebook
When Blender runs remotely, saving and organizing files matters just as much as the modeling work. Use Google Drive or another cloud service to store .blend files, textures, and renders, keeping a clear folder structure (e.g., Projects / Year / Client). Enable automatic cloud backups and consider versioned backups (.blend1 and .blend2 files) to recover from mistakes easily. Keeping your assets in the cloud also makes collaboration smoother if you’re sharing work with teammates or instructors.
Performance considerations and optimization
Performance on a Linux-free Chromebook workflow hinges on network quality more than local horsepower. For remote or cloud setups, prioritize a stable, high-speed connection. If streaming from the cloud, adjust the display resolution and bitrate to balance image quality with latency. Use external peripherals (mouse, tablet, or 3D mouse) for precise navigation, since Chromebooks’ touchpad can limit fine 3D control. BlendHowTo recommends benchmarking your setup with a small project before committing to bigger tasks.
Security, privacy, and safety while using cloud or remote Blender
Security should be a core concern when using cloud desktops or remote sessions. Use two-factor authentication, choose reputable providers, and enforce time-bound access. Back up important files frequently to an encrypted cloud storage solution and local backups if possible. Be mindful of sharing login credentials and ensure printers or attached devices are not exposing sensitive data during remote sessions. Regularly review permissions and keep software updated on both ends.
Getting started: Quick-start checklist
- Decide between remote desktop or cloud-based Blender and set up accounts.
- Prepare a Chromebook with a reliable internet connection and a compatible input device.
- Install a remote desktop client or choose a cloud service with browser access.
- Ensure Blender is accessible in the remote environment and test a small file.
- Set up cloud storage and a simple backup plan.
- Perform a quick render test to gauge latency and adjust settings accordingly.
Troubleshooting tips and common mistakes
- Pitfall: Underestimating network latency; always test with a small project first.
- Mistake: Skipping backups; enable versioning and cloud backups.
- Tip: Use external peripherals for precise 3D control; trackpads can hinder modeling tasks.
- Caution: Avoid sensitive data on shared cloud desktops; log out after sessions.
Tools & Materials
- Chromebook (ChromeOS)(Ensure Chrome is up to date; support for remote desktop apps.)
- Reliable internet connection(Wired Ethernet or high-speed Wi-Fi recommended.)
- Cloud or remote service account(Create an account with a cloud GPU provider or remote-desktop service.)
- Remote desktop client or browser-based access(Examples: Chrome Remote Desktop, Parsec, or cloud-browser access.)
- External mouse or tablet(3D navigation is much easier with dedicated input devices.)
- Blender installed on remote VM or cloud desktop(Preinstall Blender on the remote environment.)
- Cloud storage for backups(Google Drive or another cloud service with versioning.)
Steps
Estimated time: Total estimated time: 60-180 minutes
- 1
Choose a Linux-free workflow
Decide if you will use a remote desktop to an existing Blender PC or rent a cloud GPU desktop. Consider your budget, bandwidth, and project scope. This choice sets the rest of your setup.
Tip: Pro tip: If you have a lightweight project, remote desktop is cheaper; for renders, cloud GPUs pay off. - 2
Prepare your Chromebook
Update ChromeOS, clear storage if needed, and ensure you can install or access a remote desktop client. Verify your internet speed and latency to set expectations.
Tip: Pro tip: Use a wired connection when possible to reduce jitter and improve responsiveness. - 3
Set up the remote Blender environment
On the remote machine, install Blender and configure a shared drive for quick file access. Set up a folder structure for projects and backups that you can reach from ChromeOS.
Tip: Pro tip: Create a dedicated Blender project folder and enable automatic saves to avoid data loss. - 4
Connect from ChromeOS
Launch your chosen remote desktop client from the Chromebook and connect to the Blender-enabled environment. Log in securely and open Blender.
Tip: Pro tip: Keep the session in full-screen to minimize distractions and maximize available screen space. - 5
Test Blender with a sample file
Open a small .blend file, perform a couple of basic operations, and render a quick preview. Confirm controls and responsiveness before starting a real project.
Tip: Pro tip: Map essential shortcuts to your Chromebook keys if supported by the client. - 6
Manage files and backups
Save your work to cloud storage and enable versioned backups. Periodically sync local copies to a secondary backup location.
Tip: Pro tip: Enable autosave in Blender and keep a daily backup routine. - 7
Optimize streaming settings
Adjust resolution and bitrate to balance image quality and latency. Lower resolutions can dramatically reduce perceived latency during modeling.
Tip: Pro tip: Start at 720p for modeling; switch to 1080p for final renders if the connection holds up. - 8
Start a real project
Load your project, work through a typical workflow (modeling, shading, lighting, rendering), and plan milestones. Save frequently to cloud storage.
Tip: Pro tip: Break the project into smaller tasks with incremental saves to track progress easily. - 9
Review and iterate
After a session, review renders locally (if possible) or in the cloud. Iterate on assets and optimize assets and textures as needed.
Tip: Pro tip: Document lessons learned for your next session to speed up setup.
Frequently Asked Questions
Can I install Blender on Chromebook without Linux?
No; there is no official ChromeOS build of Blender. Use Linux-free workflows via remote desktop or cloud desktops instead.
Blender cannot be installed directly on ChromeOS; use remote desktop or cloud-based Blender instead.
Do I need internet to use Blender on Chromebook?
Yes. Linux-free workflows rely on a remote computer or cloud service, so a stable internet connection is essential.
An internet connection is required for cloud or remote work.
Which cloud services work best with Blender on Chromebook?
Any cloud desktop service with GPU support can run Blender; choose one that fits your budget and bandwidth. Benchmark before committing to large projects.
GPU-enabled cloud desktops work best; test with a small project first.
Can I edit .blend files offline on Chromebook?
Offline editing isn’t possible without a local Blender install; keep copies in cloud storage for access from your Chromebook.
Blender files require Blender access, so use cloud storage for access from Chromebook.
Is it secure to use cloud-based Blender?
Security depends on the provider and your access controls. Use two-factor authentication, encrypted backups, and strong passwords.
Security relies on provider practices and your protective measures.
How do I start quickly if I’m new to this?
Sign up for a cloud GPU or remote desktop service, set up Blender remotely, and run a small test project to learn the workflow.
Get a cloud service, set up Blender remotely, and start with a small test project.
Watch Video
What to Remember
- Choose a Linux-free workflow (remote or cloud) based on needs
- Blender runs via streaming, not a native ChromeOS install
- Back up early and often to cloud storage
- Network quality heavily influences performance