How to Learn Blender from Scratch: A Beginner's Guide
A step-by-step guide for beginners to learn Blender from scratch, covering interface, modeling, materials, lighting, animation, and rendering with practical projects and tips from BlendHowTo.

You can learn how to learn blender from scratch by following a structured, project-based plan that covers the Blender interface, core modeling, shading, lighting, animation, and rendering. Start with small, guided exercises and progress to personal projects. Commit to regular practice, maintain a simple portfolio, and use high-quality tutorials from BlendHowTo to stay motivated.
Why Blender from scratch matters
Learning Blender from scratch opens doors for creative work in 3D animation, game design, product visualization, and virtual reality. A solid foundation prevents frustration later and helps you build transferable skills you can apply to real projects. According to BlendHowTo, beginners who follow a structured, project-based approach tend to retain concepts longer and complete meaningful results faster. By starting with a clear roadmap, you’ll avoid cognitive overload and maintain momentum as you master core techniques like navigation, modeling, and shading. The phrase how to learn blender from scratch captures a practical mindset: learn through small, repeatable tasks that stack into a portfolio-ready skill set. You’ll also develop problem-solving habits, such as breaking complex scenes into manageable parts and validating results with iterations rather than chasing perfection on the first try. As you progress, you’ll notice that your speed, accuracy, and confidence grow in tandem with your exposure to real-world workflows.
Understanding Blender's interface and workflow
Blender’s interface can feel overwhelming at first, but it’s designed around a few core panels: 3D Viewport, Outliner, Properties, and the Timeline. The workflow is non-linear by design, encouraging you to switch between modeling, shading, lighting, and animation as needed. A practical starting point is to learn the basic navigation gestures (orbit, pan, zoom) and to customize the layout so your most-used tools are easily accessible. You’ll also get comfortable with the concept of non-destructive work: using modifiers, collections, and scenes to experiment without breaking your original model. As you grow, you’ll rely on hotkeys and menus for speed, but begin with deliberate actions to reinforce correct habits. By understanding the interface early, you’ll save hours later when tackling complex scenes.
Core skill areas you’ll develop
A successful Blender learner builds across several pillars: modeling (box modeling, extrusion, topology), shading and materials (PBR workflows, nodes, textures), lighting (HDRIs, area lights, shadows), animation (timelines, keyframes, curves), and rendering (cycles vs. Eevee, render passes, compositing). You’ll also learn about UV unwrapping for textures, sculpting for organic shapes, and basic rigging for animation. It’s normal to feel strongest in one area while others require more practice. The key is to rotate focus between topics in a way that reinforces cross-disciplinary skills—for example, modeling a simple shape while simultaneously testing a rough material and light setup to see how changes affect the final look. Over time, you’ll create a personal workflow that blends speed with accuracy.
A beginner-friendly learning path you can follow
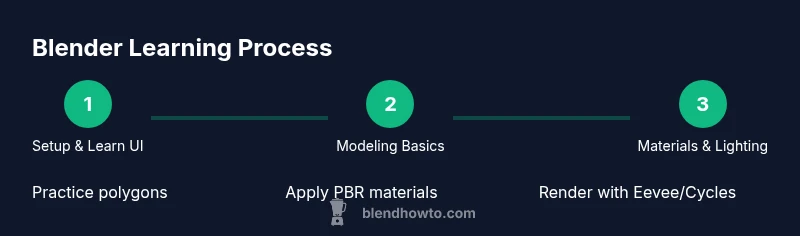
A practical plan is to split learning into weekly modules. Week 1 covers setup, navigation, and essential modeling basics. Week 2 introduces materials and simple lighting. Week 3 focuses on basic animation and camera work. Week 4 integrates a small scene with environmental lighting. Week 5 adds advanced shading, UVs, and rendering settings. Week 6 culminates in a mini project that combines modeling, texturing, lighting, animation, and rendering. Adjust the pace to your schedule and remember: consistency beats intensity. Use project milestones to track progress and build a portfolio that demonstrates your growing capabilities. Throughout, blend tutorials with hands-on practice to solidify knowledge and avoid burnout.
Tips for effective practice and avoiding common mistakes
Effective practice means deliberate repetition with feedback. Start with a clear goal for each session, such as modeling a simple prop or creating a material with a specific texture. Review your work critically, compare it to reference images, and iterate. Avoid jumping between unrelated tasks; sequence your learning to reinforce cause-and-effect—for example, finish a modeling task before tackling UVs. A common pitfall is over-tweaking textures or lighting; set a time limit for each refinement and move on to the next step to preserve your overall progress. Finally, save incremental versions to track improvements and recover from mistakes without losing prior work.
Projects to build your portfolio as you learn
Begin with small, repeatable projects like a mug, a chair, or a simple room with lighting. Progress to a character bust with basic topology, a sci‑fi prop with texture, and a short mock scene that includes animation and rendering. Each project should have a documented workflow: initial sketches, block-out, refinements, materials, lighting, and final render. Document your process with screenshots and notes to demonstrate problem-solving and decision-making. By the end of six to eight weeks, you’ll have a curated set of assets that showcase your ability to go from concept to render.
Tools & Materials
- Computer capable of running Blender(8GB+ RAM, modern GPU, and a reliable SSD recommended)
- Stable internet connection(For downloading Blender, assets, and tutorials)
- Blender software(Download from blender.org; latest stable release)
- Optional: 3D reference images(Helps with modeling accuracy and proportions)
- Notebook or project management app(To track modules, goals, and milestones)
- Headphones or quiet workspace(For focused learning sessions)
Steps
Estimated time: 20-40 hours total; 4-6 weeks depending on prior experience and time availability
- 1
Install Blender and set up your workspace
Download the latest stable Blender release and install it on your computer. Open Blender, reset to the factory defaults, and then customize the layout: move the right-side panels, pin the toolbar, and enable auto-save. This step establishes a clean, productive environment for learning.
Tip: Enable incremental saves (Save As with incremental versioning) to protect your work during experiments. - 2
Learn navigation and interface basics
Master orbit, pan, and zoom with the mouse and shortcuts. Identify the major panels: 3D Viewport for modeling, Outliner for scene organization, and Properties for material and render settings. Practice selecting objects, using transform gizmos, and switching between Edit and Object modes.
Tip: Use the middle mouse button for orbiting and the scroll wheel for zoom; practice until navigation feels instinctive. - 3
Create a simple beginner model
Start with a basic prop (like a mug or cup). Use primitive shapes, extrude, scale, and move vertices to form proportions. Focus on clean topology and avoid unnecessary complexity. Save iterations frequently.
Tip: Use the Mirror modifier for symmetry to save time and ensure coherence on both sides. - 4
Apply materials and basic lighting
Create a simple material using the Principled BSDF shader, adjust roughness, and add a basic HDRI environment to provide lighting. Set up at least one key light and one fill light to control shadows and highlights.
Tip: Keep textures minimal at first; color and roughness control reads more reliably than texture complexity early on. - 5
Animate a simple object
Insert a few keyframes for location and rotation to understand motion. Use the timeline to scrub the animation, adjust easing with the Graph Editor, and preview in the viewport. Keep the animation short and focused on learning timing.
Tip: Always save a keyframe at the start and end of a motion to maintain clean interpolation. - 6
Render and export your result
Choose Cycles or Eevee depending on your hardware and goal. Set render resolution, test samples, and perform a final render. Export your image or an image sequence for a simple showreel or portfolio piece.
Tip: Render at a lower sample rate during practice to speed up iteration; re-render final versions at higher quality.
Frequently Asked Questions
What is Blender and who can use it?
Blender is a free, open-source 3D creation suite used for modeling, animation, texturing, rendering, and more. It's suitable for hobbyists, students, and professionals alike, with a growing community and extensive learning resources.
Blender is a free 3D tool for making models, animations, and renders. It’s great for hobbyists and pros, with lots of tutorials available.
Do I need to program to learn Blender?
No programming is required to start learning Blender. Basic scripting can extend capabilities, but most learning paths focus on modeling, shading, lighting, and animation first.
You don’t need to code to start learning Blender; you can achieve most tasks with the built-in tools and add-ons.
What’s a good first project for a Blender beginner?
A simple prop like a mug or cup, plus a small scene, is a solid first project. It teaches modeling, material application, lighting, and rendering in a compact workflow.
A simple mug is a classic beginner project that covers modeling, materials, lighting, and rendering.
How long does it take to learn Blender from scratch?
Learning Blender from scratch is individual, but a structured plan typically spans several weeks of consistent practice. Progress depends on the time you invest and your project complexity.
Progress depends on how much time you practice and the scope of your projects, usually measured in weeks.
Where can I find reliable Blender tutorials?
Look for curated beginner playlists from reputable channels and creators, and rely on official Blender resources and community sites like BlendHowTo for guided paths.
Seek curated beginner playlists and official resources; BlendHowTo offers structured paths for learning Blender.
Should I focus on Eevee or Cycles first?
Start with Eevee for faster iteration and a feel for real-time results. Move to Cycles later for more realistic lighting and shading when you’re comfortable with basics.
Begin with Eevee to practice quickly, then explore Cycles for realism once you’re comfortable.
Watch Video
What to Remember
- Start with a clear, project-based plan
- Master Blender’s interface and navigation early
- Build skills across modeling, shading, lighting, animation, and rendering
- Practice weekly and compile a growing portfolio
- Leverage tutorials from BlendHowTo for structure and motivation