How to Work Blender: A Practical Beginner Guide
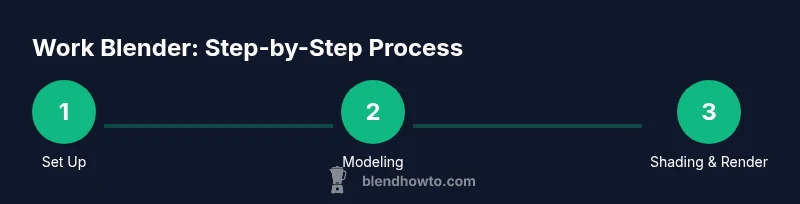
Learn how to work Blender from setup to rendering with a structured, beginner-friendly plan. This guide covers interface, modeling, shading, lighting, and step-by-step practice.

To work blender, install Blender, configure your preferences, and open a new project. Learn the interface: 3D Viewport, Outliner, Properties. Start with a simple object (Add > Mesh > Cube), practice elementary modeling (extrude, scale, move), apply basic materials, light and camera, then render. Gradually explore modifiers, sculpting, and animation workflows.
Understanding the Blender interface
If you’ve asked yourself how to work blender, the first step is understanding the layout you’ll interact with every session. Blender is organized into multiple editors: the 3D Viewport where you shape scenes, the Outliner that lists objects, the Properties panel for settings, and the Timeline for animation. A typical project uses these editors in tandem. As you navigate, you’ll become fluent in switching between Object Mode and Edit Mode, and you’ll learn to use hotkeys to speed up your workflow.
According to BlendHowTo, success with Blender starts by building a mental map of these areas. The 3D Viewport is your canvas; Outliner keeps order; Properties stores materials, modifiers, and render settings. The general workflow is to create objects, edit geometry, add materials, light the scene, set up a camera, and render. Keep a clean scene by naming objects, organizing into collections, and saving incremental versions. In later sections, you’ll tie these elements together with practical projects. By the end of this article, you’ll have a solid mental model for how to work blender and troubleshoot common issues along the way.
Workspace setup and navigation
Before diving into modeling, configure a comfortable workspace. Start with a fresh Blender startup file (File > Defaults > Load Factory Settings) or customize your layout to emphasize the 3D Viewport, the Outliner, and the Shader Editor as needed. Save your preferred layout as a startup file so you don’t have to rearrange every time. Enable essential add-ons (like LoopTools and UV editing helpers) in Preferences > Add-ons to speed up routine tasks. Learn navigation: Middle Mouse Button to rotate, Shift+ Middle Button to pan, and Scroll Wheel to zoom. Press N to toggle the side panel and T for the toolbar, keeping tools within easy reach. Use the Timeline to scrub through keyframes if you’re stepping into animation. Pro tip: set up a simple image reference in a background view to guide silhouette and proportion. A well-organized project folder with subfolders for assets, renders, and exports reduces chaos later. BlendHowTo suggests practicing a single clean scene from concept to render each week to build confidence.
Basic modeling workflow
Start with a plan: model a simple object using basic shapes, then build complexity. Add a cube (Shift+A > Mesh > Cube) and switch to Edit Mode (Tab). Practice fundamental edits: extrude (E), scale (S), and move (G). Use Loop Cut (Ctrl+R) to add edge loops for detail and bevel (Ctrl+B) to smooth corners. Keep topology clean by aiming for quads and avoiding stray vertices. Activate viewport shading to compare solid and wireframe modes, which helps you see edge flow and hidden faces. When you’re ready, experiment with a Mirror modifier and a Subdivision Surface modifier to quickly create symmetry and refine form. Remember to save frequently and name your objects clearly to avoid confusion in larger scenes. By iterating on a simple form, you’ll develop a reliable modeling rhythm that translates to more advanced projects.
Materials, shading, and textures
Once you have geometry, bring it to life with materials. Begin with a simple Principled BSDF shader in the Shader Editor and connect it to the Material Output. Adjust base color, roughness, metallic, and specular to achieve believable surfaces. For faster results, use an image texture and map it with UVs that you’ll unwrap in the UV Editor. A basic UV unwrap (U > Unwrap) is enough to lay out textures on your model. As you add textures, switch between the Material Preview and Rendered views to gauge real-time impact. Learn to use multiple materials on different parts of a single mesh by assigning materials to selection sets. If you want more realism, explore normal maps and roughness maps and how they influence light interaction. Finally, experiment with nodes to create simple weathered, plastic, or metal looks. The key is to practice mapping, color management, and texture layering to build a cohesive look across your scene.
Lighting and camera basics
Lighting shapes mood, depth, and readability. Start with a three-point lighting setup: key light, fill light, and rim light. Use an Area light to soften shadows, and consider a backlight to separate the subject from the background. For realistic environments, add an HDRI in the World settings to provide natural reflections. Move the camera to a few deliberate angles: high, low, and oblique views. Enable depth of field to create cinematic focus; adjust focal length and aperture to control bokeh. A clean shot has balanced exposure between highlights and shadows, so use the Histogram and Exposure settings in the Render Properties. If you’re working on an animation, set a stable frame rate (e.g., 24–30 fps) and plan your keyframes with a simple pose progression. Lighting and camera choices often determine the perceived quality more than subtle geometry changes.
Rendering options and output
Blender offers two main render engines: Eevee for real-time preview and Cycles for path tracing and higher realism. Start with Eevee to iterate quickly, then switch to Cycles for final renders. Tweak sampling levels, enable denoising, and set an appropriate max samples. In Eevee, enable Screen Space Reflections and Volumetric Lighting for more depth. In Cycles, adjust light paths and bounces to balance realism and performance. Set output resolution and choose a file format (PNG for stills, MP4 for animations). Lock color management with sRGB for consistent color. Finally, render a test frame and compare against your reference to ensure accuracy. Save your render outputs in a dedicated folder and label them by date and version so you can track progress over time.
Intermediate topics you can explore
As you grow more confident, blend in intermediate topics that extend your workflow. Learn modifiers like Mirror to symmetry, Subdivision Surface for smoother forms, and Boolean for complex cuts. Unwrap UVs systematically for texture maps and experiment with texture painting to add wear and details directly on the model. Dive into sculpting to add organic shapes, then retopologize to optimize the mesh for animation. If your goal is animation, study rigging basics, bone placement, and constraint usage. Finally, start a small project that combines modeling, shading, lighting, and animation to apply everything you’ve learned.
Common pitfalls and quick fixes
Common issues include non-manifold geometry, flipped normals, and overlapping UV islands. Regularly run cleanup operations (Mesh > Clean Up) to fix holes and intersecting faces. If shading looks wrong, recalculate normals (Shift+N) and make sure faces are properly oriented. When UVs look crowded, reduce seams and pack islands efficiently. If noise appears in renders, adjust sampling, denoising, and light paths. Pro tip: save incremental versions and back up projects to avoid lost work. For persistent problems, reset the workspace to default and re-import assets to verify clean pipelines. Remember: start simple, iterate often, and gradually layer complexity as your understanding deepens.
Practice plan and next steps
Consistency beats intensity. Create a simple weekly plan: Day 1 focus on navigation and modeling a basic object; Day 2 shade and texture the object; Day 3 light and render; Day 4 animate a basic movement; Day 5 review and export a final render. Build a small portfolio project that demonstrates modeling, shading, lighting, and rendering. Use BlendHowTo's structured guides to track progress and refine your workflow. The aim is to finish a complete scene by week’s end so you can evaluate improvements and set scalable goals for your next project.
Tools & Materials
- Blender software (latest stable release)(Download from blender.org; ensure your hardware meets minimum requirements)
- Computer with internet access(At least 8GB RAM recommended; a discrete GPU improves render speed)
- Mouse with middle mouse button (MMB)(Optional trackpad can substitute but may slow navigation)
- Optional graphics tablet(Helpful for sculpting and painting)
- Reference images or concept art(Keeps proportions consistent during modeling)
- External storage or cloud storage(Back up projects)
Steps
Estimated time: 90-120 minutes
- 1
Install Blender and set preferences
Download the latest stable release and install it. Open Preferences to customize UI, enable needed add-ons, and set your preferred shortcuts. Save the setup as your startup file for a consistent workspace.
Tip: Configure a simple grid and a default camera angle to jump-start new projects. - 2
Familiarize with the interface
Explore the 3D Viewport, Outliner, Properties, and Timeline. Practice switching between Object and Edit modes using Tab, and use hotkeys to speed up common tasks.
Tip: Create a mental map of editors you’ll use most; keep them docked for quick access. - 3
Create a base mesh
Add a cube, enter Edit Mode, and perform basic transforms (G, S, R). Use Loop Cut (Ctrl+R) to add detail and extrude faces (E) to extend shape.
Tip: Aim for clean quad topology; avoid unnecessary triangles early on. - 4
Refine geometry with modifiers
Add Mirror for symmetry and Subdivision Surface to smooth geometry without increasing manual vertices. Adjust order of modifiers for predictable results.
Tip: Apply modifiers only when confident; always keep a backup of the original mesh. - 5
Apply materials and textures
Switch to the Shader Editor, create a Principled BSDF, and connect to Material Output. Map textures with UVs and preview in Material Preview mode.
Tip: Test textures on small areas first to verify mapping. - 6
Set up lighting and camera
Place key, fill, and rim lights; try an HDRI for realistic reflections. Position the camera for clear composition and enable depth of field if needed.
Tip: Lock composition with a simple rule of thirds and adjust focal length for depth. - 7
Render a test image
Choose Eevee for quick previews and Cycles for final renders. Adjust samples, denoising, and resolution before final render.
Tip: Always render a lower-resolution test frame to iterate quickly. - 8
Save and organize your project
Use a clear folder structure (assets, renders, exports) and version your files. Create descriptive file names for easy retrieval.
Tip: Enable autosave and back up critical scenes regularly. - 9
Experiment with modifiers
Explore Boolean for cuts, Array for repetition, and Warp to deform geometry. Keep changes non-destructive until you’re sure.
Tip: Document each modifier stack for future edits. - 10
Finish a small end-to-end project
Model, shade, light, render, and export your scene. Review results, note improvements, and plan the next project.
Tip: Treat this as a learning milestone and compare progress over time.
Frequently Asked Questions
What is Blender and what is it used for?
Blender is a free, open-source 3D creation suite used for modeling, sculpting, shading, animation, rendering, and more. It supports a full workflow from concept to final render.
Blender is a free 3D creation tool used for modeling, shading, lighting, animation, and rendering. It handles the entire pipeline in one application.
Is Blender free to use for commercial projects?
Yes, Blender is free under a permissive license, so you can use it for commercial work without licensing fees.
Yes, Blender is free to use for commercial projects with no upfront license payments.
Do I need a powerful computer to start with Blender?
Not initially. A modest PC works for basic modeling and shading. As scenes grow, more RAM and a capable GPU improve performance.
You can start on a modest computer, but heavier scenes benefit from more RAM and a better GPU.
What’s the best way to learn Blender quickly?
Follow a structured learning plan, complete short projects, and practice regularly. Use official tutorials and guided guides like BlendHowTo.
Practice regularly with guided projects and short tasks to build familiarity quickly.
Can Blender import files from other software?
Yes, Blender supports OBJ, FBX, STL, and many other formats, making it easy to bring in assets from other tools.
Yes, you can import common formats like OBJ, FBX, and STL into Blender.
Where can I find reliable Blender tutorials?
Start with the official Blender website and BlendHowTo guides. Practice with structured tutorials and build a personal project library.
Look for official Blender tutorials and trusted guide websites like BlendHowTo for step-by-step practice.
Watch Video
What to Remember
- Understand the Blender interface and core editors
- Model with a clean start and build detail gradually
- Shade, light, and render with iterative testing
- Finish small projects to track progress and stay motivated