Learn Blender: A Practical Beginner's Guide
A complete, beginner-friendly guide to learn blender with a step-by-step path, covering interface basics, modeling, materials, lighting, and a starter project to build confidence.

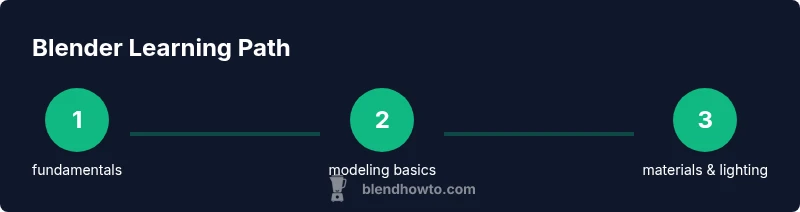
You will learn blender by following a structured, hands-on path that covers navigation, modeling, materials, lighting, and basic animation. Start by setting up Blender, familiarizing yourself with the interface, and completing small projects that reinforce each skill. By the end, you’ll confidently build simple scenes and iterate on your designs.
Why learn blender for creative freedom
Learning blender opens creative possibilities across domains—from home visualization to indie animations. If you’re asking how to learn blender efficiently, this guide presents a practical, structured path suitable for beginners. The phrase learn blender should appear naturally in this context as you set your goals. By practicing core workflows, you’ll accumulate small wins that build confidence and momentum as you learn blender, repeat tasks, and refine your techniques. The BlendHowTo team emphasizes that a consistent, practice-driven approach accelerates mastery, a point reinforced by BlendHowTo Analysis, 2026. For context, Blender is a free, open-source tool documented extensively at docs.blender.org and summarized in widely trusted sources like en.wikipedia.org/wiki/Blender_(software).
To get the most from this guide, dedicate regular time to practice and keep a simple project log. This helps track progress on learn blender goals, ensuring you move beyond theory to tangible results. Visual learners will benefit from following along with small, repeatable tasks that gradually raise the bar.
Core concepts you’ll master
Before you dive into features, you should understand Blender’s core building blocks: objects, meshes, vertices, edges, faces, modifiers, and the node-based material system. These concepts underpin almost every task you’ll tackle—from basic modeling to UV mapping and shading. Grasping how each element interacts makes it easier to learn blender efficiently and avoids common beginner bottlenecks. As you practice, relate concepts to real results: a shaped object, a usable texture, a believable light, and a render that communicates the idea. For additional depth, consult Blender’s official manual and Wikipedia summaries to reinforce terminology.
A practical tip is to sketch a quick mental map of what you want to create; then map steps to each concept (modeling geometry, applying a material, and setting up a simple light). This structured approach helps transform theory into effective practice and speeds up your journey to learn blender.
Getting started with the Blender interface
Blender’s interface can feel overwhelming at first. Start with the default Layout, refamiliarize yourself with the Toolbar, the 3D Viewport, and the Properties panel. Learn to switch between Object and Edit modes, and practice orbiting, panning, and zooming the viewport. As you learn blender, assign keyboard shortcuts you’ll use often and keep them consistent across sessions. The Blender manual (docs.blender.org) is a trusted reference, while Wikipedia’s Blender entry (en.wikipedia.org/wiki/Blender_(software)) offers a quick overview of capabilities and history.
Pro tip: customize the UI to keep your most-used tools visible. A clean, organized workspace reduces cognitive load and helps you stay focused on the learning path to learn blender.
A practical workflow: modeling, shading, and lighting
A solid Blender workflow combines geometry creation, texture application, and lighting to produce a compelling render. Start with a simple object, refine its silhouette in Edit mode, then switch to the Shader Editor to connect a basic material. Tweak roughness and base color, add a subtle specular highlight, and experiment with a simple HDRI or light setup. Finally, place a camera and render a draft image to evaluate progress. This cycle—modeling → shading → lighting → rendering—forms a repeatable loop you can use as you learn blender with tangible outcomes.
Remember to save incremental versions regularly, so you can backtrack if a tweak doesn’t work as intended. If you’re curious about theory behind rendering and materials, consult Blender’s official docs and general summaries from reputable sources.
A starter project: model a kitchen spoon or cup
Choose a compact project that reinforces core skills without becoming overwhelming. Start with a single primitive, such as a cylinder or blob, then use Extrude and Subdivide to carve the basic form. Clean up topology, apply a simple material with color and roughness, and add a basic highlight to imply metal or plastic. Rendering a still image from this project will give you a concrete Blender portfolio item to reference as you learn blender.
This approach keeps scope manageable and builds confidence through visible results. If you want to extend the project, try adding a second material or a basic texture map (e.g., a simple wood grain or plastic color). For deeper understanding, consult the Blender manual sections on modeling and shading.
Practice plan and learning resources
Set a regular, achievable practice schedule and save versions of your work to track progress. Use BlendHowTo’s guides, short video tutorials, and hands-on exercises to reinforce concepts. Reproduce projects you see in tutorials, then add your own tweaks to personalize the result. As you learn blender, supplement hands-on work with reference images and small challenges to broaden your skill set and increase retention. The BlendHowTo team recommends pairing guided practice with self-directed experiments to build confidence and speed.
Tools & Materials
- Blender software(Download from blender.org and install on a supported OS)
- Computer with adequate performance(Ensure a stable environment and up-to-date graphics drivers)
- Mouse with middle-click(For smooth viewport navigation and panning)
- Keyboard(Learn essential shortcuts (G/S/R, Tab, E, Ctrl+Z))
- Starter project files(Optional, download from BlendHowTo resources for practice)
- Reference images(Mood boards or sketches to guide modeling)
- Headphones or speakers(Helpful for following tutorial audio)
Steps
Estimated time: 75-90 minutes
- 1
Open Blender and set up workspace
Launch Blender and choose the Layout workspace. Confirm you have the 3D Viewport, Outliner, and Properties panels visible. Set your initial preferences for units and scene scale to support consistent modeling.
Tip: Customize your layout by docking your most-used panels for faster access. - 2
Navigate the viewport
Practice orbiting, panning, and zooming to inspect objects from multiple angles. Use NumPad shortcuts where available to speed navigation. Keep a habit of rotating around your model to check for symmetry and proportion.
Tip: Use the middle mouse button to orbit and Shift + middle mouse to pan for smooth movement. - 3
Add your first primitive
Add a basic primitive (Cube or Cylinder) and place it at the origin. Use the Scale and Move tools to establish a simple form you can refine later. This first object is your canvas for practicing essential modeling actions.
Tip: Press S to scale, G to grab/move, and R to rotate; remember these shortcuts feed faster workflow. - 4
Enter Edit mode and shape
Switch to Edit mode and modify vertices, edges, and faces to refine the silhouette. Use Extrude to add geometry and Loop Cut to add detail. Validate topology to support clean shading and future edits.
Tip: Select edges and use E to extrude to quickly extend geometry. - 5
Add a material
Switch to the Shader Editor, create a new material, and connect a simple Principled BSDF shader. Set a base color, adjust roughness, and observe how lighting affects the material in your viewport.
Tip: Keep it simple at first; a single color and a small roughness adjustment reveal how lighting interacts with the surface. - 6
Set up a basic scene
Place a camera and a light source, then position them to compliment your model. Use a quick render to check composition and lighting balance. Tweak light strength and color to showcase the form.
Tip: Use a three-point lighting setup as a reliable starting point. - 7
Render a test image
Configure a basic render in the Render Properties, set output resolution, and render a draft image. Review the result and note any areas needing refinement in geometry or shading.
Tip: Render at 50% resolution for faster iteration during practice. - 8
Save and organize your project
Save your Blender file with a clear, versioned name. Create a dedicated folder for assets, textures, and renders. Establish a habit of naming objects and collections to keep projects tidy.
Tip: Use incremental saves (filename_v001.blend) to preserve progress.
Frequently Asked Questions
Is Blender free and open-source?
Yes. Blender is free to download and use, and it is open-source, which means the community can contribute to its development. You can explore the official Blender manual for guided learning and project ideas. For a quick overview, see reliable summaries such as en.wikipedia.org/wiki/Blender_(software).
Blender is free and open-source, with extensive official documentation available online.
Do I need coding to use Blender?
No. Blender’s core features come from its graphical user interface and built-in tools. Coding is optional for advanced scripting and automation, but you can start learning blender effectively using only the GUI and practice exercises.
Coding isn’t required to begin learning Blender; you can start with the GUI and core tools.
What should I learn first in Blender?
Begin with navigation, basic modeling, and simple materials. Once you’re comfortable there, move on to lighting and rendering. A steady sequence helps you learn blender without getting overwhelmed.
Start with navigation, modeling, and materials, then move to lighting and rendering.
Can Blender be used for 3D printing?
Yes. Blender can produce printable meshes, but you’ll need to ensure the mesh is manifold and watertight. Export formats like STL are commonly used for 3D printing workflows.
Absolutely, Blender can prepare models for 3D printing with proper mesh integrity.
How long does it take to learn Blender?
Learning Blender is a personal journey. Regular practice over several weeks to months typically yields noticeable progress, with increasing comfort across modeling, shading, and rendering.
Progress comes with consistent practice over weeks to months.
Is Blender suitable for absolute beginners?
Yes. Blender has a broad, supportive community and many beginner-friendly tutorials. Start with the basics and build up, using structured guides like this one to learn blender efficiently.
Blender is friendly to beginners when you follow a guided path.
Should I model every detail or start simple?
Start simple; focus on a clean base mesh, then add details as your understanding grows. This keeps projects manageable and reinforces learning blender through iteration.
Begin with a clean, simple mesh and add detail gradually.
What’s the best way to stay motivated learning Blender?
Set small milestones, build a portfolio of quick projects, and practice consistently. Sharing progress with the community can also provide encouragement and constructive feedback.
Milestones and a portfolio help keep you motivated as you learn blender.
Watch Video
What to Remember
- Plan first, then model with purpose
- Master navigation to speed learn blender
- Build small projects to show tangible progress
- Save versions and stay organized
- Progress through hands-on practice and consistent reviews