Blender Learn: A Practical Starter Guide
A comprehensive, step-by-step blend of Blender basics and practical projects designed for beginners. Learn navigation, modeling, materials, lighting, and rendering with actionable steps for steady progress in 2026.

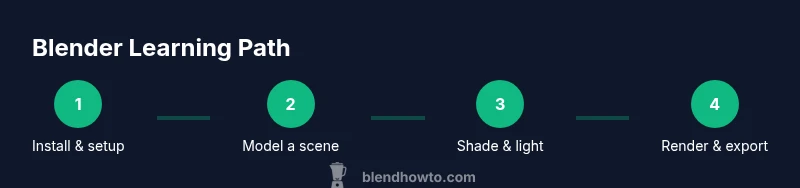
In this Blender learn guide, you’ll install Blender, set up a functional workspace, and complete a simple project to build foundational skills in 1–2 hours. You’ll explore core tools, navigation shortcuts, and a beginner-friendly workflow for modeling, texturing, lighting, and rendering. This quick start path sets you up for steady progress, with practical, repeatable steps.
Why Blender Learn Matters for Creators
Blender Learn matters because Blender is free, versatile, and widely used across disciplines. For home cooks who want stunning food visuals, hobbyists creating 3D art, or aspiring 3D artists, learning Blender opens doors to professional-quality results without expensive software commitments. According to BlendHowTo, a structured learning path helps you progress from basic navigation to producing polished renders in weeks, not months. The BlendHowTo Team emphasizes that Blender acts as a universal canvas for modeling, sculpting, texturing, lighting, animation, and video editing. Starting with Blender learn builds confidence, supports experimentation, and reduces the intimidation many beginners feel when first opening the software. Consistency matters: even 15–20 minute daily sessions beat long, sporadic bursts. This article uses practical steps and real-world examples to translate theory into repeatable action.
Core Blender Concepts You Should Master
Blender combines data as objects, meshes, modifiers, materials, and a node-based workflow for shading. At its core, you’ll work with an outliner that lists every object, a 3D viewport for editing, and a properties panel for settings like render engine and materials. A solid Blender learn path starts with understanding how to navigate in 3D space (orbit, pan, zoom), then moves to creating simple geometry, applying a basic material, and rendering a preview. The Blender community emphasizes non-destructive workflows: use modifiers and non-destructive editors to preserve your base geometry. Mastery of the Principled BSDF shader, basic lighting, and clean topology will save you time on bigger projects. BlendHowTo’s guidance highlights practicing with small scenes before tackling complex models, and encourages using reference images to guide proportions, scale, and silhouette.
Setting Up Your Blender Workspace for Efficiency
A productive Blender workspace reduces friction and unlocks your creative flow. Start by loading a clean startup file, enabling the Node Wrangler add-on for faster material work, and configuring a simple layout: 3D Viewport, Outliner, and Properties panels in easy reach. Customize preferences for keyboard shortcuts that feel natural to you, and consider enabling autosave at short intervals to protect your work. A pragmatic Blender learn approach suggests keeping a dedicated project folder with versioned files, so you can track progress and rollback when necessary. In this section you’ll also learn how to switch between Eevee for speed and Cycles for realism, and why you might choose one over the other depending on your hardware and desired look.
Building a Simple Project: From Idea to Render
To put Blender learn into action, start with a tiny project. Imagine a simple scene like a mug on a table or a fruit bowl. Begin with a basic primitive, extrude features, and keep your topology clean. Apply a basic material using the Principled BSDF shader, adjust roughness and color, then introduce a light setup to shape shadows. Create a camera, compose your shot, and render a still image to evaluate proportions and lighting. Repeat with small refinements: tweak materials, adjust light temperature, and refine the camera angle. The goal is to complete a complete, render-ready scene in a single session that yields a tangible result you can assess and build upon in your next practice.
Navigation, Modeling, and Texturing Basics
Efficient navigation is the foundation of Blender learn: learn to orbit around objects, pan across the scene, and zoom with precision. Start modeling with a cube, then use extrude, inset, and bevel to craft simple shapes. As you progress, try blocking out a character or an object with a few editable vertices. Texturing begins with UV unwrapping; even simple color textures benefit from UV maps for consistent texture alignment. The node-based shader editor lets you combine textures and colors for more convincing surfaces—start with a basic color texture, then layer roughness and specular maps. Document your steps in a changelog to track methods and revisit ideas later.
Lighting, Shading, and Rendering Essentials
Lighting defines mood and realism. In Blender learn, experiment with different light types: area, point, sun, and HDRI environments. Practice balancing light temperature, intensity, and shadows to achieve a believable look. Shading relies on a few core nodes: Principled BSDF for materials, a Noise texture for subtle variation, and an HDRI for realistic reflections. Rendering can be done with Eevee for fast previews or Cycles for higher fidelity. Start with a simple daylight setup, then add a secondary light to sculpt highlights. Save iterations and compare renders to learn how even small changes alter the final image.
Importing, Exporting, and File Management
A robust Blender learn practice includes efficient import/export workflows. Learn common formats like OBJ, FBX, and GLTF for moving assets between Blender and other software, and know when to use each for animation, static scenes, or game assets. Organize files with descriptive names, version numbers, and a clear folder structure. Use consistent units and scale to ensure your models align with real-world dimensions. When exporting, verify textures paths and ensure compatible settings for the target platform. A good habit is to keep a master blend file and separate assets in a dedicated library for quick re-use.
Tips for Practice: Quick Routines that Build Muscle Memory
Establish short, repeatable drills. Spend 15 minutes on each routine: (1) navigate and view controls, (2) block out a simple chair or cup, (3) apply a basic material, (4) light a scene, (5) render a test image. Keep a log of results and note which shortcuts speed up your workflow. Use the Node Wrangler and simple texture setups to accelerate shader work. Regular practice cements muscle memory and reduces hesitation when approaching new projects.
Common Pitfalls and How to Avoid Them
Blender learn can stall on topology, texture stretching, or overcomplicated rigs. Avoid dense polygons in early stages by blocking out the silhouette and using modifiers for smooth detailing. Textures should be sized appropriately to the scene; oversized textures waste memory and slow renders. Don’t skip saving and versioning; losing work is a frequent setback. Finally, stay mindful of hardware limitations; adjust render settings and use simplified lighting when your machine struggles. A steady pace and consistent review help you improve without burnout.
How to Create a 2-Week Practice Plan That Sticks
A two-week plan keeps Blender learn moving forward. Week 1 focuses on navigation, modeling basics, and a single material workflow. Week 2 adds lighting, rendering, and an export/iterations routine. Schedule short daily sessions and a longer weekend project where you combine all skills into a small scene. By the end of two weeks, you should have a polished render and a framework you can reuse for future projects.
Tools & Materials
- Blender software (latest stable release)(Download from blender.org; ensure you have admin access to install.)
- Computer with reasonable performance(Any modern PC or Mac that can run Blender smoothly; allocate 8 GB RAM minimum if possible.)
- Mouse with scroll wheel(Prefer a mouse with multiple buttons for faster navigation.)
- Reference images or sketches(Organize a few images to guide proportions and lighting.)
- Optional drawing tablet(Helpful for sculpting or detailed adjustments but not required.)
- Headphones or speakers(For better audio cues while following tutorials.)
Steps
Estimated time: 2 hours
- 1
Install Blender and set up preferences
Download the latest stable Blender. Install it on your system and open to configure basic preferences, such as units, theme, and autosave intervals. This establishes a clean baseline for your projects and prevents surprises later.
Tip: Set autosave to a short interval (e.g., 2-5 minutes) to protect ongoing work. - 2
Create a simple scene and orientation
Start with a cube and a plane to form a basic scene. Move, rotate, and scale objects to establish spatial awareness and practice viewport navigation.
Tip: Use the Numpad for quick viewport toggles and enable the grid to gauge scale accurately. - 3
Add a material with Principled BSDF
Select the object, add a new material, and plug colors into the Principled BSDF shader. Adjust roughness to control surface gloss and reflectivity for a basic look.
Tip: Experiment with a simple texture map later; start with color first to learn shading logic. - 4
Set up basic lighting
Place a key light, a fill light, and a back light. Tune intensity and color temperature to create natural shading and depth.
Tip: Use an HDRI for realistic reflections if your hardware allows it. - 5
Camera setup and composition
Add a camera, align it to a pleasing angle, and enable depth of field for focus control. Frame the subject to emphasize shape and silhouette.
Tip: Rule of thirds can guide your composition for a balanced render. - 6
Render a test image
Choose Eevee for speed or Cycles for realism, then render a test frame. Check for noise, shadow quality, and color accuracy.
Tip: If noise appears, increase samples slightly or enable denoising in post-processing. - 7
Save, export, and document
Save your file with a clear version number. Export a compatible format if sharing with others, and note your settings for future reference.
Tip: Keep a simple changelog to track progress and decisions. - 8
Iterate and review
Review your render, compare with references, and adjust materials, lighting, or geometry. Re-render to measure improvement.
Tip: Create a quick checklist for each iteration to stay focused.
Frequently Asked Questions
What is the best way to start learning Blender for beginners?
Begin with understanding the interface, navigation, and a tiny project. Then gradually add shading, lighting, and rendering. Short, consistent practice tends to yield better results than long, infrequent sessions.
Start with the interface and navigation, then build a tiny project and add shading and lighting step by step.
Do I need a powerful computer to begin Blender learning?
Blender runs on modest hardware, and you can start on many laptops or desktops. As you begin to experiment with complex scenes or high-resolution renders, you may benefit from more RAM and a faster GPU.
Blender works on common hardware; upgrade only if you start working with very heavy scenes.
What is Eevee vs Cycles for rendering?
Eevee is real-time, fast, and great for previews. Cycles offers higher realism with physically based rendering. Choose Eevee for learning speed and Cycles for final renders when you need quality.
Eevee is fast for previews; Cycles gives more realism for final results.
How long does it take to become proficient in Blender?
Proficiency depends on practice frequency and project complexity. A focused beginner plan can yield solid basics within a few weeks, with continued learning over months.
It varies, but consistent practice over weeks builds solid foundations.
Is Blender suitable for artists with no 3D background?
Yes. Blender is designed to be accessible to newcomers, and a structured learning path helps bridge non-3D backgrounds into practical skills.
Definitely—start with basics and grow gradually with small wins.
Should I learn Blender on Windows, macOS, or Linux?
Blender runs well on all major platforms. Your choice may depend on your preferred ecosystem and hardware compatibility, not on Blender itself.
Any major OS works; choose what aligns with your setup.
Watch Video
What to Remember
- Master Blender basics before complex projects
- Practice daily with short sessions for retention
- Build a repeatable workflow you can reuse
- Render frequently to measure progress