How to Put Blender in Inches: Set Units to Inches in Blender
Learn to switch Blender's unit system to inches for precise modeling, 3D printing, and consistent exports. This step-by-step guide covers setup, testing with a 1-inch reference, and practical tips.

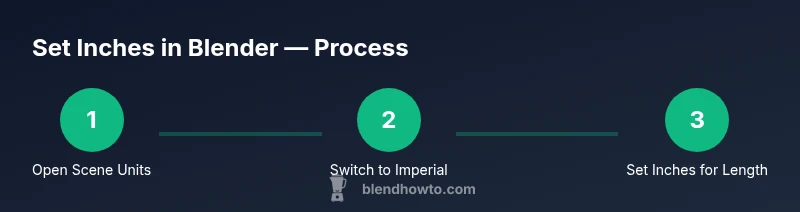
Switch Blender’s Unit System to Imperial, then set Length to Inches. Verify your setup by creating a 1-inch reference object and measuring it in the viewport. This ensures all dimensions read in inches for accurate modeling, printing, and exports. Follow the step-by-step guide to put Blender in inches with confidence.
What it means to put Blender in inches
Blender can display and operate using real-world measurements, which is essential when you model for 3D printing, product design, or scene scale. The phrase 'how to put blender in inches' refers to configuring Blender's unit system so that every dimension you set, read, or export is expressed in inches. According to BlendHowTo, this isn't about changing how Blender internally handles geometry; it's about how it reads and shows numbers, so your modeling aligns with inch-based specifications. In Blender, the unit system is available in the Scene Properties under Units. You can choose Unit System: Imperial, and then set Length to Inches. This combination ensures that the grid, transform values, and measurement readouts reflect inches. You will notice changes in the 3D Viewport where the rulers display in inches, and the transform panel will show numbers in inches. Note that changing units does not automatically scale your existing objects; you must apply any desired scale after modeling. Also, remember that metric and imperial workflows have different defaults; choosing inches avoids mental math when you're referencing a real-world part or print.
-1 2 placeholder? Not needed
Tools & Materials
- Blender software(Any recent version; ensure it’s installed and up to date)
- Ruler or caliper (optional)(Useful for real-world validation during setup)
- Reference cheat sheet for inch conversions(Helps quick checks when calibrating units)
- Screen capture/annotating tool(Optional for recording a setup walkthrough)
Steps
Estimated time: 20-40 minutes
- 1
Open Blender and locate the Unit settings
Launch Blender and open your project. In the Properties editor, select the Scene tab (the icon that resembles a cone). Scroll to the Units section. If Units is hidden, expand the panel or enable it from preferences. You want Unit System set to Imperial and Length to Inches. Starting from a clean scene helps avoid surprises if your previous project used a different unit system.
Tip: Take a quick screenshot of your Units panel for reference and easy reset if needed. - 2
Switch Unit System to Imperial
From the Units panel, choose Imperial as the Unit System. This change unlocks inch-based length options and tweaks the in‑viewport readouts accordingly. If you’re migrating an existing model, plan to verify scales after switching because some numbers may appear different.
Tip: If the numbers don’t update immediately, toggle the viewport or re‑open the project to refresh the display. - 3
Choose Inches for Length and set a baseline scale
Under Length, select Inches. The Unit Scale acts as a multiplier between Blender units and real-world inches. Start with a neutral baseline and test with a simple reference object to confirm the display aligns with inches. Create a reference cube and compare its dimensions against a ruler to verify that 1 Blender unit corresponds sensibly to inches.
Tip: Use a known-inch reference to confirm the scale before proceeding with complex models. - 4
Calibrate Unit Scale and Grid Display
Fine‑tune Unit Scale so that grid spacing and readouts reflect inch-based measurements. Enable snapping to Increment and set it to 1 inch where practical for quick placement. Save these settings as part of a project template to keep consistency across files and team workflows.
Tip: Regularly re-check with the reference cube after adjusting scale. - 5
Create a 1-inch reference to validate
Add a cube and resize it so its dimensions match 1 inch on each axis. With Inch units active, enter exact values in the Transform panel. This reference becomes your baseline for subsequent parts and ensures future measurements stay accurate.
Tip: If the 1‑inch cube reads off, revisit Unit Scale and rerun the validation. - 6
Model an inch-based object and check measurements
Now that inches are the standard, model simple parts using precise inches (e.g., brackets, spacers). Enter dimensions directly in the transform fields, rely on the ruler, and check readouts before finalizing. If you plan to 3D print, keep inch-based tolerances in mind and test-fit prototypes accordingly.
Tip: Prefer exact numeric input over visual estimation for critical parts. - 7
Export and workflow considerations to preserve inches
When exporting (STL/OBJ/GLTF), apply transforms so the inches translate cleanly in other software. If collaborating with others on inch-based designs, share your unit setup and template to prevent unit drift. For print pipelines, confirm slicer software expects inches as the base unit and adjust scales if needed.
Tip: Always export with 'Apply Transform' to lock inches into the file’s data.
Frequently Asked Questions
What unit system options does Blender offer?
Blender provides None, Metric, and Imperial as unit system options. None uses Blender units without real-world references, Metric uses metric units like mm or cm, and Imperial uses inches and feet for real-world alignment.
Blender’s unit options are None, Metric, and Imperial.
Will changing units resize existing objects?
Changing the unit system mainly changes how numbers are displayed. It does not automatically resize existing objects; you may need to apply scale or adjust dimensions after switching.
Changing units changes the readouts, not the actual size unless you apply the scale.
How do I preserve inches when exporting to STL or OBJ?
Export with transforms applied and ensure the unit scale remains consistent. Use the relevant export settings to lock dimensions, especially when sending files to printers or other software.
Apply transforms before exporting to keep inches intact.
Can I mix inches with metric in the same project?
Mixing units in one scene can cause confusion and drift. It’s best to convert everything to inches first, or work in a single unit system per project.
Stick to one unit system per project to avoid confusion.
What should I do if a 1-inch reference reads off?
Re-check Unit Scale, re-measure with the reference cube, and adjust scale as needed. Small adjustments can fix cumulative measurement drift across parts.
If the 1-inch reference is off, tweak the scale and verify again.
Watch Video
What to Remember
- Set Blender to Imperial inches at project start
- Validate with a 1-inch reference object
- Enter exact inch values for precise parts
- Export with Apply Transform to preserve inches