How to Put Blender in mm: Set Millimeter Units in Blender
Learn how to set Blender to millimeter units for precise modeling, 3D printing compatibility, and CAD workflows. Step-by-step guidance, tips, and common pitfalls.

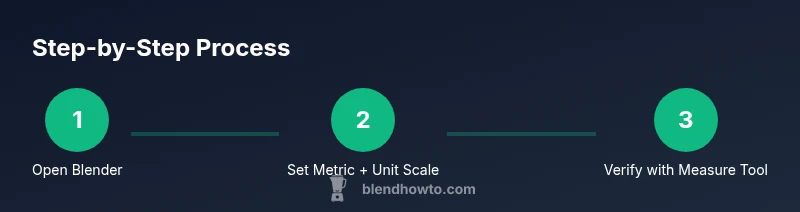
To use millimeters in Blender, switch the Unit System to Metric, then set Unit Scale to 0.001 so 1 Blender Unit equals 1 millimeter. Enable length display to show mm, and verify measurements with the Ruler/Measure tool. Save your preferences to keep mm throughout your projects.
Understanding Millimeter Units in Blender
Blender’s default workspace uses Blender Units which can be confusing when you work with real-world dimensions. If you’re modeling for 3D printing, CNC machining, or CAD exchanges, mapping Blender units to millimeters helps ensure accuracy from concept to export. This approach aligns your virtual dimensions with manufacturable tolerances and reduces the need for post-export scaling. According to BlendHowTo, adopting a consistent mm workflow minimizes surprises when you bring models into other programs or print them. In Metric mode, Blender internally uses meters as the base unit, but a carefully chosen Unit Scale redefines what a single unit represents in real-world length. For most mm workflows, you’ll map 1 Blender unit to 1 millimeter by setting Unit Scale to 0.001. This keeps your on-screen numbers intuitive and reduces conversion errors during exports.
Additionally, consider how display affects perception. When you enable length display in the viewport, you’ll see measurements in millimeters, which makes it easier to check critical dimensions at a glance. While internal calculations still use the underlying base unit, the displayed values align with your mm intent. This balance between internal units and display units is key to maintaining accuracy across modeling, sculpting, and exporting stages.
Why Set Units to mm for Modeling and 3D Printing
When your end goal involves physical fabrication—whether 3D printing, milling, or laser cutting—precise dimensions in millimeters reduce the risk of misfit parts. Using mm units helps you compare components against real-world specs, test fits, and integrate with CAD-like workflows. While Blender isn’t a dedicated CAD tool, it can be configured to produce dimensionally faithful models. The most important step is to establish a single unit convention early in the project. If you’ve already started a model in Blender Units, it’s worth switching to Metric with a consistent Unit Scale and then re-checking measurements before committing to export. BlendHowTo’s guidance emphasizes planning your unit system upfront to prevent rework later in the pipeline.
How Blender Internally Handles Units
Blender’s Unit System is a surface-level abstraction over the internal scene scale. In Metric mode, the base unit is meters. By setting Unit Scale to 0.001, you tell Blender that one Blender unit equals one millimeter. This means the distance between two vertices can be interpreted as millimeters for UX, while the underlying math remains consistent. If you’ve ever toggled between Metric and Imperial, you’ve seen how unit selection impacts tools like the Measure tool, Snap, and dimension fields. Display Units can further reinforce mm by showing length measurements in millimeters in the viewport. The key is to keep unit system, unit scale, and display consistent across your project to avoid drift when importing or exporting.
Practical note: Some add-ons or external tools may override or reinterpret units. Always confirm the active unit settings in the main Scene properties before starting a new modeling session, especially when working with scale-critical parts.
Practical Examples: Recreating Real-World Dimensions in mm
Let’s consider a simple shear-clip part that needs to be exactly 25 mm wide, 12 mm tall, and 8 mm thick. With the Unit System set to Metric and Unit Scale at 0.001, you can enter the exact values in the Dimensions fields of the object’s Transform panel or manually set them using the S (scale) or N (sidebar) inputs. Because your viewport displays in mm, you’ll visually confirm proportions against a ruler reference. For more complex features—like holes with precise diameters or bores—use the Add Numeric Constraints and the Ruler/Protractor tool to confirm diameters and clearances. If you model at 1:1 mm scale from the outset, exporting to STL or OBJ will preserve those dimensions without heavy post-processing.
Remember to document your target mm dimensions in a notes block or project brief. This practice reduces ambiguity when collaborating with others or handing off files to printers or fabrication shops. BlendHowTo recommends a small template file where you store your preferred unit settings and a couple of test objects sized in mm for quick reference.
Verifying Accuracy: Tools and Techniques
Accuracy verification is about cross-checking internal dimensions against intended mm values. Start by creating a calibration cube or a simple box with known mm dimensions and measure between opposing faces using the Ruler/Measure tool. Ensure the tool is set to display in mm and that the numbers reflect your values. If you notice any discrepancy, double-check the Unit Scale, Confirmation that the object’s dimensions are set in mm (not just displayed in mm), and consider applying scale (Ctrl-A) before exporting to ensure the dimensions persist in the target file. Exported formats like STL should carry your mm-sized dimensions; if the destination software uses a different unit system, you may need a final scaling step. Keeping a running log of your settings helps prevent drift across sessions.
Additionally, test-export a simple model to your printer’s slicer or CAD software to confirm that the mm measurements align with how the software interprets dimensions. The goal is reproducible, predictable size from modeling through to manufacturing.
Export and Interchange: Ensuring mm Consistency Across Platforms
A core reason to commit to mm units is reliable interchange with downstream tools. When exporting, verify the receiving application’s unit expectations (e.g., slicers often assume mm when provided with mm-sized models). In Blender, keeping the Unit System in Metric with Unit Scale 0.001 helps ensure that the exported metric data remains consistent. If you export to formats that do not preserve units, perform a post-export check by re-importing the file into Blender or another viewer and confirm that the dimensions still read as your intended mm values. Document the export workflow so teammates or clients can reproduce the same results. If you need to collaborate across software ecosystems, include a note in your export presets that mm is the standard unit for your project.
Final Considerations and Next Steps
Switching to millimeters in Blender is not a one-click miracle; it’s a workflow choice that improves precision when dimensions matter. Establish a lightweight documentation trail for your unit choices, test with a few representative models, and regularly verify dimensions with the measurement tools. As you gain confidence, you’ll rely less on mental conversions and more on direct mm values during modeling, constraint setup, and export. BlendHowTo’s approach emphasizes consistency, cross-application verification, and a clear naming convention for objects sized in mm to keep your projects tidy and scalable.
Tools & Materials
- Blender software (any recent version)(Download from Blender’s official site; ensure you have access to the Scene Unit settings)
- A computer capable of running Blender(Windows/macOS/Linux; 4GB+ RAM recommended; stable internet for updates)
- A reference object or real-world dimensions for cross-checking(Helpful when validating mm measurements against real parts)
- Ruler or caliper (optional)(Useful for external validation when modeling for manufacturing)
- Notes or a quick template file for unit settings(Keeps unit preferences consistent across sessions)
Steps
Estimated time: 15-25 minutes
- 1
Open Blender and access unit settings
Launch Blender and switch to the Scene properties where units are defined. Locate the Units panel to control Unit System, Unit Scale, and how lengths are displayed. This initial setup establishes the mm workflow for all subsequent modeling. If you’re starting fresh, this is your first concrete step toward precise mm modeling.
Tip: Use the N-key panel to quickly bring up the transform sidebar when you’re configuring values. - 2
Set Unit System to Metric
In the Units panel, change Unit System from None or Imperial to Metric. This aligns Blender’s length math with metric distances and prepares your project for mm-scale modeling. The change affects how dimensions are entered and displayed, so apply it at the start of your session.
Tip: Metric mode is essential for mm workflows; if you plan to work with real-world parts, this is the baseline choice. - 3
Adjust Unit Scale to 0.001
Set Unit Scale to 0.001 so that one Blender unit corresponds to one millimeter. This mapping is the core step that translates Blender’s internal meters-based math into mm-friendly numbers in the UI. The grid, gizmos, and numeric fields will align with mm expectations.
Tip: After changing Unit Scale, re-check the grid spacing in the viewport to confirm the visual representation matches mm expectations. - 4
Enable display of units in mm
Turn on Display Units for length and set the display to show millimeters. This makes the on-screen readouts reflect the mm values you’re modeling, reducing mental arithmetic and boosting accuracy during measurements and alignment.
Tip: If you don’t see mm in the viewport yet, ensure you have Display Units enabled in the Scene properties and try toggling the length display option. - 5
Test with a simple object
Create a cube and set its dimensions explicitly to 50 mm x 25 mm x 10 mm to verify that mm values propagate correctly through the Transform panel. Use the Ruler/Measure tool to confirm these exact distances across faces. This test confirms both input and display are consistent.
Tip: Use precise numeric entry (e.g., 0.050 m) if your UI shows meters behind the mm display; confirm mm by cross-checking with the measure tool. - 6
Export and verify
Export your mm-accurate model to STL or OBJ, then re-import into Blender or your target software to verify that dimensions remain true to the intended mm values. If discrepancies appear, revisit Unit Scale and re-check the exporting workflow for any unit conversions.
Tip: Always test a minimal example export before committing to large files or complex assemblies.
Frequently Asked Questions
Why should I use millimeter units in Blender?
Millimeter units align with real-world measurements common in 3D printing and CAD workflows, reducing the need for later conversions. They help ensure parts fit together when manufactured. Consistency in mm also simplifies collaboration with suppliers.
Using millimeters helps ensure your models align with real-world sizes and reduces conversion errors during manufacturing.
Can I mix mm with Blender Units in a single project?
Blender internally uses meters as the base unit, with Unit Scale mapping to mm. Mixing workflows is possible but should be avoided mid-project to prevent inconsistencies. If you must switch, do so at a clear project milestone and document the change.
You should keep a consistent unit approach; mixing units can cause confusion and errors down the line.
Will enabling mm units affect modeling tools?
Enabling mm units primarily changes display and input interpretation, not the geometry algorithms. Tools like Move, Scale, and Rotate operate on the same data; the difference is how you read and input numbers.
Tools work the same; mm mainly changes how you read and specify dimensions.
How do I switch back to meters later?
Return to the Scene units panel, set Unit System to None or Metric as desired, and adjust Unit Scale accordingly. Remember to re-check display units to reflect the new target dimensions.
Yes, you can revert by changing the unit system and scale, but re-check your models afterward.
How do I measure a distance in mm in the viewport?
Use Blender’s Measure/Ruler tool from the toolbar to measure distances between points, edges, or faces. Ensure the display is set to millimeters to read accurate values directly in mm.
Use the ruler tool and have the display show mm for direct measurement.
Are there export considerations to ensure mm accuracy?
Yes. Export with your mm-setup and verify after import in the target software. Some formats default to Blender units; ensure they respect your scale or apply a final mm-based scale on export if needed.
Export with your mm setup and verify dimensions post-export to maintain accuracy.
Watch Video
What to Remember
- Set Metric with Unit Scale 0.001 to map to mm
- Enable mm display for clarity in viewport
- Use the Ruler/Measure tool to verify dimensions
- Export with mm-conscious workflow to maintain accuracy