Is Blender a Good Video Editor? A Practical Review
A balanced, hands-on review of Blender's built-in video editor. We test features, performance, and workflow, with tips for beginners and 3D artists.

Blender's built-in video editor is a capable starter tool for basic editing like cutting, trimming, and adding simple transitions, especially if you already use Blender for 3D work. It proves cost-effective and scriptable, but it lags behind dedicated editors on complex timelines, multicam workflows, and advanced color grading. For quick assemblies and hobby projects, it’s a practical option, with caveats on longer workflows.
What Blender Is and How It Handles Video Editing
Blender is best known as a free, open-source 3D creation suite, but it also bundles a capable Video Sequence Editor (VSE). For the question is blender a good video editor, the answer hinges on your use case. If your work includes quick cuts, trims, titles, and simple overlays, the VSE delivers a surprisingly solid experience, especially when you’re already using Blender for 3D assets. The VSE sits in the same ecosystem as Blender’s compositor and shader nodes, making it convenient to blend 3D renders with footage, titles, and audio in one project file. This tight integration saves setup time and helps keep media assets organized. On the flip side, the Blender video editor isn’t a full replacement for mature, professional-grade editors focused on large multicam timelines, advanced color grading, or finishing polish. For Blender-centric projects and learning, it’s frequently sufficient; for professional broadcast workflows, a dedicated tool remains preferable.
Core Features of Blender's Video Editor
The Video Sequence Editor (VSE) provides a non-linear editing canvas built from strips. You can perform essential edits: cut, trim, ripple delete, and rearrange clips on multiple tracks. Transitions are available, as well as basic effects like color correction, blur, and transform operations. A standout advantage is the integration with Blender’s compositor, enabling you to drive effects that span 2D video and 3D renders in a unified workspace. Audio handling supports synchronization with frames, basic mixing, and volume keyframes. Proxies can help keep editing responsive by working at lower resolutions, with a seamless switch back to full quality for export. Keyboard shortcuts speed workflow, and the scripting API allows automation for repetitive tasks. These features cover everyday projects, but the editor remains better suited for compact, Blender-centered pipelines rather than sprawling, multi-user productions.
Testing Methodology: How We Evaluate Blender's Video Editor
To assess whether is blender a good video editor, we performed a hands-on evaluation across typical hobbyist workflows. Our test setup included a mid-range desktop and a modest laptop, mirroring a home studio environment. We tested rough cuts, transitions, audio syncing, color adjustments, titles, and final export. We documented responsiveness, drag-and-drop performance, and stability over timelines with multiple tracks and effects. We also checked import/export compatibility with common codecs and containers, watched for color space consistency, and verified that audio drift didn’t creep in as timelines lengthened. Finally, we noted how Blender’s release cadence impacts workflows, since new features can alter available tools and keyboard mappings. Overall, the tests aimed to reflect realistic, non-commercial projects that home editors and 3D artists might tackle.
Performance and Stability Across Systems
Blender’s video editor performance is highly sensitive to hardware configuration and project complexity. On a capable GPU/CPU combo, basic edits remain responsive, while longer timelines with many effects can introduce lag, especially if proxies are not active. The UI may feel sluggish when large media libraries or heavy color-correcting nodes are in use, and stability can vary between Blender versions and builds. Add-ons, experimental features, or niche codecs can occasionally cause instability or crashes. Practical recommendations to maintain a smooth experience include enabling proxies for heavy footage, keeping GPU drivers up to date, using a stable Blender build, saving frequently, and segmenting projects into smaller sequences when possible. For users with older hardware, expect longer render times and plan your edits accordingly.
Working with Media Formats and Codecs
Blender relies on libav/FFmpeg backend for decoding and encoding many common formats, which means you’ll typically rely on the same codecs you’d expect in other editors. Importing video, audio, and image assets is straightforward, but you may encounter codec compatibility issues with some format wrappers. When in doubt, transcode troublesome media to widely supported wrappers (for example, h.264 in an mp4 container) before bringing it into the VSE. Export options balance quality and file size, with standard codecs suitable for social sharing or quick reviews. If you hit a rare format with limited support, an external transcoder can bridge the gap while preserving the project timeline inside Blender.
Shortcomings and Practical Workarounds
Blender’s video editor excels in simplicity and integration but lacks some advanced editing features found in professional tools. Multicam editing, robust multicam syncing, and advanced color grading control are not its strongest suit. The color pipeline can feel basic compared to Resolve or Premiere, and audio editing lacks the depth of a dedicated DAW. Practical workarounds include using proxies to speed up editing, performing precise color grading and finishing in a dedicated editor or Blender’s compositor, and exporting in image sequences for lossless processing elsewhere. You can also extend Blender with add-ons to improve color grading, media management, and export workflows, but be mindful that third-party tools may introduce compatibility issues with future Blender updates.
Hands-On Workflow: A 10-Minute Edit in Blender's VSE
Here’s a quick, practical workflow you can follow to get a basic edit done in about ten minutes: 1) Open a new Blender project and switch to the Video Editing workspace. 2) Import your media into the sequencer by dragging files into the timeline or using the Add menu. 3) Drag clips onto the timeline and use Q to perform a quick cut, then scrub to trim ends. 4) Stack audio on a separate audio track and ensure frame-accurate alignment with video. 5) Apply a basic transition between clips from the Add > Effect Strip menu. 6) Add a simple color balance or curves adjustment on a color strip to correct exposure. 7) Insert a title with the built-in text tool and position it over the clip. 8) Adjust audio levels with keyframes to avoid clipping. 9) Do a final review by scrubbing the timeline and zooming into critical frames. 10) Export using a standard mp4/h.264 preset and review the result. This streamlined approach highlights Blender’s strength for quick, Blender-centric edits without enlisting another tool.
Blender vs Popular Dedicated Editors
When comparing Blender’s video editor to dedicated editors like Premiere Pro or DaVinci Resolve, the most apparent contrast is scope. Blender’s VSE is free, tightly integrated, and excels for users who want to keep 3D work and video in a single project. It shines for quick cuts, overlaying titles, and basic effects without leaving Blender. However, it trails behind in multicam workflows, advanced color grading, track-based audio mixing, and finishing polish. In cost terms, Blender is unbeatable for hobbyists and students, while professional studios often favor specialized tools for efficiency and feature depth. For a blended pipeline—3D animation plus editing—Blender can be the starting point, with a dedicated editor filling in the gaps as needed.
Best Practices for Getting the Most from Blender's Video Editor
To maximize Blender’s video editor, adopt a few best practices: plan your project layout with separate sequences for footage, audio, and effects, and use proxies to keep the timeline responsive. Leverage Blender’s color management and the compositor for more controlled color correction rather than pushing complex color grades directly in the VSE. Organize media by folders within Blender to simplify asset management, and build a lightweight workflow for exports by testing different codecs and wrappers. Regularly save your project and enable autosave, especially when working with long timelines. Finally, explore community add-ons that extend the VSE with improved import/export, better color grading options, and more robust sequencing controls, while keeping in mind compatibility with Blender’s update cycle.
Add-Ons and Community Resources
The Blender community develops add-ons that extend the video editor’s capabilities, from enhanced media management to improved export options. Useful add-ons typically focus on streamlined import pipelines, color grading presets, and automation scripts that batch-process clips. When evaluating add-ons, verify compatibility with your Blender version and test in a separate project to avoid disrupting your main workflow. Community resources, tutorials, and forums can provide practical tips for optimizing the VSE for specific tasks—e.g., quick social media cuts, educational videos, or simple vignettes—without needing a separate editing suite. Always back up configurations before enabling new add-ons, and document which tools you rely on for future updates.
Who Should Use Blender's Video Editor
Blender’s built-in video editor is ideal for home editors, hobbyists, and 3D artists who want an all-in-one solution. It suits quick edits, prototype projects, and light finishing within a Blender-first workflow. If your work involves heavy color grading, multicam editing, or professional finishing, you’ll likely rely on a dedicated editor for the final pass. For learners and students, Blender’s VSE offers an approachable entry point to editing concepts while you simultaneously build animation or game assets. In short, use Blender for entry-level to intermediate editing when you value cost-efficiency and seamless Blender integration, and pair it with a specialized tool for advanced finishing when needed.
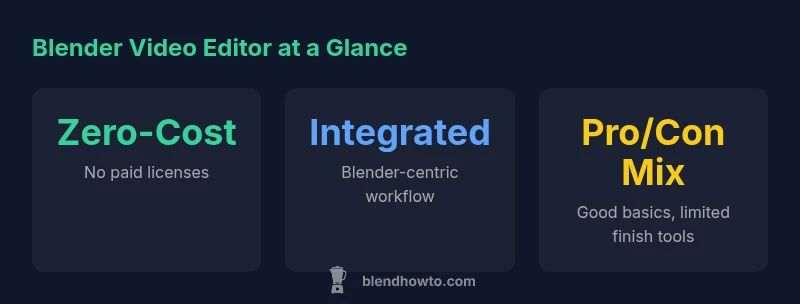
What's Good
- Zero upfront cost and licensing simplicity
- Integrated into Blender for Blender-centric workflows
- Supports basic editing, audio, and simple effects in a single timeline
- Strong community and plentiful free learning resources
The Bad
- Lacks advanced multicam editing and professional color grading tools
- Performance can lag on long timelines without optimization
- Stability can vary between Blender versions and add-ons
Best for Blender-centric workflows and hobbyists seeking a zero-cost editor
Blender’s video editor offers a solid base for simple edits and quick prototypes within a Blender-driven pipeline. It’s cost-effective and highly scriptable, but falls short on advanced editing features found in professional tools. For basic projects and learning, it’s a strong fit; for high-end finishing, pair it with a dedicated editor.
Frequently Asked Questions
Is Blender suitable for professional video editing?
Blender’s video editor handles basic to intermediate tasks well, especially if you’re already using Blender for 3D work. For high-end finishing, multicam editing, or complex color grading, dedicated editors are typically preferred.
Blender works for basic editing, but for professional finishes you’ll likely want a specialized tool.
Can Blender do multicam editing?
Blender’s VSE supports single-camera editing scenarios well, but it does not offer robust built-in multicam editing like some professional editors. You can approximate multicam workflows with manual syncing across tracks, but it isn’t seamless.
Multicam editing isn’t built-in; you’ll need workarounds for multi-angle projects.
Does Blender handle 4K editing well?
Blender can handle 4K footage in principle, but performance depends on hardware, proxies, and project complexity. For smooth editing, use lower-resolution proxies and test exports before final renders.
4K is possible with proxy workflows and a capable system.
Are there add-ons to improve Blender’s video editor?
Yes. Community add-ons exist to enhance import/export, color grading, and workflow management. Install cautiously and verify compatibility with your Blender version.
There are helpful add-ons, but check compatibility first.
How does Blender compare to Davinci Resolve or Premiere for editing?
Resolve and Premiere offer deeper editing tools, professional color grading, and established multicam workflows. Blender is free, Blender-native, and superb for quick, integrated work but not a full replacement for professional finishing pipelines.
Pro editors usually go with Resolve or Premiere, but Blender can cover basics at no cost.
What’s the best workflow for beginners?
Start with simple projects, learn the VSE basics—import, cut, place transitions, and add audio—then gradually introduce color corrections and titles. Build a repeatable file structure to keep assets organized as you scale up.
Start small and build your skills in the VSE step by step.
What to Remember
- Master basic cuts and transitions in Blender's VSE for quick projects
- Use proxies to keep timelines responsive on heavier footage
- Explore add-ons to extend editing capabilities, while testing compatibility
- Pair Blender with a dedicated editor for professional finishing and multicam workflows
- Keep projects organized to leverage Blender's cohesive asset management