MakeHuman Blender: A Practical Character Pipeline Guide
Learn how to create, rig, texture, and render humanoid characters by pairing MakeHuman with Blender. This step-by-step guide covers setup, export/import, topology, rigging, and shading for home artists and hobbyists.

You will learn to use MakeHuman for generating base humanoid models and bring them into Blender for rigging, shading, and animation. This guide covers setup, export/import workflow, clean topology, and practical tips to speed up your project. You’ll finish with a ready-to-pose character suitable for renders, games, or animation. It assumes basic Blender familiarity.
Foundations of the MakeHuman Blender Workflow
The MakeHuman to Blender workflow is a practical pipeline for creating humanoid characters by starting in MakeHuman and finishing in Blender for rigging, shading, and animation. This approach gives you a parametric base you can customize quickly, which is especially useful for concept art, game prototyping, or storytelling scenes. In this section, we cover the core concepts and why the makehuman blender workflow is valuable for home cooks? not relevant. Instead, we focus on home artists and hobbyists: how to iterate faster, keep topology clean, and reduce repetitive tasks. You will learn how MakeHuman’s morph controls translate into Blender-friendly geometry, how export formats preserve rig data, and how to validate scale and pose alignment before diving into texture work. The goal is a predictable, repeatable process you can adapt to different characters and styles using the BlendHowTo approach.
Getting Started: Tools, Environment, and Best Practices
To maximize your results with makehuman blender, you need a reliable software stack and a balanced workstation. Install MakeHuman for your base mesh and Blender for finalization, shading, and animation. Make sure you’re using compatible versions and enable any optional addons that streamline data transfer (for example, MHX2, if you choose to use it). Before you begin, configure your scene with a neutral ground plane, unit scale set to meters, and a reference camera that matches your render target. This helps keep proportions consistent from export to import. As you’ll often work with subtle adjustments, plan your session in focused blocks: modeling, rigging, texturing, lighting, and rendering. Remember to back up frequently, label morph targets and rigs clearly, and document your export settings for reproducibility with future projects.
Exporting from MakeHuman: Formats, Morphs, and Rig Data
Export options in MakeHuman determine how cleanly your data transfers to Blender. The most common choices are FBX for full rig data and MHX2 for smoother MakeHuman to Blender integration. OBJ is suitable for static meshes without rig data. When exporting, verify scale and orientation (MakeHuman uses a different up-axis than Blender by default), and ensure that the morphs you need are included. If you rely on the MHX2 workflow, keep both MakeHuman and Blender versions in sync to avoid compatibility issues. Export in a way that preserves vertex order and rig hierarchy whenever possible, as this reduces later surprises during weight painting and animation. A small tip: apply transforms before export to lock in your dimensions.
Importing into Blender and Initial Cleanup
Import the chosen format into Blender and immediately verify the scene setup: scale, rotation, and the origin are correct. If your model imports upside down or too large, adjust the scene unit system and reimport with the correct axis orientation. Parent the mesh to a clean armature if rig data was included, or keep the mesh separate until you’re ready to bind it. In this stage you’ll also check for mesh integrity, ensure normals are facing outward, and correct any shading issues caused by import. A quick UV check ensures textures map predictably. By aligning the origin to the center of the character and placing a reference plane at foot level, you’ll simplify posing and animation work later.
Rigging, Weights, and Pose in Blender
If the export includes an armature, verify bone names and hierarchy in Blender. Start with major joints (hips, shoulders, knees) and inspect deformation in a few basic poses. Weight painting should begin with broad regions and then refine around joints to avoid unnatural pinching. If you’re not exporting a full rig, you can rig using Blender’s built-in tools by parent-child relationships and skinning. Retargeting a MakeHuman-generated rig to Blender’s standard skeleton is common, but it requires careful mapping of bone names and constraints. Testing with a simple walk cycle helps catch weighting errors early and saves hours later.
Texturing, Materials, and Shading Essentials
Texture work brings your character to life. Start with clean UVs inherited from MakeHuman if available, or unwrap in Blender for a fresh layout. Use the Principled BSDF shader for skin, eyes, and hair, and layer roughness maps to control specular highlights. If you export in a format with textures, re-link them in Blender and check color management settings to ensure consistency across renders. For faster iteration in gaming contexts, bake textures where possible and use simple, optimized materials for real-time previews. Always test your shaders in a range of lighting scenarios to avoid surprises in final renders.
Clothing, Hair, and Accessory Integration
Clothing and hair are often separate meshes that must deform convincingly with the body. Import or model clothing on a separate layer and bind to the same armature, or use weight painting to fit clothing specifically to motion. Hair systems can be simple planes with alpha textures or more advanced hair particles, depending on your target. Check for geometry gaps during extreme poses and adjust the cloth to prevent intersections. When using accessories, ensure they do not interfere with joints and adjust collision settings if your pipeline includes physics-based animation.
Rendering Prep: Lighting, Cameras, and Export for Projects
Before final renders or export to a game engine, polish lighting and camera work. Set up a neutral lighting rig to highlight form and texture without washing out details. Create a few camera angles, test renders, and adjust exposure or color grading as needed. If you plan to publish or share your work, generate a final export that matches your target format (e.g., FBX for engines, GLTF for web). Keep a record of the exact export path, textures, and shader nodes used so you can reproduce results in future projects. This disciplined approach makes the makehuman blender workflow faster and more reliable.
Tools & Materials
- MakeHuman software(Latest stable release installed and activated)
- Blender software(Version 2.93+ recommended; ensure it's updated)
- FBX/OBJ export formats(Use FBX for rig data; OBJ for static meshes)
- MHX2 add-on (optional)(Facilitates data transfer between MakeHuman and Blender)
- UV textures or texture packs(Optional for faster setup; helps with shading)
- A reliable workstation(16-32 GB RAM recommended for smooth work)
Steps
Estimated time: 120-180 minutes
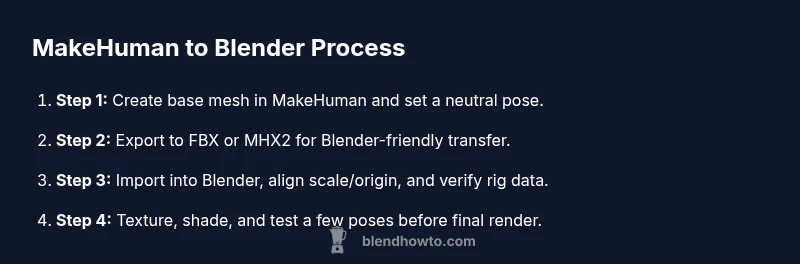
- 1
Install MakeHuman and Blender
Install the MakeHuman and Blender applications from their official sources. Verify you can launch both and that your system meets minimum requirements. This step sets the baseline for a smooth pipeline.
Tip: Keep both apps updated and back up your work before major version changes. - 2
Create a neutral base mesh in MakeHuman
Open MakeHuman, choose a neutral pose, and adjust global proportions. Use the morph sliders to define body shape, height, and approximate head-to-torso ratios. The goal is a clean, non-deformed base mesh ready for export.
Tip: Avoid extreme morphs at this stage to minimize topology issues later. - 3
Export from MakeHuman
Export the model in a Blender-friendly format, typically FBX or MHX2 if you use the plugin. Ensure that rigging data and scale are exported correctly and that you collapse any unnecessary meshes.
Tip: If exporting to FBX, enable 'Apply Transform' to keep the correct scale in Blender. - 4
Import into Blender and align scene
In Blender, import the file and check scale, rotation, and units. Align the arms and legs to Blender’s global axes and set the model to the origin. This ensures predictable posing and animation later.
Tip: Use a reference character in the scene to compare scale. - 5
Retarget rig and weight paint basics
If your export includes bones, verify the armature, then adjust vertex groups in weight paint to refine deformation. Start with major joints before smoothing edge loops, and test a few simple poses.
Tip: Enable symmetry to speed up weight painting; work on one side and mirror changes. - 6
Texture and material setup
Apply skin textures and materials. If your model uses UVs from MakeHuman, ensure UV maps are clean and non-overlapping. Use Blender’s Principled BSDF to achieve realistic skin, eyes, and hair shading.
Tip: Bake textures to reduce shader complexity for real-time apps. - 7
Add clothing and accessories
Import or model clothing separately to avoid rigging clashes. Parent clothing to the armature or use weight painting to fit clothing to movement. Check fit in a few dynamic poses to catch intersections.
Tip: Avoid tight gaps around joints; adjust clothing to maintain silhouette. - 8
Pose, test render, and export
Pose the character, run a quick render test, and verify lighting and camera. If satisfied, export in the needed format for your project (renders, game engines, or animation).
Tip: Render at a few different angles to catch shading errors.
Frequently Asked Questions
Can I use MakeHuman models in Blender without the MHX2 plugin?
Yes, you can export to FBX or OBJ from MakeHuman and import into Blender without MHX2. However, some rig data may be simplified or require manual retargeting. The plugin streamlines data transfer, especially for rigs.
You can import via FBX or OBJ, but MHX2 makes rig transfer smoother.
What export formats work best for Blender?
FBX is commonly used for rigged characters with animation data. OBJ is good for static meshes or when rig data isn’t needed. MHX2 can optimize data transfer.
FBX for animation, OBJ for static mesh.
How do I fix shading issues after import?
Check normals, apply scale, and ensure UV maps are intact. Recalculate normals in Blender and verify the shading model uses a suitable shader like Principled BSDF.
Fix normals and check UVs; use a realistic shader.
Is retargeting necessary with MakeHuman models?
Not always; if the exported rig aligns with Blender's armature, retargeting may be minimal. Expect occasional tweaks to weights for natural deformation.
Sometimes minimal retargeting is needed; expect tweaks.
Are there licensing considerations for MakeHuman assets?
MakeHuman models are released under open licenses. Check the specific asset licenses when combining with Blender projects, especially for commercial use.
Open licenses apply, verify asset licenses for commercial use.
Can I animate MakeHuman characters in Blender?
Yes, once rigging is set up, you can animate MakeHuman characters in Blender. Ensure the armature and skin weights behave well under motion.
Yes, after rigging, you can animate in Blender.
Watch Video
What to Remember
- Audit geometry before import to Blender.
- Retarget rigs carefully for natural movement.
- Texture steps matter for realism.
- Plan export format based on final use.