R Blender: A Practical Guide for Blenders in Cooking and 3D
A practical, dual-context guide to r blender—combining safe kitchen blending with beginner Blender software workflows. Learn the basics, workflows, and tips to get real results in cooking and 3D modeling.

By the end of this guide you will master a dual approach to r blender: use a kitchen blender to craft smooth, consistent blends, and apply Blender software basics to create simple 3D scenes. You’ll learn a practical workflow that keeps both uses aligned—from safety and setup to step-by-step techniques and common pitfalls.
Why r blender Matters for Home Cooks and 3D Artists
The term r blender is a useful umbrella for anyone who wants to combine practical kitchen skills with beginner-friendly Blender lessons. In this guide, we treat r blender as a cross-disciplinary approach: you’ll gain confidence in blending ingredients to a smooth texture, and you’ll translate that discipline into building a simple 3D scene in Blender. According to BlendHowTo, bridging cooking and 3D workflows helps you see how precision, timing, and safe handling transfer between domains. This dual focus can shorten learning curves and boost confidence, especially for hobbyists who enjoy both food and digital art. As you progress, you’ll notice that the same habits—measuring, cleaning as you go, and planning ahead—improve outcomes in both arenas.
Core Concepts You’ll Learn
- Safety first: keep blades sharp and hands away from the blender’s blade housing; always unplug before cleaning.
- Consistent workflow: plan, measure, blend, and document results for both a smoothie and a scene render.
- Reusable templates: create a simple Blender project template and a smoothie recipe template that you can reuse for future projects.
- Visual alignment: learn how to set up a scene that visually echoes a recipe, so your kitchen and your workstation feel coordinated.
How This Guide Is Structured
We’ll walk you through a practical, two-track workflow: Track A (kitchen blending) and Track B (Blender 3D project). Each track shares the same core habits: prep, execute, and review. You’ll also see how to document results so you can replicate success next time. The goal is not to master every detail at once, but to build a reliable baseline you can grow from. This approach directly supports the keyword r blender by demonstrating how the term applies in real tasks.
Getting the Most Out of This Guide
- Follow the steps in order to build confidence in both domains.
- Use the included checklist to track your progress across tracks.
- Refer back to the quickAnswer as a reminder of the dual goal: a smooth blend and a clean, render-ready scene.
Tools & Materials
- Countertop blender(Choose a blender with a stable base and a blade suitable for fruits and ice.)
- Measuring cups/spoons(Used for precise ingredient measurements in recipes and reference values for Blender projects.)
- Glass jar or pitcher(For blending small batches and avoiding container damage.)
- Sieve or strainer(Optional to remove pulp for smoother juice or puree.)
- Spatula(To scrape sides and transfer blended contents.)
- Dish soap and sponge(For cleaning blades and the blender jar safely.)
- Computer with Blender installed(Blender 3.x or newer recommended for a smooth experience.)
- Mouse/keyboard(Essential input devices for Blender navigation and workflow notes.)
- Reference images for Blender(Images to guide basic modeling (cups, fruits, etc.).)
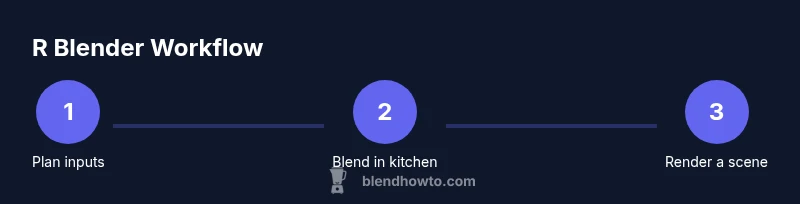
Steps
Estimated time: 2 hours
- 1
Prepare and plan
Before you turn on any appliance or open Blender, outline your two targets: a simple smoothie recipe and a basic 3D scene. Choose consistent measurements and a scene reference to keep both tasks aligned. This planning step saves time and reduces mistakes.
Tip: Write down key measurements and the Blender object names you will create. - 2
Set up tracks
Create a track for the kitchen blender: ingredients gathered, blender assembled, and a safety check completed. In Blender, set up a project file with a cube or cup as a base, and preset a simple material. Keeping file names and folders organized helps both workflows.
Tip: Use a consistent naming convention (e.g., Blend_Track_01) for all assets. - 3
Run the kitchen blend
Activate the blender with controlled pulses, documenting the texture at each stage. If needed, strain to a smooth puree. This mirror process in Blender—start with a basic mesh, then refine the material and lighting.
Tip: Always start on a low speed and increase gradually to avoid splashing. - 4
Create a basic Blender scene
Model a simple cup and a base object to hold your blended content. Apply a basic material, set up a light source, and position the camera to frame the scene. This step translates your blending discipline into 3D form.
Tip: Keep the viewport shading set to Material Preview to gauge realism. - 5
Blend and render
Render the Blender scene with a simple setup: a single light, basic material, and a neutral background. For the kitchen track, sample the texture and consistency you achieved. Compare both outputs to check for balance between the two tracks.
Tip: Use a small resolution render first to iterate quickly. - 6
Review and document
Record what worked well and what didn’t in both tracks. Save the Blender project with a new version number and log the recipe results, including any adjustments. This keeps your r blender process repeatable.
Tip: Create a one-page recap that ties the two tracks together. - 7
Save and plan next steps
Back up your Blender file and recipe notes. Plan a more advanced scene or a more complex smoothie using the same workflow, building on your successful baseline.
Tip: Schedule a follow-up session to reinforce the habit.
Frequently Asked Questions
What is r blender?
In this guide, r blender refers to a combined approach that treats kitchen blending and Blender software basics as parallel skills. It helps beginners build confidence by applying similar planning, measurement, and cleanup habits to both tasks.
R blender is a dual approach that combines cooking blends and Blender basics in one workflow.
Do I need prior Blender experience to start?
No. This guide starts with very basic Blender concepts, using simple shapes and materials to build a foundational scene. You can learn while you practice your blending technique.
No prior Blender experience is required; you’ll start with the basics and build up.
How long does the full workflow take?
The beginner-friendly workflow is designed for about two hours, depending on how deeply you want to explore the scene and recipe details. You’ll gain a solid baseline you can expand later.
Estimate about two hours to complete the initial workflow, with room to grow.
What safety cautions should I follow in the kitchen?
Always unplug the blender before washing, keep fingers away from the blades, and handle hot containers with caution. Start with soft ingredients and avoid overfilling the jar.
Remember to unplug before cleaning and keep your hands away from the blades.
Can I apply these steps to more complex Blender projects?
Yes. The same planning, naming conventions, and documentation can scale to more complex models, materials, and lighting setups as you gain experience.
Absolutely—you can build on the basics to tackle bigger Blender projects.
Watch Video
What to Remember
- Plan both tasks before starting
- Maintain consistent naming and documentation
- Start with simple, repeatable templates
- Render small previews to speed iteration
- Back up work frequently and plan next steps