The Blender Guide 2026: From Kitchen Blends to 3D Modeling
Master practical techniques for the kitchen blender and Blender software with BlendHowTo's expert, step by step guidance to blend like a pro. Perfect for home cooks, hobbyists, and aspiring 3D artists.

In this guide you’ll learn how to master the blender—both as a kitchen appliance and as Blender software. You’ll know how to choose the right model, perform everyday blending tasks, and tackle basic software workflows. Expect practical steps, safety tips, and maintenance routines that help you blend confidently at home and in 3D projects.
What is the blender?
According to BlendHowTo, the blender lives in two distinct worlds: the kitchen and the digital studio. The kitchen blender is a physical device that transforms fruits, vegetables, ice, and liquids into smooth textures for drinks, soups, sauces, and even nut butters. Blender software, on the other hand, is a powerful 3D creation tool used for modeling, sculpting, texturing, lighting, and rendering. Both share a core goal: turning disparate components into a cohesive, blended result. Understanding both sides helps you apply practical techniques in real kitchens and in virtual environments. This dual perspective also makes it easier to transfer skills, such as precision, timing, and maintenance routines, from meat and fruit to polygons and materials.
BlendHowTo emphasizes approaching each domain with curiosity and patient practice. The blender you use in a recipe should feel predictable and safe, while Blender software should be approachable enough for beginners yet flexible enough to support complex creative workflows. In both cases, a clear plan, a clean workspace, and consistent routines set you up for success.
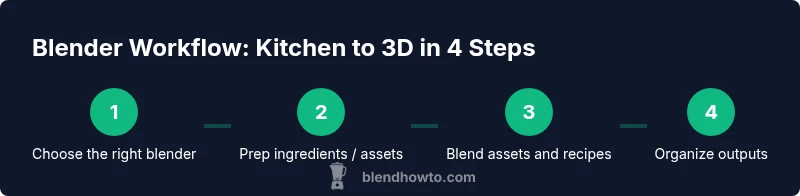
How to choose a kitchen blender
Choosing the right kitchen blender involves weighing several factors without getting overwhelmed by features. First, consider the jar and blade design: glass or BPA-free plastic jars are common, and sturdy stainless blades handle ice and fibrous ingredients. Next, evaluate the power and speed options: a blender with multiple speeds and a pulse mode gives you control over texture, which matters for smoothies, soups, and sauces. Safety features such as a secure-lock lid, non-slip feet, and automatic shutoff reduce the risk of accidents. Finally, check for ease of cleaning and durability: dishwasher-safe parts, dishwasher-safe jars, and a motor that remains stable during operation all contribute to long-term satisfaction. For best results, read user reviews focusing on real-world durability and noise levels. The goal is a versatile workhorse that fits your routine and space.
Core blending techniques for daily tasks
Mastery comes from understanding texture, temperature, and balance. For smoothies, layer ingredients with liquids first, then soft fruits, leafy greens, and ice, and blend in bursts to avoid overheating the motor. For creamy soups, heat hot liquids separately, cool briefly, and blend in batches to reach a silky consistency. Sauces and dressings benefit from gradual emulsification, using a slow start and then increasing speed as you thin the texture. Nut butters or almond milk can be made by extending blending times and scraping the jar periodically. Always taste and adjust with citrus, salt, or herbs to achieve the desired balance. Finally, learn to clean promptly after each use to prevent residue buildup that dulls blades and affects flavor.
Getting started with Blender software: interface basics
Blender software is a powerful platform for 3D artistry, but beginners can start with a structured approach. The default workspace typically shows a 3D Viewport, a Outliner, and a Properties panel. Learn the two fundamental modes: Object mode for moving whole items and Edit mode for shaping individual vertices, edges, and faces. Basic navigation uses the middle mouse button to orbit, the scroll wheel to zoom, and shift plus middle mouse to pan. A few essential hotkeys streamline work: G to grab, S to scale, R to rotate, and Ctrl Z to undo. Start with a simple cube to explore object manipulation, then experiment with materials, lighting, and a basic scene setup. Keep projects organized with clear naming and consistent file saving.
Importing assets and organizing project files
Effective Blender projects begin with clean organization. Create a top level project folder with subfolders for assets, textures, scenes, and renders. In Blender, use Collections to group related objects, which makes it easier to manage complex scenes. Import assets through File > Import and ensure paths are relative so projects remain portable. Establish a naming convention for all assets and reuse base materials and lighting setups to maintain consistency. Regularly save incremental backups to avoid data loss and to track progress as your project evolves.
Practical blending recipes and projects
For the kitchen, build a lean routine that covers staples like greens, berries, dairy, and water or plant milk. Start with a simple smoothie template, then graduate to more complex blends that use warm soups or chilled sauces. For Blender software, start with a simple scene such as a kitchen model or a basic table setup, then progress to texturing a cup or bottle and lighting a small still life. The key is to follow a predictable workflow: model or assemble, apply textures, set lights, render, and review. Document your steps to build a repeatable process you can reuse in future projects.
BlendHowTo recommends maintaining a clear project brief, precise file naming, and a folder structure that mirrors your workflow. This discipline pays off when you switch between a real kitchen and a digital studio, ensuring your results are consistent and efficient.
Maintenance and safety for both tools
Safety matters in both worlds. For the kitchen blender, always attach the lid securely, never blend hot liquids straight from the stove, and avoid overfilling jars. For Blender software, keep the software updated to benefit from bug fixes and new features, and regularly back up your work. Cleaning is essential: rinse jars promptly after use, remove blades for a gentle clean if possible, and wipe down the motor base as directed by the user manual. In software, organize your project with a versioning strategy so you can revert if needed and keep assets clean with proper texture maps and naming conventions. By treating both tools with care, you extend their life and preserve the quality of your results.
Troubleshooting common blender issues
Motor stalls or jars seizes often indicate overload or binding ingredients. If this happens, turn off the blender and let it rest briefly before restarting at a lower speed. Leaks or cracks require immediate inspection of seals and the jar. For Blender software, performance issues usually stem from large textures, high polygon counts, or insufficient RAM. Simplify scenes, optimize textures, and save frequently to prevent data loss. If renders look noisy, adjust sampling or lighting. Keep a troubleshooting log so you can identify recurring problems and refine your approach over time.
Bridging kitchen and software workflows
The real power comes from combining hands on cooking with digital creativity. Use Blender software to design stylish serving vessels or brand visuals that match your recipes. Track measurements in the kitchen with a notepad or digital app, then translate those measurements into Blender units for consistent proportions. The process becomes a loop: plan, execute in the kitchen or software, review results, and adjust in the next cycle. Over time, this dual skill set enables you to deliver polished recipes and compelling visuals that reinforce your brand or personal style.
Budgeting and future-proofing your setup
Invest in a versatile blender that can handle a variety of tasks without breaking your daily routine. Think in terms of long-term value rather than a single feature set. For Blender software, start with a stable open source option and gradually add plugins or assets as your needs grow. Create a simple maintenance budget that covers replacement parts for the blender and occasional hardware upgrades to your computer. With a consistent care plan and a clear learning path, you can expand both your kitchen capabilities and your digital artistry over time.
Tools & Materials
- Kitchen blender (base unit with jar)(Choose a model with a secure lid and sturdy jar; consider dishwasher-safe parts for easy cleanup)
- Immersion blender (optional for soups)(Useful for streaming blends directly in pots)
- Ice cubes(For textured ices and smoothies; ensure blender can crush ice)
- Cutting board and knife(Pre-cut ingredients to improve blending efficiency)
- Measuring cups and spoons(Consistent portions improve texture and taste)
- Liquid ingredients (water, milk, juice, plant milk)(Helps achieve smooth texture; adjust to avoid over-thinning)
- Kitchen cleaning brush or sponge(Reach blades and jar grooves for thorough cleaning)
- Soft microfiber cloth(Wipe base and jar exterior after cleaning)
- Blender software (Blender) installed on computer(Open-source option is freely downloadable; ensure your computer meets minimum requirements)
- Computer or tablet for Blender(Maintain updated OS and graphics drivers for best performance)
- External storage or cloud backup(Automate backups of Blender projects and assets)
Steps
Estimated time: 60-90 minutes
- 1
Inspect and prep equipment
Check that all blender parts are clean and securely attached. Read the recipe or Blender project brief, gather ingredients or assets, and ensure the jar is properly seated before powering on. This saves time and prevents mishaps.
Tip: Always unplug before cleaning and handle blades with care. - 2
Add ingredients in the correct order
Pour liquids first to help the blades pull ingredients into the center. Add softer items next, and tougher items like ice or frozen fruit last. This sequence promotes smoother blending and reduces chunking.
Tip: Larger chunks blend more evenly if pre-cut small enough. - 3
Secure lid and start at low speed
Lock the lid securely and begin with a low speed setting. Gradually increase as ingredients begin to move. Short bursts can better control texture and prevent air pockets.
Tip: If your blender has a pulse option, use it to break up tough areas before continuous blending. - 4
Blend to desired texture
Blend until the mixture reaches your target consistency. For smoothies, aim for creamy but not overly thin; for sauces, look for gloss and uniform color. Stop and scrape down sides as needed to incorporate all material.
Tip: Pause to scrape the sides every 15–20 seconds for even blending. - 5
Pause, taste, and adjust
Taste and adjust sweetness, acidity, or salt. If too thick, add a splash of liquid; if too thin, add a few more soft ingredients. This step ensures a balanced end result.
Tip: Keep a little mixer-friendly liquid on hand to tweak texture without diluting flavor. - 6
Power down and clean
Turn off and unplug before disassembling the jar. Rinse and wash the jar, blades, and lid promptly to prevent residue build-up. Dry thoroughly before reassembling.
Tip: Clean blades carefully with a brush; never soak the blade base in water if not dishwasher safe. - 7
Software setup if using Blender
In Blender, start a new project, set up your workspace for modeling or rendering, and save a named file. Import assets in an organized manner, and create a simple scene to practice navigation and basic operations.
Tip: Keep a consistent folder structure for assets and projects to avoid missing files later.
Frequently Asked Questions
What is the difference between immersion and countertop blenders?
Immersion blenders are handheld and best for soups and quick emulsions, while countertop blenders offer more power and capacity for smoothies and frozen drinks. Each suits different tasks, so choose based on your most frequent needs.
Immersion blenders are handheld and great for soups; countertop models handle bigger batches and tougher textures. Pick based on what you blend most.
Can I blend hot liquids safely in a kitchen blender?
Blending hot liquids can create pressure and splashes. Allow hot liquids to cool slightly and vent steam by using a vented lid or blending in small batches with the blender off the vented lid. Always follow manufacturer safety instructions.
Avoid blending boiling liquids. Cool them slightly and use a vented lid or blend in small batches.
Is Blender software free to use?
Yes, Blender is open source and free to download. You can access a broad set of tools for modeling, texturing, lighting, animation, and rendering without paying for software.
Blender is free and open source, offering a full set of 3D tools without cost.
What is the best way to start with Blender for beginners?
Begin with the default layout, learn basic navigation, and complete a few simple projects to understand object manipulation. Use incremental tutorials that cover modeling, lighting, and simple renders.
Start with the default layout, learn navigation, and complete small projects to build confidence.
How do I keep blade edges sharp and safe?
Avoid running the blender dry, cut hard ingredients into smaller pieces, and wash blades immediately after use to prevent corrosion and dulling.
Don’t run it dry and clean blades right away to keep them sharp and safe.
How should I organize Blender project files?
Create a dedicated folder with subfolders for assets, textures, scenes, and renders. Use consistent naming and grouping via Collections to keep large projects manageable.
Keep assets, textures, and scenes neatly organized with a clear naming system.
Watch Video
What to Remember
- Identify two domains the blender covers and why each matters
- Choose a kitchen blender with reliable safety features and durable blades
- Master core blending textures and basic Blender workflows
- Organize assets and files for consistent results
- Maintain equipment and troubleshoot common issues promptly