Rig in Blender: A Practical Beginner's Rigging Guide
Learn to rig in blender with a practical, step-by-step approach. Build an armature, skin your mesh, apply IK, and test poses to create animation-ready rigs for characters and props.

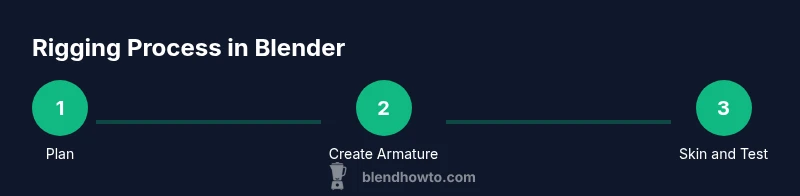
Rigging in Blender means creating a controllable skeleton (an armature) to deform and pose a model for animation. You’ll build bones, bind them to the mesh with weights, and set up basic IK for intuitive posing. This quick guide helps you plan, build, and test a simple rig in blender, emphasizing clean deformation and repeatable steps.
What rigging is in Blender and why it matters
Rigging in blender is the process of creating a controllable skeleton that can move a 3D model. In Blender, rigs are built from bones connected in a hierarchy called an armature. You bind the mesh to these bones with weight painting and vertex groups, then drive bone movement with controllers, constraints, and drivers. A well-planned rig makes posing and animation predictable, reduces cleanup time, and lets you reuse a rig for multiple characters or props. According to BlendHowTo, a good rig reduces iteration cycles and speeds up the animation pipeline, which is especially helpful for hobbyists and small studios. This section lays the groundwork for practical rigging on simple models and props, with emphasis on common workflows you can apply to your own projects. If you want to rig in blender efficiently, start by framing your plan around joints, deformation, and control systems that you can reuse later.
Core concepts you must know: bones, armatures, and constraints
A bone is a single segment of the skeleton; an armature is the collection of all bones that drives a mesh. In Blender, you’ll typically create a root bone, build a spine, limbs, and control bones, then parent the mesh to the armature. Constraints are tools that govern how bones move relative to others, enabling behaviors like following a target or staying within a range. In practical terms, IK (inverse kinematics) chains let you position a hand or foot and have the rest of the limb follow naturally. FK (forward kinematics) requires rotating each bone from the parent downward for more deliberate, chained motion. Understanding these concepts helps you decide when to use IK for quick posing versus FK for fine-tuned motion. For beginners, a simple two- or three-bone limb with an IK constraint is a great starting point to get familiar with the workflow and the feel of Blender’s rigs.
Planning your rig: levels of complexity
Before touching the mesh, decide the rig’s goal. A basic humanoid rig can be built with a handful of bones for the spine, limbs, and head, plus control bones for animation. For props or hard-surface models, a smaller, mechanical rig with hinge-like joints may be more appropriate. Sketch a high-level plan: which joints are essential, where the control handles will live, and how many weights you’ll need to paint. Consider future reuse: naming bones consistently (e.g., spine_01, arm_R_01) makes it easier to transfer rigs between models or reuse rig assets. BlendHowTo’s approach emphasizes modular rigs: start with a minimal skeleton, test deformation on your base mesh, then add complexity as needed. This mindset keeps the process approachable and scalable when you’re learning how to rig in blender.
Setting up a basic armature in Blender
Creating an armature in Blender begins with adding a single bone and entering Edit Mode to extend it. Position the bone to align with the part of the mesh it will influence, then mirror or duplicate for symmetrical limbs. Parent the daughter bones to the root and organize the hierarchy so that moving the top bone drives the chain below. When you finish the skeleton, switch to Pose Mode to test rotations. The next step is binding the mesh via automatic weights and refining weight painting for natural deformation. A tidy bone naming scheme and a clean armature structure save you time as your rig grows more complex. Rigging in blender becomes more predictable once you establish a consistent workflow and check every joint for correct influence over the geometry.
Weight painting, vertex groups, and skinning
Weight painting determines how much influence each bone has on every vertex. Vertex groups map vertices to bones, controlling deformation during movement. Start with automatic weights after parent-child binding, then switch to Weight Paint mode to tweak. In regions like shoulders and elbows, weights must blend smoothly to avoid hard edges. Pro tip: enable a mirrored painting workflow if your model is symmetrical, using the X-axis mirror option. Save frequently and inspect deformation from multiple angles and poses. Remember that clean topology with evenly distributed quads helps weights distribute predictably. As you refine weights, you’ll notice the rig in blender responding more naturally to pose changes, which makes animation easier and more convincing.
Using constraints and IK to create flexible rigs
Constraints let bones follow or influence others in controlled ways. IK is especially helpful for limbs: you place the end effector (hand or foot) and Blender adjusts the rest of the chain. For a beginning rig, start with a basic leg and arm IK setup, then add a pole target to prevent bending in undesired directions. Constraints can also drive bones to follow curves, limit rotations, or maintain alignment with another object. As you become comfortable, you can explore more advanced constraints to automate hand or finger motion. A well-constructed IK setup saves time during posing and provides a strong foundation for more complex rigs later in Blender.
Rigging for mechanical props vs organic characters
Mechanical props rely on rigid hierarchies, hinges, and precise constraints to mimic real-world motion. Organic rigs require softer deformation, more careful weight painting, and sometimes corrective shape keys to preserve volume. The choice between a playful, cartoonish rig and a realistic one matters because it dictates bone placement, joint ranges, and control layout. For beginners, start with a simple prop like a chair or a blocky character so you can observe how limbs bend and how weights influence deformation. Gradually introduce extra bones, constraints, and control shapes as you gain confidence. This approach helps you build rigs in blender that are usable across projects.
Testing and debugging your rig in pose mode
Pose Mode is your primary testing ground. Try basic poses, then extreme poses to identify deformation issues. Look for weight bleed (weights extending beyond intended joints), flipping normals, and clamp angles on joints that cause pops. If you see issues, adjust weights in Weight Paint mode, refine bone envelopes, and consider adding corrective shapes or extra bones to stabilize movement. A calm, methodical testing process catches problems early, saving hours of rework later. Regular testing also reveals where control handles could be reorganized for more intuitive posing.
Export considerations and animation pipeline
When you’re ready to animate or export, ensure your rig is clean and well-organized: rename bones clearly, group related bones, and apply scale consistently. If you plan to export to a game engine or render farm, check compatibility for IK chains, constraints, and armature modifiers. Some engines require baked animations or simplified rigs to optimize performance. Always test one short animation cycle after export to verify that deformation holds up and that controls behave as expected. Keeping your rig modular and well-documented makes collaboration easier and improves reuse across projects.
Real-world beginner project: rig a simple prop
To practice, rig a simple prop such as a chair or a prop block that has a few moving parts (legs or a backrest). Start with a minimal skeleton aligned to the prop's joints, bind the mesh with automatic weights, and adjust weights to prevent distortion during motion. Add a basic control bone for rotating the backrest, set up a simple IK chain for the legs if needed, and test both static poses and simple animation. This practical exercise helps you apply concepts from the previous sections in a tangible way and builds confidence in your ability to rig in blender.
Tools & Materials
- Blender software (latest version)(Download from blender.org and verify your system meets the minimum requirements)
- A computer with sufficient specs(8 GB RAM minimum; a dedicated GPU is helpful for real-time viewport shading)
- 3-button mouse with scroll wheel(Improves orbit control and bone selection in 3D Viewport)
- Reference images or concept art(Helpful for weight painting and proportion accuracy)
- Optional graphics tablet(Can improve brush control during weight painting)
Steps
Estimated time: 3-6 hours
- 1
Prepare the model
Inspect topology, apply scale and rotation, and ensure the mesh is clean for rig binding. If needed, adjust edge flow to support natural bending at joints. Reason: good topology reduces distortion and makes weight painting more predictable.
Tip: Keep a symmetry plan and name reference images to guide placement. - 2
Add the base armature
In Edit Mode, add a single root bone and place it at the model's pelvis or base. Extend bones to match major limbs and spine. Reason: a solid backbone makes later posing intuitive.
Tip: Enable X-Ray mode to see through the mesh while building. - 3
Create limb chains
Duplicate and connect bones to form arms and legs with proper parent-child relationships. Reason: hierarchical bones ensure predictable motion when the parent moves.
Tip: Keep bone tails aligned with natural joints to reduce deformations. - 4
Add control bones
Create separate helper bones for handles (e.g., hand, foot, spine controls). Reason: controls simplify posing and keep the rig clean.
Tip: Place controls away from the mesh so you don’t accidentally select the wrong bone. - 5
Bind the mesh with automatic weights
Parent the mesh to the armature with automatic weights and inspect initial deformation. Reason: a good starting skinning saves time in painting.
Tip: Toggle Topology-based weights to guide weight distribution on complex meshes. - 6
Refine weights with painting
Enter Weight Paint mode and adjust weights for shoulders, elbows, and knees to avoid bulges. Reason: precise weights produce cleaner deformation.
Tip: Use mirror painting for symmetrical rigs and compare poses from multiple angles. - 7
Add IK for limbs
Create an IK constraint for the leg and arm chains and set up pole targets to constrain bending directions. Reason: IK makes posing fast and natural.
Tip: Always test extreme poses to ensure joint limits don’t cause flipping. - 8
Create and test control shapes
Add custom bone shapes to controllers and test their usability in Pose Mode. Reason: clear visual controls speed up animation work.
Tip: Keep control shapes consistent across the rig for easier learning. - 9
Add minor corrective shapes
If deformation looks off in certain poses, add corrective shape keys or extra bones to stabilize geometry. Reason: small fixes prevent noticeable artifacts.
Tip: Name corrective shapes descriptively for future edits. - 10
Organize and document
Rename bones clearly, group them, and keep a simple document outlining what each bone controls. Reason: good organization speeds up collaboration and reuse.
Tip: Create a separate layer for controls and one for the mesh’s deform bones. - 11
Test, iterate, and save
Pose your rig in several key positions, fix any issues, and save incremental versions. Reason: iterative testing catches problems early.
Tip: Save as project-wide backups after major milestones. - 12
Prepare for animation
Lock transforms to prevent accidental changes, bake simple animations, and verify that cycles loop smoothly. Reason: a solid setup reduces debugging time during production.
Tip: Create a basic animation cycle early to validate the rig’s performance.
Frequently Asked Questions
What is rigging in Blender?
Rigging is building a skeleton (armature) and assigning weights so a mesh can be posed and animated. It’s the bridge between a static model and a living character or prop.
Rigging is the skeleton you put inside your model to move it and animate it.
What is the difference between IK and FK?
FK is the natural rotation of parent bones in a chain, used for flowing motion; IK lets you place the end effector and the system solves the rest for quick posing.
FK is rotating bones, IK is solving joints from the end effector to the base for easier posing.
Can Blender auto-rig a model?
Blender offers tools and addons to generate starter rigs, but a custom, clean rig usually requires manual tweaking for best deformation.
Blender can auto-rig to a starter rig, but you’ll often refine weights and bones for quality deformation.
How do I export rigs to game engines?
Export tasks vary by engine, but you’ll typically bake or simplify motion, ensure armatures are compatible, and test the rig inside the target environment.
Export rigs by baking animations and verifying compatibility with the game engine you use.
What if weights look wrong after posing?
Revisit Weight Paint mode, refine vertex groups, and consider adding corrective bones for problematic joints.
If deformations look odd, adjust weights and add small corrective bones.
Should I rig in Edit or Pose mode?
You build bones in Edit Mode and pose the rig in Pose Mode to test deformation and animation control.
You edit the bones to build them, then pose to test the rig.
Watch Video
What to Remember
- Plan before you rig: define joints, controls, and deformation goals
- Armature and weights are the core of Blender rigs
- IK creates intuitive posing; FK offers deliberate chain control
- Test early and iterate to ensure clean deformation