Blender Rig Character: Step-by-Step Rigging Guide
Learn how to rig a blender rig character with a practical, step-by-step workflow. This guide covers armatures, weights, control rigs, and testing methods to achieve clean deformations for animation in Blender.

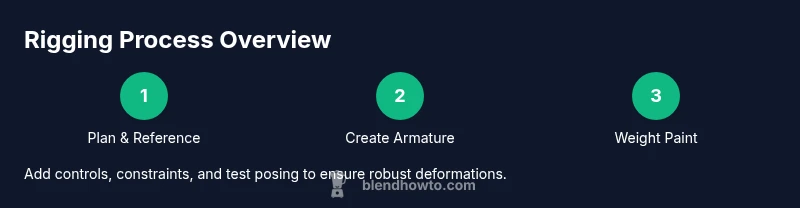
You can rig a character in Blender by building an armature that mirrors anatomy, parenting the mesh, and painting weights for natural deformations. Start with a mirrored bone setup, then add controls and constraints for posing. This guide walks you through a practical, end-to-end workflow for a clean rig today.
What is a blender rig character?
Rigging a blender rig character means creating a logical skeleton (armature) that drives the mesh, enabling realistic movement. In Blender, rigging is essential for animation, games, or VFX. A good rig gives you predictable deformation, clean posing, and flexible control. This guide uses practical steps suitable for home artists and hobbyists aiming to build reliable rigs without a production pipeline. The core idea is to separate deformation bones (that bend the mesh) from control bones (that a animator moves). You’ll also learn how constraints, IK and FK systems, and shape keys interact to deliver believable character motion. By the end of this section you’ll understand why a thoughtful rig saves time and prevents common deformation issues when animating a blender rig character.
Core components: Armature, bones, weights, and controllers
A blender rig character relies on four interconnected pillars. The Armature is the skeleton made of Bones. Weights (vertex groups) determine how much each bone influences a given vertex. Controllers—often visual shapes or extra bones—provide intuitive handles for posing. Clean separation between deformation bones and control bones is the hallmark of a robust rig. IK (inverse kinematics) chains help with natural limb movement, while FK (forward kinematics) delivers straightforward, pose-driven motion. When you combine constraints, drivers, and shape keys, you gain a flexible, animation-friendly rig that remains efficient for evaluation and rendering.
Tips: keep a dedicated layer for control bones, and name bones consistently to avoid confusion during big projects.
Planning your rig: topology, naming, symmetry, and references
Successful rigs start with planning. Evaluate the character’s anatomy and desired range of motion. Plan bone placement to match major joints (shoulders, elbows, hips, knees, wrists, ankles). Use neutral pose (A- or T-pose) to simplify mirroring. Establish a naming convention (e.g., “limb_arm_R,” “limb_arm_L,” “ctl_head,” “jnt_knee_R”). Consider symmetry by creating the left side first and mirroring it to the right. Gather reference images in multiple views and consider any deformations required for facial rigging or finger control. A solid plan minimizes later rework and helps you scale the rig for different characters.
Outcome: a clear blueprint for bone placement and control layout before you touch Blender’s data.
The rigging workflow: from base mesh to control rig
Begin by creating an Armature and placing bones to match major joints. Parent the mesh to the armature with automatic weights for a quick baseline. Refine by painting weights and adjusting bone roll to reduce artifacts. Add control bones or shapes to serve as easy handles for animators, then constrain the controls to the deformation bones so posing remains intuitive. Build an IK/FK switch if your character requires both modes, and ensure a smooth transition with a clean hierarchy. Finally, test with several poses to identify any unexpected deformations and adjust weights or bone placements accordingly. This workflow emphasizes modularity and reusability across similar characters.
Techniques to optimize your rig: automatic weights, mirror, and Rigify
Auto weights provide a fast starting point, but manual weight painting yields precise deformations. Use the Mirror tool for symmetric characters to halve work. Consider using Rigify or a similar meta-rig to generate a robust control rig, then customize to your character’s anatomy. Freeze transformations on the base mesh and ensure scale is applied before rigging to avoid unexpected results. Regularly bake or cache pose data for performance in animation playback. These techniques help produce a professional rig with reliable deformations and efficient workflows.
Testing, posing, and refining deformations
Testing is integral to rig quality. Pose your character in a variety of extreme positions to reveal deformation flaws at joints, fingers, and facial regions. Inspect mesh topology for stretched triangles or pinching; adjust weights locally with the weight paint brush, or tweak bone placement and constraints. Validate performance by rendering simple animations to confirm that the rig behaves predictably under time constraints. Iterate until the rig remains stable under all expected poses, ensuring your blender rig character is ready for production tasks.
Tools & Materials
- Blender software (latest stable release)(Install from blender.org; ensure version >= 3.x)
- Character mesh (neutral pose)(Clean topology; preferably in A- or T-pose)
- Armature object in Blender(Create as part of the scene; separate from base mesh)
- Rigging add-ons (e.g., Rigify)(Optional for a fast, production-ready rig)
- Mirroring setup(Enable for symmetric characters to save time)
- Reference images (front/side)(Helpful for accurate proportions)
Steps
Estimated time: 3-6 hours
- 1
Prepare your mesh and scene
Open your character mesh in Blender, apply scale, and verify topology. Set a neutral pose and align the view for consistent bone placement. Prepare reference images in front and side views to guide rigging.
Tip: Apply scale (Ctrl+A) before rigging to ensure consistent bone lengths. - 2
Create the base Armature
Add an Armature in Edit Mode and create the first spine bones to establish the torso. Add legs and arms with symmetrical placement, keeping bones aligned with major joints.
Tip: Name bones with consistent prefixes (jnt_, limb_) to simplify scripting later. - 3
Arrange bone hierarchy and parenting
Extend parent-child relationships to form a clear skeleton. Create a root bone, connect limbs to the spine, and ensure proper roll angles for natural bending.
Tip: Keep a mirrored copy for the opposite side to maintain symmetry. - 4
Bind the mesh and refine weights
Bind the mesh to the armature using Automatic Weights first, then switch to Weight Paint to fix problem areas like shoulders and elbows.
Tip: Start with global weight painting, then zoom into problem joints for precise control. - 5
Add control bones and custom shapes
Create control bones (or null objects) and assign custom shapes for easy selection. Group them on a separate layer and constrain deformation bones to these controllers.
Tip: Use custom shapes to distinguish controls from deformation bones visually. - 6
Set up IK/FK and a switch control
Implement IK for limbs and FK for long-range movement. Add a switch to blend between IK and FK for versatile animation options.
Tip: Test the blend in a few poses to ensure seamless transitions. - 7
Fine-tune constraints and drivers
Configure constraints (Copy Location/Rotation, Limit X/Y/Z) to prevent unnatural movements. Use drivers to automate control behavior when needed.
Tip: Keep drivers simple and document their relationships for future edits. - 8
Create facial controls (optional)
If needed, add a lightweight facial rig with bones or shape keys for essential expressions. Keep it modular and separate from body rig to simplify updates.
Tip: Scope facial rig to the project requirements to avoid overcomplication. - 9
Test, iterate, and finalize
Pose the character in varied scenes, test edge cases (extreme bends, occlusions), and refine weights and constraints. Save iterations to compare progress.
Tip: Document changes and lock a final rig version for production use.
Frequently Asked Questions
What is the difference between an armature and bones in Blender?
An armature is the overall skeleton object that contains bones. Bones are the individual elements that form the structure and drive the mesh deformations when weighted to vertices.
An armature is the whole skeleton; bones are the parts that bend and move the mesh.
Should I use Rigify for every character?
Rigify can speed up rigging with a robust control rig, but you may need to customize it for unique anatomy or specific animation needs.
Rigify helps a lot, but you might tailor the rig for your character.
How do I fix pinching at joints?
Pinching usually comes from faulty weight distribution. Use weight painting to smooth weights around joints and adjust bone roll alignment.
Rework weights around joints to smooth pinches.
What is an IK/FK switch and why use it?
An IK/FK switch lets you choose between inverse kinematics for posing and forward kinematics for straight bones. This provides flexibility for various animation tasks.
IK for natural limb motion, FK for simple bending.
Can I rig facial expressions separately?
Yes, facial rigs can be added as a separate module using bones or shape keys, keeping the body rig lean and reusable.
You can add facial rigs separately from the body rig.
What is a good starting pose for rigging?
A neutral pose (A- or T-pose) simplifies bone placement and mirroring, reducing deformation surprises later.
Start in a neutral pose to make rigging easier.
Watch Video
What to Remember
- Plan your rig before building bones.
- Separate deformation and control systems for clarity.
- Use IK/FK blends for versatile posing.
- Test extensively to refine weights and constraints.