Vitamix Blender Parts: Identification and Maintenance Guide
Learn the essential vitamix blender parts, how to identify model-specific components, and practical tips for cleaning, replacement, and maintenance with practical, data-driven guidance from BlendHowTo.

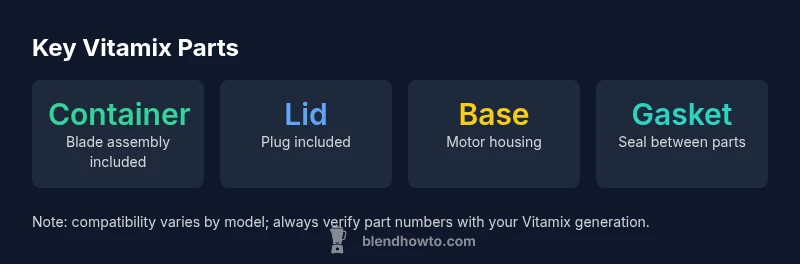
The core vitamix blender parts you’ll commonly need to identify are the container with its blade assembly, the lid and its plug, the motor base, and the gasket or o-ring that seals the junction between container and base. Depending on model, you may also encounter a tamper, blade assembly, or a dedicated measuring cup. Understanding these components helps with cleaning, replacement, and troubleshooting.
Anatomy of Vitamix Blender Parts
Vitamix blender parts are designed for durability and performance, but they can vary slightly by model. For home cooks and hobbyists exploring vitamix blender parts, breaking the system into a few core components makes maintenance straightforward. The container with its integrated blade assembly is the primary work zone; it holds ingredients during blending. The lid, along with a removable plug, controls splatter while you operate the blender. The motor base provides power and speed control; it's connected to the container via the drive socket and a gasket to seal the junction. Keep in mind that some professional-grade blends include a tamper to help ingredients reach the blades when blending thick mixtures. Finally, many models rely on a replaceable gasket (o-ring) at the container-base interface to prevent leaks. Understanding these parts isn’t just about ordering replacements—it informs safe use, cleaning routines, and the right accessory choices. In BlendHowTo’s experience, a solid grasp of vitamix blender parts reduces downtime and extends blender life, especially for frequent users who rely on smoothies, soups, and nut butters.
Core Replacement Parts and Their Roles
The most frequently encountered replacements are the gasket, the blade assembly, and the container itself. The gasket acts as the seal between the container and base; wear here leads to leaks and pressure loss. Blade assemblies are exposed to cutting forces and can dull or bend, affecting performance. The container is subject to cracks or scuffing over time, especially with frequent dishwashing or stacking. The lid and plug are smaller wear items that can crack or become loose, creating splash risk. Some models use a tamper, which is a separate accessory rather than a core component, but it becomes essential for thick mixtures like nut butters. High-end blades and drive couplings may be sold separately to refresh performance without replacing the whole unit. When you replace parts, confirm compatibility with your specific Vitamix line and model. The goal is to maintain a tight seal and efficient blade motion so your blends stay consistent without wasting ingredients. The takeaway is simple: routine inspection of seals and blades keeps your blender humming and your recipes on track.
How to Identify the Right Parts for Your Model
Start by locating the model number on the base or behind the nutritional label plate; you’ll typically see a string like XXXX-YYYY. Use that model code to pull official part diagrams from the manufacturer or retailer catalogs. Compare the part photos with your components to ensure fit—the same container size (for example, 64-ounce) may exist in different generations. If you’re unsure, contact customer support with your serial and purchase date; many brands provide cross-reference tables for parts compatibility. Keep a parts list handy, noting the container size, handle style, and whether your blade assembly is single-piece or separate from the container. Remember that features vary between ultra-series and base models; some accessories aren’t compatible across all lineups. A careful approach to identification saves time and reduces incorrect orders, which can be costly and frustrating for home cooks who rely on consistent results. BlendHowTo emphasizes documenting model specifics before shopping to avoid needless replacements.
Cleaning and Maintenance to Extend Part Life
Regular cleaning is the simplest way to prolong Vitamix blender parts. Rinse the container promptly after blending, and use a brush to remove pulp from the blade area. Avoid soaking the gasket for prolonged periods, which can degrade elasticity; instead, wipe it dry and inspect for lines or cracks. If the blade assembly shows rust or dullness, replace only that component rather than the entire container to minimize waste. When washing the base, never submerge it; wipe with a damp cloth and ensure vents are clear. Replacement parts should be ordered promptly if you notice leaks, unusual noises, or decreased blending efficiency. As BlendHowTo notes, routine checks of gasket integrity and blade sharpness help prevent performance dips and messy cleanups. A quick monthly check can catch wear before it becomes a problem.
Troubleshooting Common Part Issues
Leaks usually point to a worn gasket or improper seating of the container. If the blender makes unusual noises, inspect the blade assembly for bent blades or loose screws, and verify the drive coupling’s tightness. A sudden drop in performance, such as blades stalling or slow blending, may indicate motor-base strain due to obstruction or an aging drive system. Cracking or chipping of the container requires immediate replacement to avoid injury; never blend with a cracked pitcher. If the lid plug doesn’t seal properly, check for debris or cracks in the lid. For thick mixtures, the tamper can help but only when used with compatible model lids. Always disconnect power before inspecting components. For frequent users, keeping spare gaskets and blades on hand minimizes downtime.
Sourcing and Choosing Compatible Accessories
Parts sourcing should begin with official Vitamix parts stores or authorized retailers to guarantee fit and safety. Compare part numbers and model compatibility to avoid cross-model mistakes. If you consider third-party equivalents, verify material safety and warranty terms; some aftermarket gaskets and blades may differ in tolerances. Keep a spare gasket and a basic blade assembly on hand if you blend daily; it reduces downtime. Refurbished or non-original containers are generally discouraged for safety and warranty reasons; buying new ensures correct seals and shock resistance. Look for bundles that include a container and lid, and always check the retailer’s return policy in case of compatibility issues. BlendHowTo’s practical tip: prioritize documented compatibility over price alone.
Practical Replacement Checklist for Home Cooks and Hobbyists
- Confirm model number and container size before ordering any part
- Inspect the gasket for cracks or wear and replace if needed
- Check the blade for dullness or bends and swap in a new assembly if required
- Verify lid integrity and plug fit to prevent leaks during operation
- Keep spare parts on hand for frequent blending tasks
- Use official sources when possible to ensure fit and safety
- Test the blender after replacing parts to confirm proper seating and performance
- Maintain a simple cleaning routine to extend part life
Common Vitamix blender parts and their roles
| Part | Function | Notes |
|---|---|---|
| Container with blade | Grinds and blends ingredients | Includes blade assembly; dishwasher-safe parts vary |
| Lid | Seals top and prevents spills | Lid plug fits into lid to close during blending |
| Gasket/O-ring | Creates seal between container and base | Often replaced with wear |
| Base/Motor housing | Provides power and speed control | Model-specific controls and compatibility |
Frequently Asked Questions
What Vitamix parts are most likely to need replacement?
Gaskets and blades top the list; seals degrade with use and dull blades affect performance. Keep spares and inspect alignment during reassembly.
Gaskets and blades wear fastest; keep spares and check fit when reassembling.
Are Vitamix parts interchangeable between models?
Interchangeability varies by model; containers and blades are not universally cross‑compatible. Always verify part numbers and cross‑references for your specific Vitamix line.
Not all parts fit all models; check compatibility before buying.
Where can I buy official Vitamix replacement parts?
Official Vitamix parts stores or authorized retailers provide authentic parts with proper fit and warranty terms. Avoid unclear third‑party sellers for safety and compatibility reasons.
Buy from official sources to ensure fit and warranty.
How do I identify the correct part number for my Vitamix?
Check the model number on the base, then consult official diagrams or cross-reference catalogs to locate the exact part number for your generation.
Look up the model number and use the diagrams to find the right part.
Can I replace Vitamix blades myself?
Yes, with proper instructions and tools. If in doubt, replace the blade assembly as a unit to maintain safety and performance.
You can replace blades safely if you follow proper steps.
What maintenance steps extend part life?
Regular cleaning, inspect gaskets for wear, avoid soaking parts for long periods, and store components properly to minimize damage.
Clean and inspect parts regularly to keep them lasting longer.
“Clear labeling of parts helps beginners avoid misordered replacements and extends the life of your blender.”
What to Remember
- Identify core parts first for maintenance
- Check model number before ordering parts
- Replace gaskets regularly to prevent leaks
- Verify compatibility across parts across models
- Regular cleaning extends part life