Blender Market Guide: Buy, Install, and Succeed
A practical BlendHowTo guide to Blender Market: how to evaluate assets, licensing, purchase, installation, and best practices for Blender artists and home creators.

This guide shows you how to navigate Blender Market, evaluate assets, license correctly, and install purchases in Blender. You’ll discover practical steps to compare addons, models, and textures, verify compatibility, and integrate assets into your projects while safeguarding licenses and backups. This quick answer also explains licensing basics and how to keep your library organized.
What Blender Market is and why it matters for creators
The Blender Market is a curated storefront where Blender artists publish addons, 3D models, materials, textures, rigs, and presets. For home users and professionals alike, it provides a centralized hub to discover resources that accelerate project timelines and reduce trial-and-error testing. The BlendHowTo team notes that Blender Market helps standardize version compatibility, update history, and asset licensing in one place, which lowers the risk of incompatible files and scattered credits. Readers should look for product pages with clear descriptions, supported Blender versions, and recent activity. According to BlendHowTo, starting with a small, well-reviewed asset lets you gauge compatibility before expanding your library, balancing speed with control while growing your toolkit. This approach supports consistent project quality and a scalable workflow, whether you’re building scenes, animations, or game assets.
How to evaluate assets on Blender Market
Evaluating assets effectively begins with a purposeful search and a careful read of each product page. Start by confirming the asset’s compatibility with your Blender version and viewport requirements. Read the description for scope, features, and deliverables; then skim the changelog or update history to assess ongoing support. Reviews from other users offer real-world insights into performance, installation issues, and author responsiveness. Look for assets with transparent licensing terms, examples that showcase the asset in a variety of scenes, and clear instructions for installation. Finally, compare multiple options within your budget and time constraints to identify the best value. BlendHowTo emphasizes testing any asset in a small, controlled scene before incorporating it into a production project to avoid surprises later.
Asset types you can find on Blender Market
Blender Market hosts a wide range of asset categories: addons (scripts that extend Blender’s capabilities), 3D models, materials and textures, rigs and animation presets, and scene templates. Addons can automate repetitive workflows, while models and textures accelerate scene setup without sculpting every asset from scratch. Materials and textures enable faster lighting and shading iterations, often including PBR maps and configurable properties. Rigs and animation presets help animate characters or vehicles with prebuilt rigs and ready-to-use actions. Understanding how each asset type fits your project will help you assemble a balanced library that supports both quick experiments and production-grade results. The right mix reduces manual work and increases consistency across scenes.
Licensing and usage rights you should know
Each asset carries its own license terms, independent of Blender’s license. Before purchasing, read the license section on the product page to confirm allowed uses (commercial vs. personal use, redistribution, attribution), whether updates are included, and whether you may modify assets for your projects. Some licenses permit broad commercial use but require attribution or prohibit resale of the asset by itself. Licensing terms can change with updates, so re-check when upgrading assets. Maintain a license log to track what you own, its terms, and expiration or update status.
Purchasing, downloading, and backups
Purchasing assets on Blender Market is straightforward but prudent planning saves time later. Use a secure payment method and enable two-factor authentication if available. After purchase, download assets to a primary working drive and keep a second copy in a backup location. Maintain organized folders by asset type and project, and preserve a record of license keys or activation details. Regularly review your library to remove unused assets and ensure you can access current versions. BlendHowTo recommends keeping a simple inventory that includes asset name, version, license type, date of purchase, and source URL for quick audits.
Installing assets in Blender
Installation steps vary by asset type. For addons, use Edit > Preferences > Add-ons > Install to load the .zip or .py file, then enable the addon in the list. For models, textures, or scenes, import or append into your project and assign them to the correct collections. Always start with a fresh file to test integration, checking for missing textures, shader errors, or animation hiccups. If an asset requires dependencies, install those first and verify compatibility with your current Blender build. Finally, document any configuration changes so teammates can reproduce your setup.
Best practices for project workflows with Blender Market resources
Create a dedicated asset library linked to your projects to streamline asset reuse. Tag assets by type, license, and intended workflow (e.g., environmental lighting, character rigs). Implement a version-control mindset: track asset updates, test compatibility in a sandbox scene, and plan rollbacks if a new version breaks your pipeline. Schedule periodic audits of your library to avoid stale or deprecated assets. Establish a standard process for licensing compliance, including where assets were sourced and how they’re credited in your deliverables. A disciplined workflow reduces risk, speeds production, and makes collaboration smoother across teams.
Common pitfalls and how to avoid them
Common pitfalls include buying assets that don’t match your Blender version, misinterpreting licenses, or neglecting updates. To avoid these issues, always verify version compatibility and read the update notes before upgrading. If licensing terms seem ambiguous, contact the author for clarification. Be wary of assets with few purchases, poor documentation, or no latest activity. Finally, test assets in isolated projects to verify performance before integrating them into production pipelines. Regular backups and a licensing registry help prevent future headaches.
Tools & Materials
- Computer with internet access(Stable connection and current browser)
- Blender installed (latest stable)(Test assets before production)
- Blender Market account(For purchases, licenses, and downloads)
- Payment method (credit/debit or PayPal)(Used for transactions)
- Backup/storage plan(External drive or cloud backup)
- License tracking system(Spreadsheet or asset manager)
Steps
Estimated time: 60-120 minutes
- 1
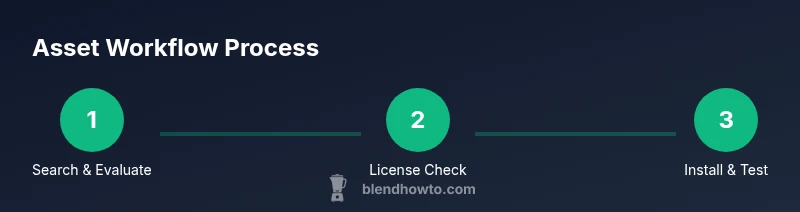
Search with intent
Start by defining what you need (addon, model, texture) and filter by Blender version, device requirements, and price range. This helps you avoid wasting time on unsuitable assets.
Tip: Use filters to narrow results and sort by rating or recent updates. - 2
Check licensing
Open the license section on the product page and confirm allowed uses (commercial, redistribution, modification). Read any attribution requirements and whether updates are included.
Tip: If unsure, contact the author before purchase. - 3
Read reviews and updates
Scan reviews for reliability, watch for repeated issues like missing textures or broken links. Check the update history to ensure compatibility with latest Blender versions.
Tip: Pay attention to the date of the last update as a trust factor. - 4
Purchase and download
Proceed with a secure checkout, save a copy of the download, and verify you can access the asset in your account downloads.
Tip: Enable two-factor authentication if available. - 5
Install the asset in Blender
For addons, install via Edit > Preferences > Add-ons > Install. For models/textures, locate and import into the correct collection or workspace.
Tip: Always test in a new project to avoid corrupting current work. - 6
Test compatibility and iterate
Create a quick scene to test performance, shading, and rigging. Note any tweaks needed for lighting, texture resolution, or motion.
Tip: Record notes for version control and future updates. - 7
Organize and manage assets
Tag assets, store them in labeled folders, and maintain a license log to prevent misuse. Consider a versioning system for asset updates.
Tip: Regularly review your library for deprecated files.
Frequently Asked Questions
What is Blender Market and what does it offer?
Blender Market is an online storefront for Blender users to buy addons, models, textures, and presets. It helps creators save time by providing ready-made resources with licensing and update history.
Blender Market is an online store for Blender assets that helps you find ready-made tools and files with clear licenses.
Do Blender Market assets require a separate license beyond Blender's license?
Yes. Each asset can have its own license terms. Always read the license on the product page to confirm commercial use, redistribution, and attribution requirements.
Yes. Check the asset page for specific license terms before using it in your project.
Can I use Blender Market assets in commercial projects?
Many assets support commercial use, but terms vary. Verify license details and update date to ensure compliance for your deliverables.
Commercial use is often allowed but depends on the license on the asset page.
How do I install a Blender Market addon?
Download the addon from your account, then install it in Blender via Edit > Preferences > Add-ons > Install. Enable the addon after installation.
Download, then install it in Blender and enable it in the Add-ons panel.
What if an asset doesn’t work in my Blender version?
Check the product page for compatible Blender versions and the update history. If needed, contact the author for guidance or look for alternatives.
If it doesn't work, check version compatibility and contact the author for support.
Are Blender Market assets safe to download?
Assets come from independent authors; review ratings and comments, and choose reputable products with recent updates to reduce risk of corrupted files.
Choose assets with good ratings and recent updates to minimize risk.
Watch Video
What to Remember
- Define your asset needs before searching
- Check licenses and updates before buying
- Test assets in a safe project space
- Organize licenses and backups for future use