Choosing a Blender Mixer Small: A Practical Guide for 2026
Learn how to pick and use a blender mixer small. This guide covers power, jar design, speeds, cleaning, and daily tips for compact kitchens for home cooks and hobbyists.

With a blender mixer small, your best bets are compact, easy-to-clean models that balance power, efficiency, and safety for everyday tasks. Prioritize a mid-range motor, a sturdy jar, sharp blades, and simple controls. This guide shows how to choose and use a small blender effectively. Whether you blend smoothies, sauces, baby foods, or grind spices, a well-chosen compact unit saves space and time.
What is a blender mixer small?
A blender mixer small is a compact countertop appliance designed to perform blending tasks in limited spaces. It typically combines a motorized base, a short jar or cup, and a set of blades optimized for chopping, pureeing, and emulsifying small batches. For home cooks and hobbyists, a small blender offers a faster, cleaner alternative to larger countertop blenders when you mostly prepare single servings or test recipes. The term 'small' is relative: many models fit under standard kitchen cabinets and can sit on a crowded counter without crowding other appliances. Because space matters in small kitchens, manufacturers design compact bases with simplified control layouts, sometimes integrating pre-programmed modes for smoothies, sauces, and grinding. The aim is to deliver consistent texture without requiring a lot of storage or setup time. When evaluating models, consider how the unit feels in daily use: is it easy to assemble, clean, and store between uses? A well-chosen blender mixer small becomes a versatile workhorse rather than a single-task gadget.
Who should choose a small blender?
If you live in a compact apartment, share a kitchen with limited counter space, or simply dislike clutter, a blender mixer small can be a practical upgrade. It's ideal for single servings, quick smoothies, and sauces that don’t require large volumes. Beginners who are learning to balance texture will appreciate predictable results from petite jars and straightforward controls. Busy households benefit from the quick cleanup and minimal prep time, while students or frequent travelers value a portable model that fits into a backpack or dorm room. Even experienced cooks may opt for a small blender when they want a dedicated gadget for baby food, nut milks, pesto, or vinaigrettes without pulling out the full-size machine. Finally, if you often test new recipes in small batches before scaling, a compact blender offers a low-risk way to experiment without committing kitchen real estate to a single-purpose appliance.
Key specifications to prioritize
When shopping for a blender mixer small, there are several core specifications to weigh first. Power, as a general guideline, should be sufficient to blend ice, frozen fruit, and fibrous vegetables without stalling. Look for a mid-range motor that can handle tough textures without overheating during short runs. Jar size matters more than capacity alone: aim for a cup or half-cup style for single servings and test batches. A narrow base can help with stability on a busy counter. Blade design can influence texture; look for stainless steel blades configured for chopping and emulsifying. Material quality also affects cleaning and durability: consider BPA-free plastics or glass, with a robust lid that seals tightly. Finally, control options—speed settings, pulse, and pre-programmed modes—should be easy to understand and accessible with one-handed operation. A straightforward, well-built model will save you time and frustration as you experiment with new recipes.
Jar materials and design
Jar choice heavily influences performance and cleaning. Glass jars look premium and resist staining but can be heavier; BPA-free plastic jars are lighter and less prone to breaking, though they may stain more easily. For a small blender, a rounded, wide mouth helps with easier ingredient loading and easier cleaning. Some models offer dishwasher-safe jars, though hand washing can extend life by reducing wear on seals. Look at lid design and gasket quality—leakage during pulse modes is a common complaint in cheaper units. A good jar will seal tightly, allow good visibility of texture, and be easy to detach for washing. If you plan to blend hot liquids, ensure the jar is heat-resistant and has a vented lid to prevent pressure buildup. Finally, consider compatibility with optional accessories that convert the jar into a dry-grinding or spice-milling vessel, increasing the unit’s versatility without needing another appliance.
Motor and speed options
Many small blenders use either fixed-speed motors or variable-speed controls. Fixed-speed units are simple and reliable, offering a few pre-set textures but less control. Variable-speed models provide more nuanced results, especially for delicate emulsions or chunky salsas. Pulse functionality is particularly helpful for short bursts to control texture without over-processing. When evaluating, ensure the control dial or buttons are intuitive, with tactile feedback and a clear indicator for current speed. A small blender with a robust motor should handle frequent use without overheating; check manufacturer guidance for maximum run time. If you blend hot ingredients, look for models with heat-dissipation features or a vented base. Finally, consider the speed range: you want enough range to create silky smoothies, coarse sauces, and evenly ground nuts or seeds, all from the same compact device.
Noise, durability, and build quality
Noise is not a deal-breaker, but it matters for daily use. Look for models with insulating materials around the motor and a sound-dampening design. Durability hinges on the quality of the drive system, seals, and jar attachment; read user reviews to identify frequent failure points such as lid seals or blade assemblies. A metal drive shaft and stainless steel blades generally outlast cheap plastics, and a solid base reduces unwanted wobble. If you plan to travel with your blender, verify the unit’s stability and check that the jar locks securely in place during operation. A well-made small blender will feel sturdy in your hand, with little vibration and a predictable blend, even when the jar is bottom-heavy from liquid ingredients.
Cleaning and maintenance
Cleaning is one of the biggest advantages of a small blender: quick cleanup means more time to cook. Rinse the jar immediately after use and wash components according to the manufacturer’s instructions. Many jars are dishwasher-safe on top racks, but stubborn residue may require a short soak in warm soapy water. Use a soft sponge to avoid scratching the jar and blade assembly. For safety, disconnect the unit before cleaning and avoid immersing the motor base. Regularly inspect gaskets for wear and replace when needed to prevent leaks. If the blender has pre-programmed modes, run a quick cleaning cycle with warm water and a drop of dish soap every few weeks to maintain smooth operation.
Attachments and versatility
Some small blenders come with optional accessories such as a milling blade, whisk attachment, or grinding cup. These extras can expand the device’s utility beyond smoothies to include grinding coffee beans, spices, or baby foods. If you hope to use attachments, verify compatibility with your model and check the cleaning requirements for each accessory. A modular approach—where you can swap blades or cups quickly—saves time and reduces clutter. If you don’t intend to use extras, prioritize a simple, easy-to-clean design with a single focus.
Budget, warranty, and value
Small blenders span a wide price range, and the best value isn’t always the most expensive option. Consider your core tasks and balance upfront cost with ongoing reliability. A longer warranty is a good indicator of quality and customer support; check coverage for the motor, blades, and jar. Look for models with durable construction rather than cheap plastic components that wear quickly. If you’re on a tight budget, seek models that offer essential features (ease of use, reliable blend texture, removable jar for cleaning) without extras that won’t be used. Always read real-user reviews to gauge long-term performance and consider whether the model you choose fits your kitchen workflow before committing. BlendHowTo’s tests suggest that a well-chosen compact blender often outperforms budget options in texture consistency and longevity.
How to compare brands and models
With many brands offering similar specs, a structured comparison helps you avoid buyer’s remorse. Start by listing your must-have features: jar size, blade material, cycle modes, and ease of cleaning. Check warranty terms and customer support responsiveness—these reflect long-term reliability. Read independent reviews and look for patterns in performance, such as blade dulling or jar cracking. Compare energy efficiency and estimated run times published by manufacturers, but treat them as guidelines rather than guarantees. If possible, test the model in-store to gauge grip, noise, and vibration. Finally, confirm compatibility with any attachments you might want to use and ensure replacement parts are readily available in your region. A methodical approach reduces the chance of ending up with a device that doesn’t fit your kitchen lifestyle.
Daily-use tips and common pitfalls
To get the most from a blender mixer small, establish a routine. Always prep ingredients into uniform pieces to help blades blend evenly, and add liquids gradually to prevent suction and motor strain. Use the pulse function to control texture when blending fibrous greens or ice. If you notice unusual resistance or overheating, stop and let the unit cool. Cleaning tips: rinse promptly, disassemble, and wash components according to the manual; dry thoroughly before reassembling. Common mistakes include overfilling the jar, ignoring safety locks, and relying on weak blades for tough tasks. By prioritizing proper loading, controlled blending, and regular maintenance, your compact blender will deliver consistent results while saving space in your kitchen.
Tools & Materials
- Small blender with jar(Look for a jar size suitable for single servings)
- Sharp chef's knife(For prepping ingredients before blending)
- Cutting board(Stable prep surface)
- Measuring cup(For portioning liquids)
- Rubber spatula(To scrape and transfer)
- Dish soap and sponge(For cleaning after use)
- Towel or microfiber cloth(Drying and quick wipe-down)
- Optional milling blade / grinding cup(Only if your model supports attachments)
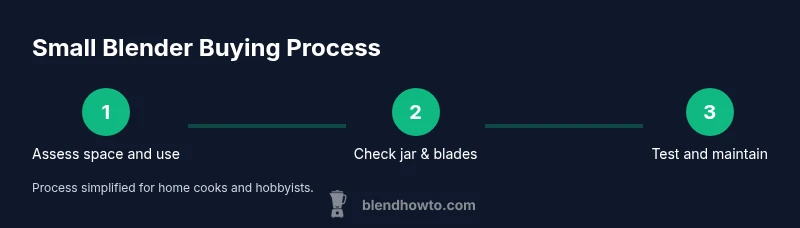
Steps
Estimated time: 20-30 minutes
- 1
Define your primary use-cases
Identify whether you mostly blend smoothies, sauces, baby food, or grinding. This clarifies jar size, blade needs, and whether you need pulse or preset modes.
Tip: Write down your top 3 tasks to compare against features. - 2
Assess jar size and material
Choose a jar that matches your typical batch size and consider glass vs plastic for cleaning and durability.
Tip: Visually inspect sealing lids and gaskets for wear before buying. - 3
Check power and speed range
Aim for a mid-range motor and a range of speeds to handle ice, greens, and soft ingredients without stalling.
Tip: Prioritize models with pulse for better control. - 4
Evaluate cleaning and safety features
Ensure dishwasher-safe parts and reliable safety locks; avoid bases with exposed blades after disassembly.
Tip: Detach the jar from the base before washing. - 5
Consider warranty and parts availability
Longer warranty and readily available parts reduce long-term risk—verify service options in your region.
Tip: Check that blades and gaskets are readily replaceable. - 6
Test the model in-store or via reviews
If possible, test grip, noise, and consistency; read multiple independent reviews for reliability.
Tip: Ask about run-time limits and motor cooling.
Frequently Asked Questions
What tasks is a blender mixer small best for?
Small blenders excel at single-serve smoothies, sauces, and quick purees. They are great for testing ideas in small batches but are not ideal for large-volume processing.
Small blenders are best for single-serve smoothies, sauces, and quick purees; they're great for testing ideas in small batches.
Can I grind coffee or nuts in a small blender?
Some models with milling blades or cups can grind coffee beans or nuts, but performance varies by design. Check attachment compatibility and blade type before purchasing.
Some small blenders can grind nuts or coffee with the right blade, but check compatibility.
Are small blenders safe for hot liquids?
Many small blenders handle warm ingredients, but you should verify jar material and vented lids. Avoid sealing pressure; stir and vent when blending soups.
They can be safe for warm ingredients if you pick a model with heat-resistant jar and vented lid.
How should I clean a blender jar after use?
Rinse immediately after blending, then wash with warm soapy water. Some jars are dishwasher-safe, but dry and reassemble thoroughly after cleaning.
Rinse right after blending and wash with warm soapy water; let it dry before reassembling.
Is warranty important when buying a small blender?
Yes. A longer warranty and readily available parts reduce long-term risk. Check coverage for motor, blades, and jar.
A longer warranty and accessible parts help you avoid costly repairs later.
Do I need extra attachments for basic tasks?
Extras are helpful but not essential for basic tasks. If you don’t need milling or whisking, focus on core features and ease of cleaning.
Attachments are nice-to-have but not required for everyday blending.
Watch Video
What to Remember
- Define your needs before buying to match jar size and features.
- Prioritize jar material, blade quality, and a safe base.
- Prefer models with pulse and easy cleaning for daily use.
- Budget for reliability and warranty over flashy extras.
- Regular maintenance extends the life of a small blender.