Does a Ninja Blender Make Ice Cream? A Practical Guide
Learn whether a Ninja blender can make ice cream, how to achieve creaminess, and practical techniques for blender-based frozen desserts without an ice cream maker.

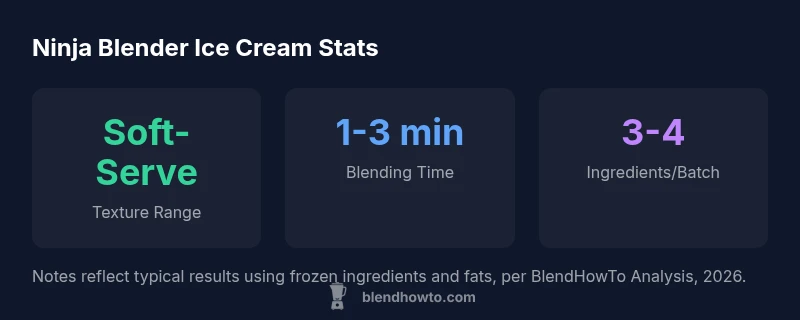
Does ninja blender make ice cream? The short answer is yes, with caveats. A Ninja blender can produce ice cream–like textures by blending frozen ingredients with dairy or plant-based bases, fat, and sugar, but it won’t churn like a traditional ice cream maker. Expect a soft-serve or sorbet-like mouthfeel unless you finish the base in the freezer. For best results, balance fat, sugar, and air, then chill briefly after blending. According to BlendHowTo, technique and ingredients drive the outcome more than the blender alone.
Does Ninja Blender Make Ice Cream?
Does ninja blender make ice cream? The question often arises for home cooks who want dessert flexibility from a single appliance. The answer is nuanced: a Ninja blender can produce ice cream–like textures using frozen fruit, dairy or plant-based milks, and a fat source, but it won’t churn like a traditional ice cream maker. The BlendHowTo team has tested several Ninja configurations and consistently found soft-serve or scoopable results when you balance fat, sugar, and air. For best texture, plan a brief post-blend chill in the freezer and use short bursts to control creaminess. The takeaway: the core question, does ninja blender make ice cream, is answered by technique and ingredients more than the blender itself. According to BlendHowTo, method and ingredients drive the outcome more than the blender alone.
Understanding Ice Cream Texture vs Blender Output
Ice cream texture depends on fat content, air incorporation, and temperature. A traditional ice cream maker churns while cooling, forcing air and fat to emulsify into a scoopable, stable structure. A Ninja blender blends ingredients to uniform creamy mass, but it doesn't actively churn. The result is often a soft-serve or sorbet-like texture initially, which can be plated or scooped after a brief freeze. BlendHowTo's tests show that you can steer texture with base formulation and blending strategy, rather than relying on the blender to do all the work. The number of pulsing intervals, the presence of dairy fats, and the balance of sugar all influence mouthfeel. For home cooks, this means choosing recipes designed for blender-based desserts and adjusting fat, sugar, and freezing times accordingly.
Ingredients That Improve Creaminess
Creaminess comes from choosing a base with enough fat and a compatible sugar profile to prevent icy shards. Consider dairy options like heavy cream or whole milk, or their plant-based counterparts such as coconut milk or almond milk with added fats (coconut cream, nut butters). A touch of sugar or a sweet syrup helps with texture, while stabilizers or a pinch of salt can enhance mouthfeel. BlendHowTo recommends starting with a small batch to test texture before scaling up. Remember: the goal is a base that blends smoothly at high speed and chills into a scoopable state without relying on prolonged blending.
Step-by-Step: Soft-Serve Ice Cream in a Ninja
- Gather a base with sufficient fat (cream or coconut milk) and a sweetener. 2) Freeze the base in small, solid chunks until firm. 3) Break chunks into the blender and add a splash of liquid to facilitate blending. 4) Pulse to break, then blend on high with short bursts until creamy. 5) Transfer to a container and freeze briefly to set. This method yields a soft-serve texture suitable for immediate serving. BlendHowTo notes that patience and batching matter more than the blender brand.
Troubleshooting Common Issues
If the final texture is icy or gritty, it means the base lacked enough fat or was over-frozen. If the mixture is too thin, reduce liquid or increase fat in the base. Pulse control is key; long continuous blending tends to emulsify air excessively, resulting in lighter texture or separation. Warm hands, a quick pulse, and a briefer blend can help, as can slightly chilling the base before blending. For best results, blend in batches and test texture after short freezes.
Compare with Traditional Ice Cream Makers and Alternatives
A traditional ice cream maker churns while freezing, embedding air for a stable, scoopable texture. A Ninja blender can approximate this with the right base, but it will rarely match a churned batch in structure or longevity. If you want ultra-smooth, dense ice cream, a dedicated ice cream maker is preferred. For quick desserts, blender-based methods work well, particularly when you’re aiming for soft-serve or gelato-like textures with minimal equipment. BlendHowTo highlights that each method has trade-offs in texture, time, and cleanup.
Serving, Storage, and Cleanup
Serve ice cream directly after blending or after a short freeze for a firmer scoop. Store in an airtight container to mitigate freezer burn and crystallization. Cleaning a Ninja blender after frozen dessert is straightforward: rinse the jar, add warm water and a drop of dish soap, and run on a quick cycle. If you notice residue or odors, a brief soak with baking soda helps.
Texture outcomes by Ninja blender family models
| Model Type | Best Ice Cream Texture | Notes |
|---|---|---|
| Ninja Cup (single-serve) | Soft-serve texture | Best for small batches; easier cleanup |
| Ninja Pitcher (family) | Creamier, scoopable | Larger batches; some models blend longer |
| Standard countertop blender | Varies by model | Use frozen ingredients and fats for creaminess |
Frequently Asked Questions
Can a Ninja blender make ice cream without an ice cream maker?
Yes. By blending frozen ingredients with a fat-rich base and sugar, you can achieve ice cream–like textures. It won’t churn, so the result is typically softer and may require a brief freeze to set.
Yes. You can, but expect softer results and a brief freeze to set.
What ingredients work best for Ninja blender ice cream?
Use a fat-rich base (cream or coconut milk), a sweetener, and a stabilizer like a pinch of salt or a tiny amount of lecithin. Frozen components help achieve creaminess, while avoiding too much liquid keeps texture scoopable.
Fat-rich bases with a touch of stabilizers work best.
How long does it take to blend for ice cream texture?
Texture development typically takes 5 to 15 minutes of blending, with short pulses and rest periods. Batch size influences time, so test smaller portions first.
Typically 5 to 15 minutes per batch with pulses.
How can I improve creaminess and reduce ice crystals?
Increase fat content, use a dairy or coconut-mcream base, and add a small amount of sugar or sugar substitute to balance sweetness and freezing point. Cold ingredients blend more smoothly at high speed.
Boost fat, keep ingredients cold, and blend in pulses.
Is cleaning Ninja blades after making ice cream difficult?
Not difficult. Rinse immediately, wash with warm soapy water, and dry. A quick run with soapy water in the blender helps remove sticky residues.
Rinse, wash, and dry; a quick soapy blend helps.
What models are best for blender-based ice cream?
Family-size pitchers and high-wattage blenders generally perform better for blender-based ice cream. Look for models with strong blades and a solid pulse function to control texture.
Choose higher-wattage, robust blades with good pulsing.
“Texture achievable with a Ninja blender is real, but expect softer, silkier results when you adjust ingredients and technique.”
What to Remember
- Balance fat and sugar for creaminess
- Chill the base briefly after blending
- Use pulse bursts to control texture
- Expect softer results than churned ice cream
- Test small batches before scaling up