Blender Archviz: Photoreal Architectural Visualization Guide
Learn a practical Blender archviz workflow to create photoreal architectural visuals—from planning and modeling to lighting, materials, rendering, and post-processing.

This guide shows you how to build a photoreal Blender archviz scene from concept to final render, focusing on a solid layout, accurate geometry, and believable materials. You’ll set up the space, model key elements, craft realistic textures, light with HDRI and area lights, and render with Cycles or Eevee using a streamlined workflow tailored for architectural visualization.
Understanding Blender archviz Fundamentals
Blender archviz combines architectural modeling with lighting, materials, and camera work to produce convincing visuals. In this guide, we focus on a practical, end-to-end workflow that prioritizes clarity, repeatable pipelines, and efficient rendering. According to BlendHowTo, a structured approach reduces iteration time and yields more consistent results across projects. You’ll learn when to invest in textures, how to balance realism with performance, and how to translate floor plans into a compelling three-dimensional space. The goal is a reproducible process that you can apply to residential, commercial, or public architecture while keeping the final look believable and professional.
As you begin, identify the deliverables (still renders, short animations, or walkthroughs) and set a target look—photoreal, cinematic, or stylized. This decision will drive choices in geometry density, texture resolution, lighting setup, and render settings. The BlendHowTo team emphasizes starting with a simple layout and gradually layering detail, so you stay in control and learn faster.
Planning Your Architectural Visualization Project
- Define the scope: clarify the building type, interior vs exterior, and required views.
- Gather references: floor plans, elevations, and mood images guide proportions and atmosphere.
- Set deliverables: number of images, camera angles, and resolution.
- Choose a style: photoreal, cinematic, or stylized aesthetics influence materials and lighting choices.
- Establish a timeline: realistic milestones prevent scope creep and keep you on track.
- Create a file structure: organize models, textures, and presets for reuse in future projects.
In this phase, communicate with stakeholders early to align expectations on lighting mood and material fidelity. A well-scoped project reduces back-and-forth and saves time during the render cycle.
Setting Up a Realistic Scene: Scale and Layout
Scale drives realism in Blender archviz. Start by setting units to meters and enabling a strict scale reference in the scene. Build a simple layout using walls, floors, and ceilings as a base and import floor plans or reference layouts when possible. Use Blender’s measure tools and snapping to align geometry precisely. Place domain elements like doors, windows, and fixed features in correct relation to each other to prevent later awkward proportions. This section also covers viewport display settings for faster iteration: enable work-in-progress materials, keep a clean material library, and use low-poly placeholders where appropriate to maintain responsiveness while you refine the architecture.
A practical tip is to model with a “bare-bones” approach first, then progressively add architectural details. This keeps the scene manageable and helps you verify proportions before investing time in textures.
Modeling Techniques for Architectural Elements
Architectural modeling benefits from modular, repeatable components. Start with efficient wall and floor primitives, then create openings (doors, windows) with precise dimensions. Use instance-based furniture and entourage to save memory, switching to real-time proxies for viewport performance. For stairs, railings, and balustrades, prefer curve-based modeling with proper bevels to guarantee clean silhouettes in render passes. When modeling complex features like crown molding or window casings, create a library of reusable cross-sections to speed up future projects.
Be mindful of clean topology; apply bevels to soften edges that catch reflections, but avoid unnecessary subdivisions in flat surfaces. Freeze transformations and apply scale before exporting assets to keep import behavior predictable across scenes.
Materials and Texturing for Realism
Material discipline is the backbone of convincing archviz. Use a consistent PBR workflow: base color, roughness, metallic, normal, and ambient occlusion maps where appropriate. Blender’s Principled BSDF shader is a robust starting point for most architectural surfaces. For metal and glass, set appropriate IOR and transmission values; for wood, calibrate grain direction and anisotropy. Create a small, reusable material library for common surfaces (concrete, glass, wood, fabric) to maintain visual consistency.
Texture scale matters: ensure tiling maps match the real-world proportion of each surface. Use UDIMs when your asset set requires high-resolution texture detail, and always sanity-check textures under lighting to avoid seams or color shifts. A practical approach is to test textures in a neutral lighting setup before integrating them into the full scene.
Lighting Strategy for Archviz
Lighting defines mood and believability. Start with an HDRI environment to establish realistic ambient light and reflections, then complement with area lights for key features like windows and artificial fixtures. Consider the sun’s path for exterior shots and adjust color temperature to reflect time of day. Control shadows with shadow softness and radius to avoid harsh lines. Use light groups or collections to isolate and adjust lighting for different rooms without affecting the entire scene.
A disciplined approach is to render quick test frames with reduced samples to evaluate light direction, color balance, and exposure. Then progressively increase sampling and enable denoising where appropriate to maintain render speed while preserving quality.
Camera Setup and Composition
Camera choice and composition are essential for architectural storytelling. Use a moderate wide-angle lens to capture space without introducing excessive perspective distortion. Position cameras to emphasize architectural lines and leading edges, and use the rule of thirds or golden ratio for framing. Set focal length around 24-35mm (full-frame equivalent) to balance space perception with natural distortion. Enable vignette subtly if needed to focus attention on the interior while avoiding dark corners, and lock exposure to maintain consistency across shots.
In Blender, save multiple camera rigs for different scenes (interiors, exteriors, and mixed views) and leverage depth of field to add cinematic depth when appropriate.
Rendering and Performance: Balancing Quality and Speed
Rendering archviz scenes requires balancing photoreal quality with practical time constraints. Choose Cycles for final, higher-fidelity renders and Eevee for fast iterations during the layout and material testing stages. Set progressive sampling, enable denoising (CuDenoise or OptiX) where available, and consider tile size adjustments for GPU renders. Use a denoise pass in the compositor to maintain image clarity while reducing render noise. Optimize geometry by using instances for repeating furniture or fixtures and bake lighting maps for static scenes to improve viewport responsiveness.
Keep memory usage in check by limiting textures to necessary resolutions and reusing assets. When a scene grows large, consider rendering in passes (diffuse, specular, lighting) to simplify post-processing.
Post-Processing and Presentation
Post-processing transforms a good render into a compelling presentation. Use Blender’s Compositor for color grading, exposure adjustments, and subtle bloom or glare effects for glass and metal. Apply a consistent color grade across shots to maintain brand aesthetics and mood. Add depth of field, motion blur, or camera shake only if it serves the narrative. Create presentation-ready outputs: multi-pass renders for VFX control, and a clean, scaled export for client reviews. Remember to document node setups for future editing and asset reuse.
Throughout post, keep a log of changes so you can backtrack if a certain adjustment doesn’t work across scenes. BlendHowTo recommends maintaining a simple, reproducible post-process chain to ensure consistency.
Common Pitfalls and How to Avoid Them
Common mistakes in Blender archviz include inconsistent scale, poor lighting, low-texture fidelity, and noisy renders. Start with accurate scale references and verify proportions with reference imagery. Use a dedicated lighting plan and test renders to catch color and shadow issues early. Maintain texture consistency by standardizing maps and ensuring proper tiling. Finally, optimize your scene before final renders to prevent out-of-memory crashes and long render times. The BlendHowTo team also notes that iterative testing and a well-structured file organization dramatically reduce rework and speed delivery.
Tools & Materials
- Blender 3.x (Stable)(Install latest LTS or stable release)
- Cycles or Eevee rendering engine(Choose based on final look and speed)
- HDRI environment map(For realistic lighting and reflections)
- PBR texture library (Albedo, Normal, Roughness maps)(Use consistent resolution and tiling)
- Architectural entourage assets (low-poly furniture, greenery)(Reuse via instances where possible)
- Measurement scale reference (1 unit = 1 meter)(Set units in Scene Properties)
- Reference plans or photographs(Guides proportions and mood)
- Render farm or GPU rendering capacity(Helpful for large scenes or tight deadlines)
Steps
Estimated time: 4-8 hours
- 1
Define project scope
Clarify deliverables, target views, and required fidelity. Gather floor plans and reference images to anchor measurements and mood. This prevents scope creep and sets expectations for lighting and textures.
Tip: Create a quick checklist of shots, then lock the scope before modeling begins. - 2
Set up Blender project
Create a new project with correct units (meters) and a clean folder structure. Establish a default material library and lighting presets for consistency across shots.
Tip: Enable auto-save and save iterative versions to prevent loss of work. - 3
Build base layout
Model walls, floors, and ceilings as the architectural shell. Use references and align geometry to plan, ensuring accurate spacing and room proportions.
Tip: Model with placeholders first; replace later with higher-detail assets. - 4
Model key architectural elements
Add windows, doors, stairs, and built-ins with precise dimensions. Create modular components for reusability in future scenes.
Tip: Use boolean cuts vs. edge modeling for clean openings when appropriate. - 5
Populate with entourage
Import or model furniture and greenery, using instances for performance. Maintain scale fidelity to match the space.
Tip: Keep a small set of high-quality assets rather than a large, varied library. - 6
Apply materials and textures
Set up a consistent PBR workflow across surfaces. Adjust roughness, metallicity, and normal maps to achieve realism without overdoing micro-details.
Tip: Test textures under the planned lighting to avoid surprising shifts. - 7
Set up lighting
Use HDRI for ambient light and add area lights for emphasis. Tweak color temperature and shadows to match the scene mood.
Tip: Render quick light-test frames to validate mood before full renders. - 8
Configure cameras & composition
Create multiple camera rigs to capture interior and exterior views. Use composition rules to guide framing and avoid distortion.
Tip: Lock focal length and exposure for consistency across shots. - 9
Render settings & optimization
Choose Cycles for final renders, or Eevee for rapid previews. Balance samples, denoising, and tile size to reduce noise without long waits.
Tip: Render in passes (diffuse, lighting, shadows) to simplify post-processing. - 10
Post-process & presentation
Color grade, adjust exposure, and apply subtle bloom. Export multi-pass outputs for the client review and final deliverables.
Tip: Document node setups for future reuse and consistency.
Frequently Asked Questions
What is Blender archviz and why should I use Blender for architectural visualization?
Blender archviz refers to creating architectural visualizations in Blender, combining 3D modeling, materials, lighting, and rendering to produce photoreal images or animations. Blender’s flexible toolset supports both real-time previews and high-fidelity renders ideal for client reviews.
Blender archviz means using Blender to create realistic architectural visuals, from layout to final render.
What are the essential steps in a Blender archviz workflow?
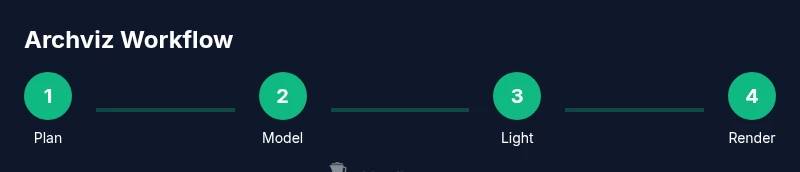
A typical workflow includes planning, layout, modeling, texturing, lighting, camera setup, rendering, and post-processing. Each step builds toward a believable scene and allows controlled iteration.
Essential steps are planning, modeling, lighting, rendering, and post-processing.
Which render engine is best for Blender archviz: Eevee or Cycles?
Cycles produces photoreal results with ray tracing, while Eevee offers faster previews. Use Cycles for final renders and Eevee for rapid iterations during development.
Cycles for realism, Eevee for speed during drafts.
How can I optimize Blender scenes for Archviz renders?
Use instances for repeating objects, keep textures at appropriate resolutions, enable denoising, and render in passes to manage noise and memory efficiently.
Keep texture resolution in check and use instances to save memory.
What camera settings boost architectural visuals?
Choose a moderate wide-angle, typically 24-35mm full-frame, and frame shots to highlight architectural lines without excessive distortion.
Choose a moderate wide-angle and frame carefully.
What are common pitfalls in Blender archviz?
Inconsistent scale, poor lighting, low-texture fidelity, and noisy renders are frequent issues. Plan asset lists and test renders early.
Scale, lighting, and texture quality are common missteps.
Watch Video
What to Remember
- Plan your layout before modeling.
- Use HDRI plus area lights for realism.
- Keep a consistent material library.
- Render with Cycles for final quality.
- Test renders early to validate composition and lighting.