Can You Pause a Blender Render? Practical Steps and Workarounds
Discover whether Blender supports pausing in-progress renders, plus practical workarounds for long renders, frame ranges, and animation workflows. Learn safe, tested steps from BlendHowTo to optimize your rendering workflow.

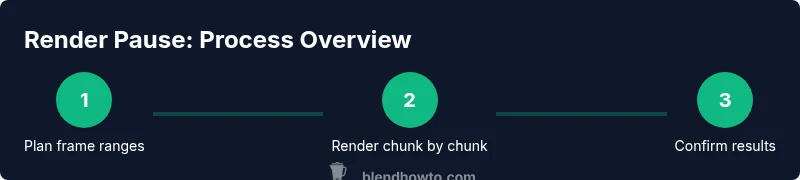
Blender does not offer a built-in pause button for an in-progress render. If you need to stop, press Esc to cancel the current render. For animations, render frames in ranges and restart from a chosen starting frame as needed. In practice, planning chunked renders is the reliable workaround rather than pausing a single frame.
Understanding Render Fundamentals
In Blender, rendering is the process of generating an image or a sequence from a 3D scene using either the CPU or GPU. Each frame is computed from the camera view, lighting, materials, and post-processing settings. Because renders can be computationally intensive, users often wonder if there is a way to pause mid-process without losing work. The short answer is that Blender does not expose a dedicated pause control for a single frame. Instead, you manage progress by canceling and restarting, or by planning renders in chunks. This distinction matters whether you’re producing a single high-resolution frame or an entire animation. A clear understanding of how Blender processes frames helps you decide the best workflow for your project, whether you’re a home cook turned hobbyist artist or a Blender enthusiast following BlendHowTo guides.
Blender's Render Flow: Frames, Passes, and Engines
Blender renders either individual frames or a range of frames, using render engines like Eevee or Cycles. The engine choice affects how long a render takes and how memory is used. Each frame is calculated separately, with shading, lighting, and compositing applied in a pipeline. Knowing this flow helps you implement effective workarounds when you need to pause progress, such as breaking your task into smaller chunks or rendering fewer samples for previews before finalizing a full-quality pass.
Managing Long Renders: The Core Idea
If your project requires lengthy renders, the practical strategy is to break the work into manageable chunks. This is particularly true for animation sequences where you’ll render a subset of frames at a time. Pausing mid-frame isn't supported as a feature, but you can avoid long stalls by planning frame windows, predefining start and end frames, and ensuring you can resume from the next range without redoing completed work. BlendHowTo recommends outlining a frame plan before starting, so you can monitor progress and adjust as needed.
Rendering in Chunks: How to Plan Frame Ranges
A reliable approach is to segment your render task into frame ranges. For example, render frames 1–50, then 51–100, and so on. This keeps memory usage predictable and makes it easier to locate and re-run any problematic ranges if a single segment fails. When you use Blender’s GUI, you select the Start and End frames in the Output properties. When using the command line, you specify -s for start and -e for end, followed by -a to render the range. chunking also simplifies troubleshooting because you can isolate frames with issues.
Stepwise Rendering with the Command Line
For larger projects or automation, the command line is a powerful ally. Example commands include: blender -b your_scene.blend -s 1 -e 50 -a to render frames 1 through 50, and blender -b your_scene.blend -s 51 -e 100 -a for the next chunk. This approach lets you run renders overnight, monitor GPU/CPU load, and avoid losing progress to a GUI freeze. It also reduces the risk of data loss by limiting the scope of each render task.
Practical Monitoring: What to Watch During Renders
During any render pass, monitor memory usage, temperature readings, and disk I/O to anticipate bottlenecks. Keep an eye on noise levels, sample counts, and denoising settings, because these influence both render time and final quality. If you notice a single frame taking unusually long, you can pause the render by canceling it and re-running just that frame range once you’ve corrected the underlying issue (geometry, textures, or lighting). Regularly saving progress in your file structure also makes it easier to recover from unexpected interruptions.
Troubleshooting Common Scenarios
If a render stalls or slows down unexpectedly, first check driver stability and hardware temperatures. Then verify scene complexity, texture sizes, and the chosen render engine. Reducing sample counts for previews and enabling denoising can speed up renders during iterative testing. When revisiting a failed range, re-check the starting conditions you used (scene scale, lighting, and camera). Documenting your workflow in a BlendHowTo notebook helps you reproduce successful results with confidence.
Best Practices for Reproducibility
To ensure consistent results, keep your Blender file organized, with a clear frame plan, fixed output resolution, and a standard set of render settings. Use version control for your .blend file when possible and maintain a log of each chunk’s outcomes, including any issues encountered. This discipline makes it easier to scale up to longer renders, including multi-scene projects or high-resolution outputs, without getting tangled in mid-task pauses that aren’t natively supported by Blender.
Tools & Materials
- Blender software(Use the latest stable release from blender.org to ensure compatibility with your GPU drivers.)
- .blend project file(Include your render settings, frame range, and output path.)
- Frame-range plan(Predefine start and end frames for each chunk (e.g., 1-50, 51-100).)
- Command-line access(Optional for batch rendering and automation (e.g., blender -b scene.blend -s 1 -e 50 -a).)
- Sufficient disk space(Large renders generate many frames; ensure ample free storage.)
Steps
Estimated time: 60-120 minutes
- 1
Open Blender project and review render settings
Launch Blender and load your .blend file. Open the Render Properties panel to confirm the engine (Cycles or Eevee), resolution, samples, and output path. This baseline helps you decide how to chunk the render task.
Tip: Double-check output size and memory usage before exporting a large frame range. - 2
Plan your frame ranges
Define a practical chunk size based on your hardware and project complexity. For example, split a 200-frame animation into four ranges of 50 frames each. Keeping ranges small improves control and reduces risk of long stalls.
Tip: Document the ranges in a simple list or spreadsheet to track progress. - 3
Render the first frame range (GUI or CLI)
In the GUI, set Start and End frames and press Render. In the CLI, use blender -b scene.blend -s 1 -e 50 -a. Monitor progress and ensure frames complete without errors.
Tip: If a frame errors, cancel, fix the issue, and re-run only that range. - 4
Verify output and log results
Check the rendered frames for quality, artifacts, and any failures. Note render times and resource usage. Keeping a log helps you optimize subsequent chunks.
Tip: Compare denoising and sampling settings across ranges to balance speed and quality. - 5
Proceed with subsequent frame ranges
Continue rendering the next ranges in sequence until the entire animation or image set is complete. Use the same settings to ensure consistency across chunks.
Tip: Maintain a running checklist so you don’t skip any ranges. - 6
Finalize and re-check the full sequence
After all ranges are rendered, assemble the frames into a final sequence or movie. Do a quick pass to ensure consistency of lighting, color grading, and post-processing across all frames.
Tip: Render a short preview sequence to verify continuity before final export.
Frequently Asked Questions
Can Blender pause an in-progress render?
No built-in pause button exists for an in-progress render. You must cancel with Esc to stop and then restart the render as needed. For animations, plan renders in frame ranges to manage long tasks.
Blender does not have a pause button for an ongoing render; you cancel with Esc and restart, or render in frame ranges for animations.
What should I do if a render gets stuck?
Cancel the render, check for scene issues or driver problems, adjust settings, and restart the affected frame range. Keeping an organized log helps identify recurring bottlenecks.
If a render stalls, stop it, inspect potential issues, adjust settings, and reattempt the affected range.
How do I render in chunks using Blender?
Use frame ranges with the GUI by setting Start and End frames, or run Blender from the command line with -s start -e end -a to render a specific range. This is ideal for long animations.
You render in chunks by specifying start and end frames, either in the GUI or via the command line.
Is there a way to resume from where I left off automatically?
Blender does not automatically resume a partial render mid-task. You can resume by re-running the next frame range, but you must specify the start frame manually.
There isn’t an automatic resume feature; you manually set the next frame range to continue.
Should I rely on external rendering farms for long projects?
For very large or time-sensitive projects, render farms or distributed rendering can speed up tasks. Ensure you’ve standardized your settings and frame ranges for consistent results across machines.
If time is critical, consider external render farms, but keep your settings consistent.
Watch Video
What to Remember
- Plan renders in chunks, not pauses.
- Use start-end frame ranges to control long tasks.
- Cancel with Esc if something stalls and restart from the next range.
- Leverage CLI for batch rendering and automation.