How to Know When Blender Render Is Done: Practical Guide
Learn how to know when a Blender render is done with clear signals, progress indicators, and quality checks to ensure artifact-free results.

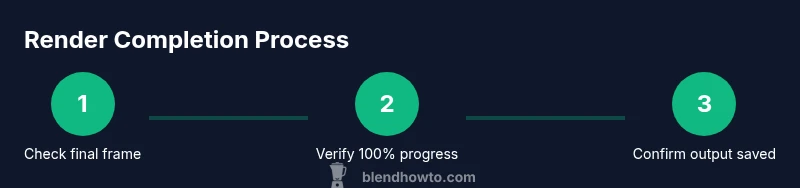
You're sure Blender render is done when the render window shows the final frame with no pending progress and the status bar reads 100% completion. Verify a saved output file and a clean, artifact-free image. If you used denoising or multiple passes, ensure all passes finished and the preview matches the final result. For animations, confirm the last frame renders and playback is seamless.
What signals a render is complete
If you're asking how to know when blender render is done, rely on a few clear signals in Blender’s UI and file system. The most reliable sign is that Blender finishes the final frame and the on-screen progress indicator reaches 100% with no ongoing calculations. At that moment, Blender often assigns a file path and writes the image to disk. You should see a saved image file in your output directory, with no obvious artifacts. Additionally, for animations, the render process should advance to the last frame and then stop advancing frames or show a final playback cue. In practice, treat completion as the point when all required passes have completed and you can open the result without errors.
How Blender displays progress during a render
Blender communicates progress in a few places. The status bar at the bottom of the main window often shows percent done or a timer. The Render Window itself may display a live progress line or tiles, especially in Cycles on GPU. If you’re using denoising or multiple render passes, you’ll see separate indicators for each pass and for the denoising stage. In Eevee, you’ll see the word Rendering with a progress bar beside it. For tile-based renders, the number of tiles and their completion percentage give a granular sense of how far the render has progressed. Always confirm the final image path in the Output Properties and verify that the target file really exists on disk.
Quality checks before finalizing the render
Before concluding that a render is done, check for artifacts, fireflies, and color glitches. Inspect the final frame at 100% magnification to catch small issues. If you enabled denoising or multi-pass compositing, ensure the denoised result and all passes align with your reference. Verify color management (Filmic, look, exposure) is consistent with your intended look. Render a small, representative frame at the target resolution first to establish a baseline, then apply final settings for a full render. A quick comparison against a known-good reference can help you decide if you’re ready to finish.
Troubleshooting common delays and delays
Long renders are usually caused by heavy scenes, high sample counts, or heavy effects like volumetrics and complex lighting. If progress stalls, check the memory usage and ensure Blender isn’t swapping to disk. Make sure the output path is accessible and not on a slow network drive. GPU heats or driver issues can also slow renders; in such cases, reduce samples temporarily to verify settings and then re-run the full render. For animations, a long last frame is often the bottleneck; consider rendering a test frame first and segmenting the render job.
Practical checklist to confirm completion
Use this concise checklist to confirm a render is truly done: 1) Frame is final and 100% progress is shown, 2) Output file exists and opens without error, 3) Denoising and all passes completed with consistent results, 4) Animation last frame renders and plays cleanly, 5) The saved file matches your intended look in color and exposure. Keeping a small, repeatable checklist eliminates guesswork and avoids re-runs.
Tools & Materials
- Blender software(Any recent stable release (2.9x or newer).)
- Working Blender project file (.blend)(Scene to render, with Output Properties configured.)
- Output destination with enough disk space(Prefer an SSD for faster writes; ensure path is writable.)
- Calibrated monitor (optional but recommended)(Helps verify exposed color accuracy and gamma.)
- Automation script or timer (optional)(Can help auto-detect completion for long renders.)
Steps
Estimated time: 30-60 minutes
- 1
Open project and verify output path
Open your .blend and confirm the Output Properties path and file format. This ensures the final render writes to the correct location with the desired extension. Save the project to lock in settings before rendering.
Tip: Use a clearly labeled folder and a unique filename to avoid overwriting previous renders. - 2
Set up a quick test render
Render a single frame at lower resolution to validate settings, lighting, and denoising before committing to a full render. This saves time and helps catch configuration errors early.
Tip: Enable Render Region to focus on a small region during testing. - 3
Increase sampling for final render
Raise the sample count to your final target and enable any denoising passes you plan to use. This balances noise reduction with render time and ensures the final image matches expectations.
Tip: Document a baseline sample count for consistency across shots. - 4
Monitor progress during rendering
Watch the status bar and render window for 100% completion and no ongoing tiles. If you’re rendering an animation, confirm the last frame starts and finishes.
Tip: If progress stalls, pause, check drivers and scene complexity, then resume. - 5
Validate final output
Open the saved image to inspect for artifacts, color shifts, or inconsistencies. Compare against a reference render and adjust exposure, color management, or denoising if needed.
Tip: Check multiple frames or a representative frame at full size. - 6
Document results and plan next steps
Record what worked and what didn’t, including render times and settings. Use this for future projects to reduce iteration time and re-renders.
Tip: Create a short post-mortem checklist for future renders.
Frequently Asked Questions
How can I tell if a render is finished without watching the UI constantly?
Look for 100% progress, the final frame in the render window, and a saved output file. If you’re using multiple passes, confirm all passes completed. A quick cross-check against the saved image helps ensure completion.
Check for 100% progress, a saved file, and no ongoing passes. That confirms completion.
What should I do if Blender stays at 99% for a long time?
A long 99% period usually means the last pass is processing or denoising is underway. Check memory usage and ensure the last pass completes. If needed, reduce sample count for a test, then re-run the final render with the adjusted settings.
If it sticks at 99%, the last pass may be running. Check memory and try a shorter test render before the full run.
Does denoising delay completion, and how should I handle it?
Denoising adds extra processing steps, so the render may take longer. Verify that denoise passes finish and compare the denoised result with the noisy preview to ensure quality before finalizing.
Denoising can extend render time, but you should still confirm completion after those passes.
Should I render a small test first to avoid wasted time?
Yes. A small test render helps verify exposure, color management, and denoising settings before committing to a full-resolution render.
Definitely run a quick test render to check settings.
Is there a way to detect render completion automatically with a script?
Blender supports post-render hooks and event handlers. You can script a post-render check that triggers after render finishes, saving you from manual monitoring.
You can automate completion checks with Blender's scripting features.
Watch Video
What to Remember
- Check final frame and 100% progress as core signals.
- Verify output file exists and opens cleanly.
- Ensure all passes and denoising complete for artifact-free results.
- Test with a quick render before the full pass.
- Document a repeatable completion checklist for future renders.