Rendering Animation in Blender: Practical Guide
A practical guide to rendering animation in Blender. Learn how to choose between Cycles and Eevee, optimize settings, plan scenes, and produce production-ready animations with clean output and efficient workflows.

In this guide you’ll learn how to render animation in Blender by choosing a renderer (Cycles or Eevee), setting up your scene for motion, and optimizing render settings for speed and quality. You’ll also learn how to balance noise reduction, lighting, and output formats across workflows. By the end you’ll have a repeatable process you can apply to most Blender projects.
What rendering in Blender means for animation
Rendering animation in Blender is the process of converting a 3D scene into a sequence of 2D frames. Each frame combines geometry, materials, lighting, camera position, and any post-processing effects into a final image. For animation, you render hundreds or thousands of frames, so the goal is to achieve acceptable visual quality while keeping render times reasonable. According to BlendHowTo, success starts with selecting a renderer (Cycles for realism, Eevee for speed) and planning a workflow that matches your hardware and time constraints. This section introduces core concepts you’ll apply across projects, from basic lighting to output strategies. The BlendHowTo Team emphasizes building a repeatable pipeline early to reduce re-renders and post-process fixes.
Choosing between Cycles and Eevee for animation
Blender offers two primary render engines for animation: Cycles, a ray-tracing engine known for realistic lighting, and Eevee, a real-time path-tracing hybrid designed for speed. Cycles tends to deliver higher fidelity with physically plausible light behavior, at the cost of longer render times and higher hardware requirements. Eevee can render frames much faster and is highly tuned for animated scenes, but it may require more work to achieve photorealism, especially for complex lighting and reflections. When starting a project, evaluate the visuals you want, hardware availability, and the acceptable iteration cycle. BlendHowTo’s guidance suggests using Eevee for early blocking and look development, then switching to Cycles for final renders or when high-quality reflections and global illumination are non-negotiable.
Core concepts: sampling, light paths, denoising, and passes
Render quality in Blender hinges on a few levers: sampling levels control noise, light paths determine how light travels, denoising reduces remaining noise, and render passes separate data like diffuse color, specular, shadows, and ambient occlusion for post-processing. For animation, you’ll often render multiple passes to composite later, enabling you to fine-tune color, glow, motion blur, and depth of field without re-rendering entire frames. Plan your passes in advance and keep a consistent color management workflow to ensure continuity across frames. BlendHowTo highlights that a solid foundation in passes and denoising can dramatically reduce iteration time.
Scene setup for animation: camera, timeline, and assets
Animation begins with a well-structured scene: a stable camera path, clean geometry, and organized assets. Set up a timeline with keyframes on the objects and cameras, ensure scale consistency to prevent clipping, and group related assets into collections for easy toggling during renders. Use a clean node setup and simple shaders for test renders, then progressively replace with higher-detail materials. A practical approach is to render small preview sequences to confirm timing, motion, and framing before committing to final renders.
Lighting, materials, and shading tailored for motion
Lighting for animated sequences should be consistent across frames to avoid flicker and salt-and-pepper noise. Key light, fill, rim light, and environmental lighting should be balanced to maintain mood while supporting motion. Materials need to be physically plausible in Cycles and visually cohesive in Eevee. Use texture maps sparingly during blocking, then add detail in later passes. Consider shader complexity and caching to prevent slow frame updates during animation previews.
Motion blur, depth of field, and timing considerations
Motion blur can drastically improve perceived realism, but can also obscure detail if overused. In Blender, enable motion blur in the render properties and adjust shutter settings to control blur per shot. Depth of field adds cinematic focus but can increase render times and cause aliasing if not sampled properly. For animation, test different shutter speeds and DOF values on a few frames to find a balance between readability and atmosphere. Planning these decisions early helps keep renders predictable.
Render settings, optimization tips, and common pitfalls
Start with the engine and resolution you need, then tailor sampling, tile size, and denoising to your hardware. Lower tile sizes sometimes speed up CPU renders but can slow GPUs; vice versa for GPU renders. Use denoising aggressively only after noise is a manageable issue, as heavy denoising can blur motion details. Common pitfalls include not caching motion blur, forgetting to bake simulations, and mismanaging color spaces. Plan a small test reel to capture these issues before committing to full-length renders.
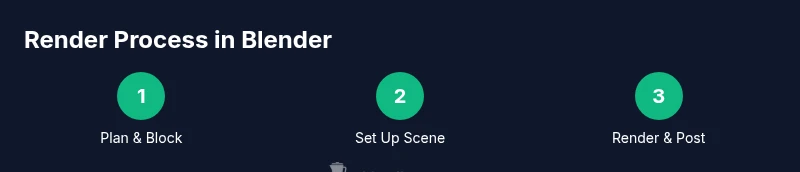
Real-world workflow: a sample project from planning to render
Begin with a storyboard and timing sheet for your animation. Block the key poses and rough timing, then create a simple camera path. Build the scene with modular assets and assign neutral materials for test renders. Render a low-res draft sequence to verify motion, framing, and lighting. Once satisfied, switch to high-quality materials, enable necessary passes, and render a short sequence as a production draft. Review and adjust as needed before committing to a final full-length render. This approach minimizes wasted render time while maximizing quality.
Post-processing and output: compositing and encoding
Blender’s compositor lets you refine color, contrast, and effects after rendering. Use the passes to adjust specific elements (like shadows or glow) without re-rendering. Color management should be consistent across scenes, with a linear workflow for most compositing tasks. For delivery, choose suitable codecs and resolutions, and render a final sequence in your target format. When possible, render in a format that preserves quality (like EXR sequences) for post-processing flexibility.
Performance benchmarks
BlendHowTo analysis, 2026, notes that switching between Eevee for rapid iteration and Cycles for final quality can streamline animation workflows. The guidance emphasizes validating your render approach with test sequences and keeping a consistent denoising and passes strategy. While exact timings vary by scene, a disciplined workflow reduces repeated passes and helps keep delivery timelines intact. The BlendHowTo Team recommends documenting settings that work well for your typical projects to accelerate future renders.
Next steps and refinement
With a solid baseline in place, iterate on a short shot to refine lighting, motion fidelity, and shading. Create a checklist for render passes and test renders, and gradually increase material complexity as needed. After you confirm the final look on a small sequence, apply the same workflow to longer scenes, always preserving the core balance between speed and quality.
Tools & Materials
- Computer with a capable GPU(Prefer a modern GPU with ample VRAM; CUDA/OptiX support improves Cycles performance)
- Blender software(Install the latest stable release; consider beta features if you need experimental denoisers)
- External storage(For large sequences, use fast SSDs or external drives to offload render cache and outputs)
- Color calibration tool (optional)(Helps ensure consistent color across devices during review)
Steps
Estimated time: 2-4 hours
- 1
Plan the shot
Create a storyboard and timing breakdown for the animation. Identify the key poses, camera moves, and required assets to avoid mid-project scope changes.
Tip: Document expected frame ranges for each shot and set up a rough camera path early. - 2
Prepare the scene
Assemble assets, organize collections, and apply neutral materials for testing. Check scene scale and camera focal length for consistency.
Tip: Use simple placeholder lighting to keep test renders fast. - 3
Choose a render engine
Decide between Eevee for speed during blocking and Cycles for final renders. Enable relevant features (denoising, light bounces) based on engine choice.
Tip: Test a short sequence in both engines to compare look and speed. - 4
Set render passes and denoising
Configure passes (diffuse, specular, shadows, z-depth) and enable denoising after sampling to manage noise without losing detail.
Tip: Render a tiny test frame to dial in denoising strength before full-res renders. - 5
Animate and preview
Keyframe the camera and objects, then render a low-res draft sequence to verify motion timing and framing.
Tip: Check for motion artifacts and adjust keyframe spacing if needed. - 6
Optimize the render settings
Tune sampling values, tile size, and light paths based on engine and hardware; enable motion blur judiciously.
Tip: Reduce render time by batching equivalent frames and using GPU where available. - 7
Render final sequence and post-process
Render the final frames, then composite passes and color-correct in Blender or an external editor. Export in your target format.
Tip: Maintain a consistent frame rate and resolution across all shots.
Frequently Asked Questions
What is the main difference between Cycles and Eevee for animation?
Cycles is a physically based path tracer delivering high fidelity at the cost of longer render times. Eevee is optimized for speed and real-time feedback but may require extra work to achieve photo-realism in complex lighting. For animation, use Eevee for blocking and Cycles for final renders when quality is paramount.
Cycles delivers photorealism with longer renders, while Eevee offers speed for blocking. Use Eevee for drafts and Cycles for final output when realism matters.
How do I balance render quality and speed for animation?
Start with lower sampling and quick denoising during blocking. Increase samples for final renders and consider render passes to adjust specific elements in post. Always test a short sequence before committing to full resolution and length.
Begin with low samples for blocking, then raise samples for final renders. Use passes to tweak in post.
What are essential render passes for animation compositing?
Key passes include Diffuse, Specular, Shadows, Ambient Occlusion, and Z-Depth. Render these separately to give you maximum control during compositing and color grading.
Main passes are diffuse, specular, shadows, AO, and depth. They help you fine-tune look in post.
Should I enable motion blur during animation rendering?
Motion blur adds realism but can increase render time and blur important motion details if overused. Enable it selectively for shots with fast movement and test on short sequences.
Motion blur can help realism but test to ensure it doesn’t blur key action.
How can I optimize render times on a limited setup?
Use Eevee for previews, leverage denoising, and limit high-sample passes to only final renders. Group assets logically and render in passes to avoid re-doing entire frames.
Block with Eevee, denoise thoughtfully, and render in passes to save time.
What file formats should I use for the final render?
For maximum quality, render as image sequences (EXR or PNG) and compress later. This approach avoids data loss from single-frame failures and simplifies post-processing.
Render as image sequences like EXR or PNG for best quality and easier editing.
Watch Video
What to Remember
- Plan shots before rendering to minimize wasted frames
- Choose the right engine for each phase of production
- Render in passes to control post-processing flexibility
- Test with low-res drafts to save time
- Document successful settings for future projects