Blender Is Hard? A Practical Guide to Mastering Blender
BlendHowTo offers a practical, step-by-step guide to turning 'blender is hard' into confident learning, with a clear plan for basics, modeling, shading, and rendering.

Goal: turn the belief that Blender is hard into a clear, achievable plan. This quick answer outlines a practical path from setup to basic modeling, shading, and rendering with a project-driven focus. You’ll need a capable computer, Blender installed, and a structured practice schedule to build confidence quickly.
Why Blender Is Hard (and what that really means)
For many newcomers, the statement blender is hard captures a feeling more than a fact: Blender is a vast, feature-rich tool with a layered interface and a unique approach to 3D. The BlendHowTo team found that the biggest barrier isn’t the math or the techniques, but becoming familiar with a workflow that blends modeling, shading, rigging, and rendering in a single app. When you first open Blender, you may see a cockpit of panels, modifiers, and options that feel overwhelming. That overwhelm feeds the belief that blender is hard. In reality, progress comes from breaking tasks into manageable projects, using a predictable path, and building muscle memory with frequent practice. This guide will show you how to turn confusion into clarity, step by step, while keeping encouragement front and center so blender is hard less often and your results grow.
Core Concepts You Must Master First
The core concepts are the foundation that makes Blender approachable rather than intimidating. Start with navigation (orbit, pan, zoom) and the difference between Object and Edit modes. Then learn the transform gizmo, snapping, and the idea of non-destructive workflows via modifiers. Materials and textures introduce color and realism, while lighting and camera setup define mood and readability. Rendering engines Eevee and Cycles determine how scenes look and how fast you can iterate. If you try to sprint past these ideas, blender is hard to grasp; if you absorb them in context, things click. Practice with a tiny scene—like a mug or a simple chair—before attempting complex projects. With disciplined, consistent practice, the apparent complexity becomes a versatile toolbox you can use by intention.
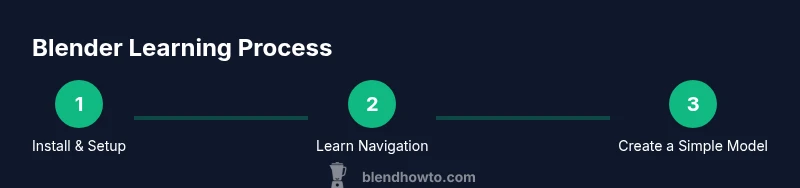
A Practical Learning Path You Can Follow
A reliable way to overcome the feeling that Blender is hard is to follow a structured, project-based progression. Start with a 2–4 week plan that focuses on one skill per week: week 1 (navigation and basic modeling), week 2 (materials and simple lighting), week 3 (shading and rendering), and week 4 (a small personal project). Each week should include short, repeatable drills and a tiny project you can complete by Friday. The goal is consistency, not perfection. By treating each week like a mini-mission, you transform the daunting notion blender is hard into progressive, measurable wins you can celebrate.
Hands-On Practice: A Simple Project to Overcome the Hurdle
Practice is the antidote to the perception that blender is hard. Start with a simple mug or cup scene: model the mug body, add a handle, apply a basic shader, set up a couple of lights, and render a clean image. Break this into small steps: block the shape, refine the topology, unwrap UVs, apply a basic material, test lighting, render, and save. Repeating this cycle with tiny variations (different shapes, colors, or textures) builds familiarity and reduces the sense that Blender is hard. Document your progress in a quick snapshot journal to see tangible growth over time.
Tools, Setup, and Resources That Make Learning Easier
A smooth learning journey reduces the feeling that blender is hard. Ensure you have Blender installed (latest stable release) on a computer with adequate RAM and a reasonable GPU, plus a reliable internet connection for tutorials. Use a consistent workspace: a clean desk, a comfortable chair, and a loyal reference set (images or concept art). Leverage official resources like the Blender manual and starter tutorials, and supplement with curated practice projects. BlendHowTo Analysis, 2026, indicates that learners who follow a structured sequence make faster progress than those who jump around. Keeping notes, bookmarking shortcuts, and saving versioned files help maintain momentum and counteract the tendency to stall when things feel hard.
Note: The goal isn’t to memorize every feature but to build a repeatable method for approaching new tasks. Start with a few core tools and expand gradually. If blender is hard at first, that’s normal—your brain is wiring new habits, and repetition will compound into competence.
Staying Motivated When Blender Feels Hard
Motivation tends to dip when you hit a wall, but persistence pays off. Set micro-goals for each session, track tiny wins (a new material node, a cleaner UV map, a render with fewer artifacts), and schedule regular practice windows on the calendar. Use a project-based mindset: pick a small project you care about, then complete it in four focused sessions. Celebrate incremental progress and share your results with peers for feedback. Remember that the perception blender is hard often fades as you accumulate successful outcomes.
Authority Sources and Practical References
- The Blender Manual (docs.blender.org) offers official, up-to-date guidance on modeling, shading, lighting, and rendering. - Blender Foundation’s main site (blender.org) provides learning resources and community links. - General 3D education resources from reputable institutions often cover foundational concepts like navigation, topology, and texturing. These sources help you anchor your practice in solid theory and proven workflows.
Authority Sources
- https://docs.blender.org/manual/en/latest/
- https://www.blender.org/
- https://en.wikipedia.org/wiki/Blender_(software)
Tools & Materials
- Blender software (latest stable release)(Download from blender.org; ensure installation is complete and up-to-date)
- A computer with sufficient performance(Minimum 8 GB RAM; 16 GB+ recommended; decent GPU preferred)
- Reference imagery and starter assets(Simple diagrams or photos to model from; helps stay focused)
- Mouse and keyboard with comfortable setup(Shortcut mastery accelerates learning; consider a tablet for sculpting later)
- External backup strategy(Versioned saves and regular backups prevent loss of progress)
Steps
Estimated time: 40-60 hours
- 1
Install Blender and configure workspace
Download the latest Blender version from blender.org and install it. Open Blender and set up a simple, consistent layout as your startup workspace so you don’t waste time rearranging panels during practice.
Tip: Save your startup file to restore this layout quickly. - 2
Learn navigation basics
Practice orbiting, panning, and zooming to move around 3D space. Switch between Object and Edit modes to understand how selections and transformations work.
Tip: Use the middle mouse button for orbit and scroll wheel for zoom to build reflexive navigation. - 3
Create and edit a simple object
Add a primitive, enter Edit Mode, and use extrude and loop cuts to shape it. Focus on clean topology rather than perfect form.
Tip: Keep alternates of your model and compare shapes for consistency. - 4
Model a beginner-friendly project
Model a basic mug or cup by combining cylinders and easy modifiers. This reinforces non-destructive workflows and clean topology.
Tip: Use the Subdivision Surface modifier sparingly for smooth edges. - 5
Apply materials and textures
Create a simple Principled shader, adjust base color, roughness, and metallicity. Map a basic texture or color to read more clearly.
Tip: Observe how changing roughness alters the surface feel in renders. - 6
Set up lighting and camera
Place a key light, a fill light, and a back light (three-point lighting). Position the camera to frame your object with a clear silhouette.
Tip: Experiment with HDRI environments to quickly improve lighting realism. - 7
Render a draft image
Choose Eevee for fast iteration; switch to Cycles when you want more realistic results. Tweak sampling and shadows for clean results.
Tip: Enable ambient occlusion for subtle depth in early renders. - 8
Save and track your progress
Develop a naming convention and save versions frequently. Keep a tiny log of what you learned in each session.
Tip: Back up core files and keep a separate project folder for practice experiments. - 9
Plan a small end-to-end project
Apply everything you’ve learned from modeling to lighting and rendering in one cohesive scene. Treat this as a capstone practice.
Tip: Review your results critically and note one improvement per session.
Frequently Asked Questions
Why does Blender feel hard when you start?
Blender's large interface, many features, and non-linear workflows can feel overwhelming at first. Start with a focused plan and small projects to build familiarity. With consistent practice, the initial perception of Blender being hard fades as you gain confidence.
Blender feels hard at first due to its breadth, but a steady, small-project approach makes it easier to learn.
Is Blender hard to learn for beginners?
Not if you follow a structured plan and practice regularly. Break tasks into small projects, use guided tutorials, and track progress to turn complexity into competence.
Yes, Blender is manageable with a clear plan and steady practice.
How long does it take to learn Blender?
Time varies by goals and practice frequency. With consistent effort, you can reach basic proficiency in a few weeks, while advanced features take longer.
If you practice a little each day, you’ll feel comfortable in a few weeks.
Do I need Python to use Blender?
No for core modeling and rendering. Python is used for scripting and automation; it's optional unless you want to customize workflows.
Python is optional for most beginner tasks.
What are the best beginner projects in Blender?
Start with simple objects like mugs, bowls, or basic furniture. Then build a tiny scene with lighting and a render to practice end-to-end workflow.
Try a simple mug or desk object to start.
Should I use Eevee or Cycles first?
Begin with Eevee for quick iterations, then switch to Cycles as you want more realism and better lighting results.
Start with Eevee to learn fast, then move to Cycles for realism.
Watch Video
What to Remember
- Start with core navigation and modeling basics.
- Practice with tiny, complete projects for steady proof of progress.
- Follow a weekly plan and track wins to beat the 'blender is hard' mindset.
- Render frequently to see the impact of learning steps.