Blender Without GPU: A Practical CPU Rendering Guide
Learn how to use Blender effectively without GPU acceleration. This guide covers CPU rendering setups, workflow optimizations, and troubleshooting for smooth CPU-only Blender projects in 2026.

With Blender, you can complete complex scenes without GPU acceleration by using CPU rendering and optimization strategies. Switch to CPU devices in Preferences, choose Eevee or Cycles with low samples, bake heavy textures, and render at sensible resolutions during iterations. This guide walks you through configuring Blender for CPU-only workflows.
Why Blender Without GPU Matters
For many home studios and hobbyists, a powerful GPU isn’t always available or affordable. The ability to work with Blender without GPU — focusing on CPU rendering and CPU-friendly workflows — empowers you to learn, iterate, and produce quality results on modest hardware. This approach also reduces power consumption and fan noise, which can be appealing when working long hours. In this guide, we explore why Blender without GPU acceleration can still be productive, especially when you optimize viewport settings, choose appropriate render engines, and leverage CPU-friendly features. According to BlendHowTo, CPU-centric workflows are a practical entry point for learners and small studios, helping you master essential techniques before investing in hardware upgrades. You’ll discover the trade-offs, best practices, and concrete steps to stay productive without a dedicated GPU.
When you start from a CPU-first mindset, you’ll notice that most editing and modeling tasks remain responsive, while heavy rendering tasks shift to longer but manageable cycles. This balance – between CPU rendering speed and memory use – is at the heart of working effectively without GPU. You’ll learn how to tailor your Blender project settings, set up efficient scenes, and plan renders so you hit your deadlines even when GPU resources are limited. As you progress, you’ll also gain familiarity with CPU-optimized workflows that translate to other 3D packages.
In short, Blender without GPU is not a limitation; it’s a constraint you can work within to build solid skills, optimize projects, and deliver results. The BlendHowTo team emphasizes that the right configuration and workflow can yield surprisingly smooth outcomes, even on mid-range CPUs. This block sets the stage for practical, day-to-day CPU rendering practices that keep your projects moving.
note
Tools & Materials
- Computer with modern CPU(Multi-core CPU (e.g., 4-core or greater) recommended; ensure BIOS/OS power settings favor sustained performance)
- Blender software (latest stable release)(Download from blender.org; ensure CPU rendering is supported by your chosen render engine)
- Solid-state drive (SSD) for scratch/cache(Speeds up scene loading and render caching during CPU renders)
- Sufficient RAM(Aim for 8 GB+ for simple scenes; 16 GB+ for moderate scenes; higher for complex textures)
- Mouse/keyboard with comfortable layout(Helpful for extended editing sessions; not strictly required)
Steps
Estimated time: 30-60 minutes
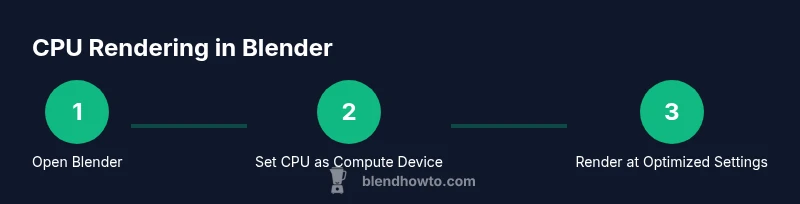
- 1
Open Blender and verify CPU rendering
Launch Blender and navigate to Edit > Preferences > System to confirm that the Compute Device is set to CPU. This ensures Blender will render using your processor rather than any GPU. If your system shows multiple options, choose CPU and disable GPU options for rendering tasks.
Tip: If you have an integrated GPU, you may still want to disable it to ensure Blender uses CPU exclusively during CPU-only work. - 2
Choose a CPU-friendly render engine
In the Render Properties panel, switch the engine to Cycles or Eevee based on your project needs. For CPU rendering, Cycles often provides better physical accuracy, while Eevee can be faster for real-time previews. Test both on a small scene to compare results and speed.
Tip: Start with Eevee for previews and switch to Cycles for final CPU renders when more realism is needed. - 3
Adjust render settings for CPU efficiency
Lower the sample count to reduce render times, enable Simplify to limit texture and subdivision complexity, and enable denoising if your CPU renders are noisy. In Cycles, use CPU-friendly features and disable devices other than CPU.
Tip: Use a small tile size for CPU rendering to improve cache locality on some CPUs. - 4
Set up viewport performance
In the Viewport Display options, reduce viewport samples and disable high-detail overlays during modeling. Use simplified shading and enable bounding box display for heavy scenes to keep interactions snappy.
Tip: Toggle Workbench highlights for enormous meshes to avoid slow viewports during iteration. - 5
Optimize textures and materials
Bake long, complex shader effects into textures when possible, or use simplified materials for previews. Large textures can slow CPU renders; keeping texture sizes reasonable helps your iteration cycle.
Tip: Consider baking ambient occlusion or lighting into vertex colors for faster previews. - 6
Manage memory usage
Monitor Blender’s memory footprint, especially with high-resolution textures. Enable memory usage hints in Preferences and avoid excessively large textures when iterating.
Tip: Save incremental versions regularly to prevent data loss from memory-related crashes. - 7
Iterate with smaller renders
Render at a lower resolution during iterations and only upscale for final outputs. This saves time while you refine composition, lighting, and motion.
Tip: Use a tight render region to test specific areas of interest before committing to a full-frame render. - 8
Test and compare outputs
Once satisfied, run a full CPU render to validate results. Compare with the initial previews to ensure consistency across engines and settings.
Tip: Keep a changelog of settings to reproduce successful CPU-only workflows later.
Frequently Asked Questions
Can Blender run without a GPU?
Yes. Blender can operate using CPU rendering without a dedicated GPU. You’ll primarily rely on your processor for rendering tasks and optimize workflow to compensate for CPU render times.
Yes, Blender can run without a GPU by using CPU rendering and optimizing your workflow.
Is Eevee usable without GPU acceleration?
Eevee is designed for real-time rendering and often benefits from GPU acceleration, but you can still use Eevee with CPU rendering for quick previews and testing. Expect slower viewport performance.
Eevee can run with CPU, though performance may be slower for real-time previews.
Is Cycles CPU rendering slower than GPU rendering?
Typically yes; CPU rendering is usually slower than GPU rendering for complex scenes. You can compensate with simpler shaders, lower samples, and smaller textures during iteration.
CPU rendering is often slower than GPU rendering, but you can optimize to stay productive.
What are good CPU optimization tips for Blender?
Use CPU-friendly render settings, bake heavy effects, render at lower resolutions for drafts, and limit texture sizes. Keeping projects modular and using render passes helps manage CPU workloads.
Use simpler settings, bake textures, and render in passes to optimize CPU workloads.
Should I upgrade hardware for Blender without GPU?
If you frequently render high-resolution scenes, a faster multi-core CPU and more RAM will improve performance. For many learners, balancing CPU power with memory is more impactful than adding a new GPU.
A CPU upgrade and more RAM can help a lot if you render large scenes often.
Are there recommended Blender presets for CPU rendering?
Yes. Save and reuse presets for render engine, samples, light paths, and denoising settings to maintain consistent CPU-only workflows.
Create and reuse CPU-friendly render presets for consistency.
Watch Video
What to Remember
- Switch to CPU in Preferences before rendering.
- Choose the right render engine for CPU performance.
- Bake shaders and textures to optimize CPU workflows.
- Render at practical resolutions during iteration.
- Monitor memory usage and cooling for stability.