How to Run Blender Without a Graphics Card (CPU Rendering Guide)
Learn how to run Blender on CPU-only systems, optimize workflows, and render effectively without a dedicated GPU. Practical steps, tips, and troubleshooting for modeling, animation, and rendering on CPU-powered setups.

Why Blender Works Without a Dedicated GPU
According to BlendHowTo, Blender runs reliably on a CPU when there is no dedicated GPU. This is especially true for students learning the basics, hobbyists experimenting with low-poly scenes, or artists working on laptops that lack discrete graphics hardware. Running Blender without a GPU doesn't prevent you from modeling, sculpting, or animating; it mainly affects rendering speed and viewport responsiveness. The main trade-off is obvious: you gain universality and lower power consumption, but you trade speed. The good news: modern CPUs have multiple cores and fast memory, which Blender can leverage to parallelize many tasks. By adjusting expectations and using a few best practices, you can complete full projects without a dedicated graphics card. In practice, a CPU-only workflow usually involves keeping the scene simple, using lower-resolution textures where possible, and choosing a render engine and settings optimized for CPU rendering. BlendHowTo has tested CPU-based workflows across several common projects, including product visualization, character animation, and architectural scenes, and found that with careful setup you can achieve usable results. You may also consider using a hardware-accelerated driver if your CPU supports AVX/AMX features, but the core rule remains: start with CPU rendering and optimize progressively. This approach helps you learn Blender’s fundamentals without investing in new hardware.
8 words per sentence? false],
Hardware Basics: What You Need to Run Blender on CPU
To run Blender effectively without a graphics card, you’ll rely on the CPU and system memory. A modern multi-core processor is a must, with at least 4 cores for reasonable responsive performance in modeling and animation tasks. RAM matters: 16 GB is a sensible minimum for small to mid-size projects; 32 GB or more helps with complex scenes and textures. An SSD speeds up scene loading and texture streaming, which reduces wait times between edits. Your operating system doesn’t restrict CPU-only Blender, but keeping graphics drivers up to date is still important for OpenGL compatibility, even if you don’t render on GPU. If you’re using an integrated GPU, ensure OpenGL support is current on Windows, macOS, or Linux. Storage should be ample enough to hold your project files, textures, and backups. Finally, a reliable internet connection helps when downloading assets, add-ons, or Blender updates. The core takeaway: CPU rendering is feasible, but moderate hardware gives you a much smoother workflow and reduces wait times during iterations.
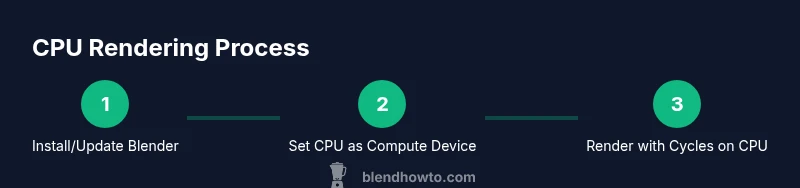
Quick setup for CPU-only work
Step 1: Update Blender and Enable CPU Rendering
Start by installing the latest Blender build from blender.org and launching the program. You’ll want to confirm you’re running a version that supports CPU rendering reliably and that your OS drivers are current. This first step lays the foundation for a stable CPU-only workflow. After installation, if you’re upgrading from an older release, back up your preferences and addons to avoid surprises. Once Blender is open, you’re ready to configure CPU-based rendering as your default path for projects. BlendHowTo recommends prioritizing up-to-date software to leverage performance improvements and bug fixes that affect CPU rendering workflows.
Step 2: Configure CPU as Compute Device
Navigate to Edit > Preferences > System. In the Cycles Compute Device section, choose CPU. If you see multiple options, select CPU and ensure that any “GPU” or “CUDA/OptiX/Metal” options are deselected for rendering tasks. This setting makes Blender use your CPU for render calculations rather than any available GPU. If you have multiple CPU cores, Blender can default to using all available threads, but you can override this in Preferences > System > Threads to balance performance and system responsiveness. For most CPU-only scenes, enabling all cores yields the fastest renders without sacrificing modeling interactivity. BlendHowTo notes that this change affects both viewport rendering (in Cycles) and final renders, so consistency between previews and final results improves when CPU is the sole device.
Step 3: Set Render Engine to Cycles and Optimize CPU Settings
In the Render Properties, set Engine to Cycles and ensure Device is set to CPU. CPU rendering benefits from lower tile sizes with many samples, so start with a tile size around 64x64 to keep CPU caches efficient, then adjust to 32x32 or 128x128 depending on your scene. Lower the number of samples for quick previews and enable denoising to maintain clarity with fewer samples. If your CPU has AVX or similar SIMD features, enable them in the BIOS/firmware if applicable and supported by your Blender build. Regularly run small test renders to gauge performance changes as you tweak settings.
Step 4: Optimize Viewport and Scene for CPU Performance
Viewport performance suffers when you overload the scene with high-polygon models or heavy textures. Switch the viewport shading to Solid or Workbench for modeling, and avoid Rendered view while actively editing complex scenes. Use Simplify in the Scene tab to cap maximum subdivisions, texture resolution, and shadow samples for real-time feedback. Use lower-res textures for UV previews, or temporarily disable heavy textures during editing and re-enable them just before final renders. Keeping a clean scene with proxy objects or decimated meshes during the iterative process saves substantial time.
Step 5: Rendering Strategies: Preview vs Final Renders
For previews, render with Cycles CPU at low samples and smaller resolution to iterate quickly. When you’re ready for a final render, increase samples, utilize denoising, and consider rendering in passes (diffuse, specular, ambient occlusion) to compositing to control quality without overwhelming the CPU. Baking lighting into textures (if suitable for your project) can reduce runtime during animation frames. If your project is time-sensitive, use the Workbench engine for quick previews and switch to Cycles CPU for final output. BlendHowTo emphasizes balancing quality and time and suggests keeping a separate project folder for CPU-optimized iterations to avoid accidental performance regressions.
Step 6: Memory and Textures: Keeping RAM in Check
Texture sizes dramatically affect RAM usage. When working without a GPU, large textures can choke memory and slow renders. Use compressed textures when possible and scale textures to match the render resolution. Pack textures into the Blender file or store assets in a fast-access location on SSDs to reduce load times. Enable memory-related options such as Bake or Texture Minification, and consider texture streaming to keep memory usage predictable. For very large scenes, enable the Decimate modifier on high-poly assets or work with simplified proxies during the iteration phase. Regularly save incremental versions to avoid data loss from memory-related crashes.
Step 7: Troubleshooting Common Issues
If Blender crashes during CPU renders, check your system RAM usage and ensure no background process is starving Blender of memory. Update CPU drivers and BIOS if possible, and verify that your Blender build isn’t running into compatibility issues with your operating system. Disable problematic addons temporarily to isolate the cause. If performance is unexpectedly slow, try reducing texture sizes, lowering resolution, and decreasing the viewport quality. For persistent issues, consult Blender’s official docs or user forums where CPU-specific troubleshooting tips are shared. BlendHowTo suggests starting from a minimal scene and gradually reintroducing assets to identify bottlenecks.
Step 8: Real-World Scenarios and Best Practices
In real-world cases, many artists start CPU-only on modest laptops for learning and early concept work. For architecture or product visuals, a well-structured scene with proxy objects, baked lighting, and Simplify settings can yield useful results within reasonable timeframes. For animation, plan render passes and caching to spread computation across frames, reducing the per-frame cost. Always keep a versioned archive of your project with the CPU-focused settings so you can reproduce results later. The BlendHowTo team recommends documenting your CPU rendering workflow, including your preferred tile size, sampling, and texture strategies, to facilitate efficient collaboration and future projects.