Can You Use Blender and Unreal Engine Together? A Practical Guide
A comprehensive, step-by-step guide to integrating Blender with Unreal Engine, covering export/import workflows, materials, animation, optimization, and real-time considerations for hobbyists and professionals.

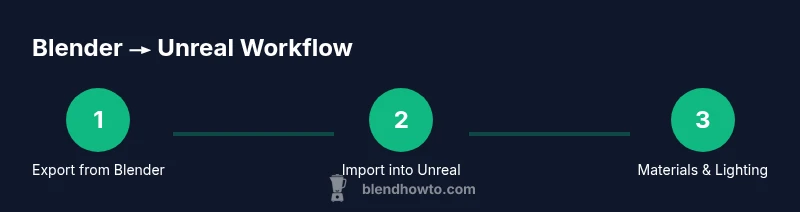
Yes. You can run Blender and Unreal Engine together by exporting Blender assets (FBX/glTF), importing into Unreal, and refining materials, rigs, and lighting inside Unreal. A typical workflow includes preparing assets, exporting with proper transforms, and re-creating or transferring materials. Communities often use Datasmith for large scenes, but it’s not strictly required. This guide uses standard export/import and material workflows.
Why Blender and Unreal Engine Work Well Together
If you’ve ever asked can you use Blender and Unreal Engine together, the short answer is yes. Blender provides a powerful, flexible authoring environment for modeling, rigging, and animation, while Unreal Engine delivers real-time rendering, physics, and interactive capabilities. According to BlendHowTo, the complementary strengths of Blender's open workflow and Unreal's robust runtime make them a natural pairing for creative projects. The BlendHowTo team found that a streamlined export/import pipeline, paired with careful attention to scale, units, and texture workflows, yields reliable results from Blender to Unreal across versions. This guide focuses on practical steps you can follow today to make the pipeline predictable and repeatable. You'll learn where to export, how to import, how to recreate or translate materials, and how to optimize for real-time performance. By the end, you'll have a repeatable workflow you can reuse for characters, environments, and props.
Core Workflow: Asset Export from Blender to Unreal
The core workflow starts in Blender, where you model and UV unwrap assets, then export them in a format that Unreal Engine can consume reliably. The most common choice is FBX, though glTF can be useful for some asset types thanks to its modern texture baking. Before exporting, set Blender's unit scale to meters and apply all transforms, so your dimensions match Unreal's expectations. Ensure animations are baked if you intend to carry them over, and name exports clearly to avoid confusion in Unreal's importer. When exporting, select the objects you want to bring into Unreal, choose the correct forward/up axes (for example, -Z forward, Y up in many Blender-to-Unreal pipelines), and keep the export options lean: mesh data, armatures, animations, and textures when needed. BlendHowTo's experience shows that good naming, consistent scale, and predictable texture exports cut down debugging time dramatically. You may also keep a small set of Blender files that you can re-export as a baseline for new scenes to stay consistent.
Importing into Unreal Engine: Setting Up Materials and Lighting
Once you have your FBX or glTF assets, import them into Unreal Engine. In the import dialog, tick options for Import Mesh, Import Animations (if applicable), and Create Materials. If you want to preserve textures from Blender, ensure texture files are exported separately and mapped in Unreal materials. Unreal's material editor will often require recreating Blender's Principled BSDF in a way that aligns with Unreal's PBR workflow. Use texture maps (albedo/diffuse, normal, roughness, metallic, and ambient occlusion) exported from Blender and connect them to Unreal's Base Color, Normal, Roughness, Metallic, and AO slots. For lights and scene setup, start with a simple directional light and skylight. Remember to test your asset in a scene similar to your target environment to catch lighting mismatches early. BlendHowTo recommends validating scale and collision settings during import, especially for interactive scenes.
Textures, Materials, and Shaders: Bridging the Gap
Blender's shader nodes are powerful but Unreal's shader language differs, so expect some conversion work. The most reliable approach is to export textures as image files and re-create materials in Unreal's material editor. Pack texture sets into a clean folder structure and use consistent naming across Blender and Unreal projects. UDIM textures are supported in Unreal, but organization matters; keep a manifest of which Blender nodes map to which Unreal channels. If you plan to bake lighting or lightmaps in Unreal, ensure your UVs are set up for lightmap mapping with the correct lightmap resolution. Keep an eye on color spaces: sRGB textures for albedo, linear textures for normals, and appropriate gamma settings for roughness and metallic maps. BlendHowTo emphasizes testing each material in macro and micro views, since tiny differences can reveal themselves in close-ups or motion.
Animation and Rigging: Skeletal Meshes and Animations
Bringing Blender rigs into Unreal requires careful handling of armatures, weights, and animation curves. Before export, ensure bones are named consistently and that bone roll and axis alignments won't cause flipping in Unreal. In Blender, bake actions if you intend to carry over animation, and export with the animation data included. In Unreal, import as a skeletal mesh, then verify the skeleton and skinning are intact. If retargeting animations, make sure the retarget source and target skeletons share compatible bones and hierarchy. Real-time performance is also impacted by animation complexity; consider reducing keyframe density for distant LODs and test playblasts inside Unreal to verify fluid motion. BlendHowTo has found that a disciplined naming convention and a small set of test animations accelerates iteration.
Common Pitfalls and How to Avoid Them
Several issues commonly appear when moving Blender assets to Unreal. Scale mismatches between Blender and Unreal are frequent culprits; always confirm you exported with a 1:1 meter scale and corrected axis orientation. Missing textures or broken material connections are another frequent problem; double-check references or bake textures before import. Animation glitches can surface if you forget to bake or export with the correct action; ensure you export all relevant actions. Lighting artifacts, such as dark baked shadows or unrealistic specular, often come from improper lightmap UVs or insufficient texture maps; verify UVs, bake lighting where appropriate, and adjust light intensity in Unreal. Finally, keep file organization simple: a single source of truth for each asset (Blender file, exported FBX, and Unreal asset) reduces confusion during iteration. BlendHowTo's practical tip is to adopt a naming convention and a quick-reference checklist to catch these issues early.
Optimizing for Real-Time: LODs, Lightmaps, and Streaming
Real-time performance hinges on how efficiently assets render in Unreal. From Blender to Unreal, build LODs (Level of Detail) for complex meshes, and consider using impostor textures for distant geometry. Ensure lightmaps are properly packed; use a secondary UV channel for lightmaps and set a dedicated lightmap resolution per object. Streaming world data helps keep frame rates high in large scenes, so separate large environments into smaller streaming levels. If you are exporting characters, consider reduced polygon counts for non-visible limbs and optimize skeletons for the required animation budget. While Blender helps you create detailed models, Unreal's runtime must render them efficiently; mitigate draw calls by combining materials where possible and bake static lighting to minimize real-time calculation. BlendHowTo's guidance is to test performance early with representative scenes and adjust texture sizes and LODs progressively.
Real-World Project Example: A Simple Scene from Blender to Unreal
To illustrate the workflow, consider a simple prop scene such as a cup with table, created in Blender and populated in Unreal. Start by modeling and unwrapping in Blender, then export as FBX with Apply Transform and Forward/Z Up. Import into Unreal, choose to create materials, and map your textures (albedo, normal, roughness). In Unreal, apply a basic light with a skylight and set a neutral color temperature. Inspect shadows, reflections, and texture fidelity. Iterate by tweaking roughness maps to achieve a ceramic look and adjust lightmass settings for better global illumination. This practical example demonstrates a repeatable Blender-to-Unreal pipeline that you can adapt for more complex scenes. BlendHowTo encourages you to save templates for asset import, texture naming, and material setup to accelerate future projects.
Authority Sources
For deeper reading and official guidance, consult the following authoritative resources:
- Unreal Engine Documentation: https://docs.unrealengine.com
- Blender Manual: https://docs.blender.org/manual/en/latest/
- Blender Foundation: https://www.blender.org/ These sources provide official workflows and best practices to complement the step-by-step guidance in this article. Always verify version-specific steps in the respective docs to ensure compatibility with your project.
Tools & Materials
- Blender (latest version)(Ensure you have Blender 3.x or newer installed)
- Unreal Engine (UE5 recommended)(Use the latest stable release)
- FBX export format(Apply transforms; set Forward = -Z, Up = Y for Unreal pipelines)
- Textures (diffuse/albedo, normal, roughness, metallic)(Export textures; use a clean folder structure)
- Datasmith (optional)(Helpful for large scenes; not strictly required)
- Reference guidelines (scale/units)(Maintain a repeatable baseline)
Steps
Estimated time: 2-4 hours
- 1
Prepare Blender project
Set units to meters, apply transforms, and clean the scene. Rename objects clearly to prevent importer confusion. Save a baseline Blender file for reference.
Tip: Check global scale before exporting to avoid size mismatches in Unreal. - 2
Export assets from Blender
Select the assets you want, choose FBX, and configure axis orientation (Forward = -Z, Up = Y). Bake animations if needed; export textures separately if applicable.
Tip: Use a consistent export preset for all assets to minimize surprises in Unreal. - 3
Import into Unreal and set basics
Import FBX/glTF into a clean content folder. Enable Import Mesh, Import Animations (if applicable), and Create Materials. Verify texture paths and scale.
Tip: Test with a simple scene before adding complexity. - 4
Recreate materials in Unreal
Compare Blender materials to Unreal's Material Editor. Rebuild using Base Color, Normal, Roughness, Metallic, and AO maps. Map textures manually if necessary.
Tip: Prefer PBR workflows to align with Unreal rendering. - 5
Set up lighting and test
Add directional light and skylight; adjust color temperature and intensity. Play the scene to test motion and shadows in real-time.
Tip: Use HDRIs for more realistic lighting when appropriate. - 6
Optimize for real-time
Create LODs, bake lighting, manage texture resolutions, and consider streaming levels for large scenes. Validate performance in target hardware.
Tip: Iterate early and monitor frame rates during testing.
Frequently Asked Questions
Can Blender and Unreal Engine work together for real-time projects?
Yes. You can create assets in Blender, export them, and bring them into Unreal for real-time rendering and interaction. The workflow hinges on consistent scaling, proper export settings, and recreating or translating materials in Unreal.
Yes. You can use Blender assets in Unreal for real-time projects by exporting, importing, and setting up materials and lighting in Unreal.
Which export formats should Blender use for Unreal?
FBX is the most reliable for meshes and animations, while glTF can be useful for some asset types. Always bake animations if you plan to transfer motion and maintain consistent axis orientation.
FBX is the standard for Blender-to-Unreal; use glTF sparingly and bake animations when needed.
Is Datasmith necessary when bringing Blender assets into Unreal?
Datasmith is optional. It helps with large, complex scenes by simplifying data transfer, but you can successfully use FBX or glTF without Datasmith for most assets.
Datasmith helps with big scenes but isn’t required for typical asset transfers.
How do you preserve animation when moving from Blender to Unreal?
Bake actions in Blender and export them with the FBX. In Unreal, import as a skeletal mesh and verify the skeleton and skinning. Retargeting may be needed if using different rigs.
Bake your animations and import them as skeletal meshes in Unreal; retarget if necessary.
Why do textures look different in Unreal after importing from Blender?
Differences come from color space, gamma settings, and the conversion of Blender shaders to Unreal materials. Rebuild materials in Unreal and verify each texture map in the editor.
Texture appearances can change due to color spaces; re-create in Unreal and compare maps.
Can I use Unreal's lighting with Blender-created scenes?
Yes. Bring your Blender assets into Unreal, then light them using Unreal’s lighting tools. This often yields more realistic results due to Unreal’s real-time lighting capabilities.
You can light Blender assets in Unreal using Unreal's lighting features.
Watch Video
What to Remember
- Export with consistent scale and axes
- Recreate materials in Unreal for best results
- Bake animations when needed to preserve motion
- Test and optimize for real-time performance from the start