Blender to Unreal Engine 5: A Practical Step-by-Step Guide
Master the Blender to Unreal Engine 5 workflow with practical export, import, and optimization steps to ensure clean geometry, textures, and materials for real-time projects.

This guide explains blender to unreal engine 5 workflows, showing how to export Blender assets and import them into UE5 with correct scale, clean geometry, and intact textures. You'll learn practical export settings, texture preservation, material transfer, and troubleshooting to keep your real-time pipeline efficient and predictable.
Why the Blender to Unreal Engine 5 workflow matters
In modern real-time production—whether for games, architecture, or visualization—the ability to move cleanly from Blender to Unreal Engine 5 is a foundational skill. According to BlendHowTo, a consistent, well-documented workflow reduces rework, speeds up iteration, and helps artists focus on creativity rather than import headaches. By mastering this pipeline, you ensure that geometry, UV layouts, textures, and materials behave predictably when you switch between Blender and UE5. The blender to unreal engine 5 process also supports collaboration across teams, since shared presets and export settings minimize miscommunication and errors. In short, a reliable Blender-to-UE5 workflow improves both quality and throughput for real-time projects.
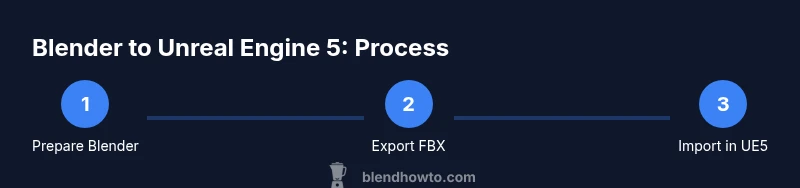
Understanding the typical pipeline
A typical Blender-to-Unreal workflow follows a clear sequence: asset creation in Blender, preparation and cleanup, export with robust transform data, import into Unreal Engine 5, material setup or recreation, texture verification, lighting setup, and final testing. The process benefits from a shared understanding of scale, coordinate systems, and texture channels. Unreal uses a metric system with a different axis orientation than Blender, so consistent origin points and scale calibration are essential. Early planning—such as naming conventions, texture naming, and origin alignment—prevents headaches during import. Keeping a checklist of export settings also helps maintain consistency across multiple assets and projects.
Preparing Blender assets for Unreal
Preparation is the backbone of a smooth transfer. Start by setting Blender units to meters to align with Unreal. Apply transforms (location, rotation, scale) before exporting to avoid surprises on import. Clean up the mesh by removing hidden or duplicate vertices, and ensure normals are consistent. UV maps should be clean and non-overlapping where texture integrity is required. If your asset uses multiple textures, group them logically and name textures clearly (diffuse, normal, roughness, metallic). Finally, consider simplifying complex geometry where possible to keep real-time performance in UE5. These steps reduce import surprises and set the stage for faithful material reproduction in Unreal.
Export formats and settings
FBX remains a robust choice for Blender-to-UE5 transfers, but GLTF can also be effective for certain asset types. When exporting FBX, enable Apply Transform, use the forward axis as -Z and up axis as Y to match Unreal's convention, and bake animation only if needed. Export with mesh, normals, and tangent space information preserved. If you use textures, ensure they are exported as embedded or easily accessible files in an organized folder structure. In UE5, you can then re-link or recreate materials. The goal is to export geometry without doubling faces or losing UVs, while keeping textures accessible and correctly named.
Textures and materials transfer
Textures are the lifeblood of realism. In Blender, bake or pack textures where necessary and keep maps in a standard set: Albedo, Normal, Roughness, Metallic, and AO if used. In Unreal, you’ll often rebuild materials using the Texture Sample nodes, plugging in your maps and fine-tuning roughness and metallic values to achieve the same look. If your Blender material uses nodes that don’t have direct equivalents in UE5, simplify to a PBR approach and re-create the shader as needed. Consistency in texture resolution across assets helps maintain a coherent scene.
Lighting and camera setup
UE5’s lighting system differs from Blender’s, so plan lighting in a way that transfers well. Use neutral, high-quality textures and avoid overreliance on Blender-specific lighting tricks. In UE5, set up a basic directional light, skylight, and some post-processing to approximate your Blender lighting. If you rely on camera animation, export animation data and verify frame rate compatibility. A common pitfall is importing cameras directly; instead, consider exporting animation and re-creating camera movements in UE5 to ensure compatibility with Unreal’s timing and exposure.
Animation and rig considerations
If your Blender asset includes rigged characters or animated objects, retargeting in UE5 can be involved. Export the mesh with its armature if you intend to reuse Blender’s animation, but be prepared to adjust bone mappings, retargeting options, and export scales. In many cases, exporting a non-skinned version for testing helps confirm geometry and texture integrity before you commit to full rig transfers. When possible, bake animations in Blender before export if you need predictable playback in UE5. Finally, validate that bone orientation and scale align with Unreal’s expectations to avoid jitter or misalignment.
Troubleshooting common issues
Even well-prepared assets can encounter issues during import. Common problems include wrong scale, missing textures, or smoothed normals appearing flat in UE5. Start by checking the asset’s transform data and ensuring textures are correctly linked in Unreal. If textures appear dull or missmapped, revisit texture paths and re-link maps in UE5 materials. Lighting discrepancies are often due to HDRI or exposure differences; adjust post-processing settings in UE5. If geometry imports with unexpected smoothing, review normals and apply edge splits or custom normals in Blender before export. A methodical, repeatable workflow minimizes these issues over time.
Best practices and tips for efficiency
Adopt a repeatable export preset and naming convention to streamline asset imports across projects. Maintain a shared texture library with consistent naming and resolutions, and document decision points in a project wiki. Use utility scripts or add-ons in Blender to automate repetitive export steps where possible. Regularly test a small set of representative assets in UE5 to catch issues early, and keep a versioned export pipeline to track changes. The BlendHowTo team emphasizes documentation and consistency as the most effective ways to improve your Blender-to-UE5 workflow over time.
Tools & Materials
- Blender (latest stable release)(Set units to meters; apply transforms before export)
- Unreal Engine 5(Prepare a clean project with a simple test scene)
- FBX export/import tooling(Use Apply Transform; forward = -Z, up = Y; bake animations if needed)
- Texture maps(Albedo, Normal, Roughness, Metallic; keep textures organized)
- UV maps and clean topology(Non-overlapping UVs where important; reduce polycount if needed)
- Optional: Blender add-ons for export automation(Helpful for batch exporting presets)
Steps
Estimated time: 2-4 hours
- 1
Prepare Blender scene
Set the scene scale to meters, apply all transforms, and clean up geometry. Ensure UV maps are valid and textures are organized. This prevents import surprises in UE5 and keeps the asset ready for export.
Tip: Double-check the origin point and apply rotations to avoid axis mismatches. - 2
Export geometry with FBX
Export the selected mesh as FBX with Apply Transform enabled and appropriate forward/up axes for UE5. Include normals and tangent space data to preserve shading. If exporting animations, bake them before export.
Tip: Use a clean file path; avoid spaces and special characters in texture names. - 3
Import into Unreal Engine 5
In UE5, import the FBX asset and verify the import options. Check import geometry, materials, and textures. If textures don’t auto-link, re-assign texture maps in the material editor.
Tip: Enable import for textures and normals to reduce post-import setup time. - 4
Recreate or adjust materials
Recreate PBR materials in UE5 by sampling Blender textures. Adjust roughness, metallic, and normal maps to approximate Blender’s look. Use the Material Editor to tune values for UE5 lighting.
Tip: Keep a reference sheet of Blender material settings for faster recreation. - 5
Check scale and orientation
Verify that object scale and orientation match UE5 expectations. Correct any discrepancies using UE5’s scale controls, and consider creating a small test scene to validate import fidelity.
Tip: If scale is off, reorient the asset and re-export with consistent transforms. - 6
Optimize lighting and post-process
Set up a basic UE5 lighting rig; adjust exposure, ambient occlusion, and bloom to match Blender preview. Use post-processing volumes to fine-tune the final look.
Tip: Avoid overlighting; use neutral lighting to test material fidelity. - 7
Test assets in a small UE5 scene
Place assets in a test world, check performance, and verify texture fidelity across lighting scenarios. Tweak LODs and meet target frame rates early to avoid late-stage rewrites.
Tip: Record a quick playthrough to catch animation or shading issues early. - 8
Iterate and document
Document export presets, naming schemes, and material setups for future assets. Create a living checklist to improve consistency over time.
Tip: Share a project wiki with your team to standardize the workflow.
Frequently Asked Questions
What is the recommended export format for Blender to Unreal Engine 5?
FBX is commonly recommended for Blender to Unreal Engine 5 transfers because it preserves geometry, normals, and transforms well. GLTF can be useful for non-animated assets or web pipelines, but FBX tends to offer broader UE5 compatibility for game-ready assets.
FBX is typically the best choice for Blender to Unreal Engine 5 because it preserves geometry and transforms reliably. GLTF is an alternative for static assets.
How can I preserve textures when importing from Blender to UE5?
Organize texture files in a dedicated folder, ensure textures are exported to accessible paths, and re-link maps in Unreal’s material editor if needed. Use consistent naming for Albedo, Normal, Roughness, and Metallic maps to speed up the process.
Keep textures in a clear folder structure and re-link them in UE5 if needed; name maps consistently.
Why is the asset scale off after import, and how can I fix it?
Mismatched axes or unit settings are the typical causes. Set Blender units to meters and apply transforms before export, and ensure Unreal’s import uses the correct axis orientation. If needed, adjust scale in Unreal and re-export.
Axis mismatches and unit differences are common. Normalize to meters in Blender and align axes in Unreal.
Do I need to recalculate normals after import into UE5?
Often you’ll rely on Unreal to compute shading, but ensuring Blender exports correct normals and avoids duplicate geometry helps. If shading looks incorrect, recheck normals in Blender and re-import.
Normals can be handled by UE5 shading, but ensure they’re clean in Blender before export.
How can I optimize assets for Unreal Engine 5?
Keep polycount appropriate for your target platform, bake textures where possible, and use LODs. Reuse texture atlases and reduce texture sizes for distant objects to improve performance without sacrificing visual quality.
Aim for sensible polycount, bake textures, and implement LODs to balance quality and performance.
Can Blender materials translate directly to UE5 materials?
Direct translation is rarely perfect; recreate materials in UE5 using its node system and the imported texture maps. Use a PBR workflow in UE5 to match Blender’s look as closely as possible.
Materials usually need recreating in Unreal, using the texture maps you exported.
Should I bake animations before exporting to UE5?
If you need consistent playback in UE5 across platforms, baking animations in Blender before export can reduce retargeting issues. For complex rigs, retargeting in Unreal may still be necessary.
Baking can help maintain animation fidelity in UE5, but test if retargeting works for your setup.
What are common import errors and how can I fix them quickly?
Missing textures, wrong scale, or incompatible normals are frequent. Verify file paths, re-link maps in UE5, adjust transform settings during export, and test with a small asset to isolate the issue.
Check paths, re-link textures, and confirm transforms during export to fix import errors.
Watch Video
What to Remember
- Plan exports with consistent scale and axes from Blender to UE5
- Recreate materials in UE5 for reliable results
- Organize textures and naming to minimize link breakage
- Test assets in UE5 early to catch issues sooner
- Document your workflow for team consistency and future projects