Unity Blender: A Practical Guide to Asset Pipelines
Master a practical unity blender workflow to export Blender assets, import into Unity, and preserve textures, materials, and animations for real-time projects. This guide covers formats, import settings, shaders, lighting, animation pipelines, and performance optimizations for a smooth asset lifecycle.

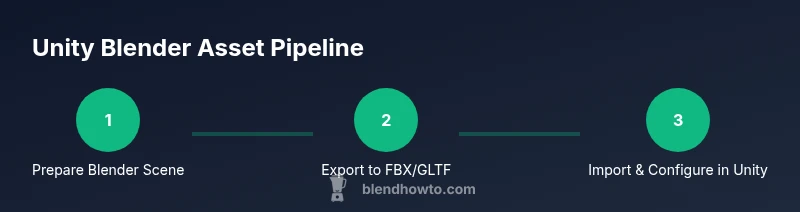
With the unity blender workflow, you’ll export Blender assets for Unity, import into Unity, and optimize textures, materials, and animations for real-time playback. This guide covers exporting from Blender (FBX/GLTF), importing into Unity, configuring materials, light setups, and basic animation pipelines. By the end, you’ll have a clean asset pipeline and reliable steps to speed up game-ready content creation.
Understanding the unity blender workflow
A reliable unity blender workflow lets you move assets from Blender into Unity without reworking geometry or textures. It reduces back-and-forth, keeps proportions consistent, and supports iterative design. For home developers and hobbyists using Unity with Blender models, the trick is to standardize units, apply transforms, and pick export formats that preserve animation and materials. According to BlendHowTo, planning the pipeline upfront saves hours later. Start by agreeing on the unit system (Blender uses meters by default) and a consistent scale between Blender and Unity; this ensures your assets behave predictably in the engine. In practice, you’ll create assets in Blender, then export to a Unity-friendly format, import, and verify a few essential checks: unit scale, animation bake, and material references. Once the pipeline is stable, you can batch export multiple pieces and reuse presets for future projects. Unity Blender workflows shine when artists maintain clean topology, crisp UVs, and organized file naming.
Exporting from Blender: formats and settings for Unity
Choosing the right export format is the first decision in a unity blender workflow. FBX is the traditional choice for animated assets, while GLTF/GLB can be preferable for web or lightweight projects. In Blender, set the scale to 1, apply transforms, and align axes with Unity (Z up, Y forward). Bake animations if needed and ensure you export only the visible geometry you intend to use in Unity. When possible, include armatures and animation curves, and avoid exporting redundant nodes. Maintain consistent naming conventions for meshes, materials, and textures to simplify Unity import. BlendHowTo recommends keeping a small, well-documented export preset you reuse across projects to maintain consistency throughout the workflow.
Importing assets into Unity and initial setup
After dragging and dropping your Blender-exported files into Unity, review the Import Settings for Scale Factor, Rig type, and Animation. Set the correct material search order (prefer importing materials when possible) and check that the texture maps align with Unity’s color spaces. Enable “Apply Root Motion” only if you exported root motion from Blender. If your asset uses bones, verify that the Avatar type matches your rig (Generic vs Humanoid) and adjust the import scale to prevent 0.01 or 100x misfits. It’s common to separate assets into subfolders (Models, Textures, Animations) to keep scenes clean and accelerate re-import when assets are updated.
Materials, textures, and shaders: keeping visuals consistent
Blender’s Principled BSDF and Unity’s Standard/URP/HDRP materials aren’t one-to-one, so expect some translation work. For best results, bake textures in Blender (albedo, normal, roughness) and import as native textures, then reassemble materials in Unity using a URP/HDRP-compatible shader. Import texture maps with correct color spaces: albedo in sRGB, normal maps in non-color data, and metallic/roughness maps in appropriate channels. Maintain consistent texture resolution to avoid mipmap noise. If you need to tweak visuals after import, adjust Unity materials rather than re-exporting from Blender to save time in the pipeline.
Animations and rigs: moving from Blender to Unity
Exported Blender animations often require baking and clean up before Unity can play them back reliably. Bake actions to ensure frame-by-frame fidelity and export with the armature if needed. In Unity, verify animation import settings, clip names, and ensure the animation wrap mode matches the project’s expectations (Once, Loop, PingPong). If using humanoid rigs, retargeting may be necessary, especially when asset proportions differ between Blender and Unity. The key is keeping a consistent rigging approach across assets so that retargeting doesn’t break visuals or timing.
Lighting, cameras, and scene optimization in Unity
Lighting behaves differently in Unity than in Blender. Use Unity’s real-time or baked lighting depending on the project, and adjust light probes and reflection probes for dynamic scenes. Place cameras with sane clipping planes and avoid extreme FOVs that distort proportions carried over from Blender. For mobile or VR builds, prioritize URP or HDRP, reduce real-time lights, and bake shadows where possible. Keeping scene complexity in check helps maintain framerates while preserving the Blender-derived visuals.
Performance tips and common pitfalls
Common issues include scale mismatches, aliasing on textures, and misinterpreted normals. Always verify the asset scale in Unity against a simple primitive and confirm that texture maps use correct color spaces. Avoid importing over-detailed meshes; decimate or optimize in Blender before export, or use Unity’s LOD groups to maintain performance. When assets fail to import correctly, recheck export axes, apply transforms, and confirm that the correct export settings were used for animation vs static geometry.
Real-world example: a simple character prop pipeline
Imagine a small prop—a sword blade—from Blender that needs to enter Unity with a simple material and a short animation (twirl). In Blender, model the blade with clean topology, bake textures, and rig a lightweight bone for animation. Export as FBX with the mesh, textures, and animation. In Unity, set up a URP material using the albedo and normal maps, assign the blade’s animation clip to an Animator component, and test in Play mode. This concrete workflow demonstrates how a single asset moves through the pipeline with minimal friction and predictable results.
Version control and collaboration between Blender and Unity teams
Effective collaboration hinges on a shared folder structure, clear naming conventions, and version control for assets. Keep Blender files (BLEND) separate from Unity assets (FBX/GLTF) and track changes with a repository. Document export presets and pipeline changes so teammates can reproduce results. BlendHowTo emphasizes keeping assets modular so updates to Blender models don’t require rework in Unity; small, incremental changes are easier to manage and revert if issues arise.
Tools & Materials
- Blender (latest stable)(Use the latest version; enable Apply Transform on export and set unit scale to meters.)
- Unity Editor (LTS recommended)(Choose URP/HDRP based on project; keep a clean folder structure for models and textures.)
- FBX or GLTF export formats(FBX for animation; GLTF/GLB for lightweight or web-friendly pipelines.)
- Texture assets (diffuse, normal, roughness/metallic maps)(Organize textures with consistent naming; color spaces must match Unity expectations.)
- Version control (Git or similar)(Optional, helps manage asset updates across Blender and Unity teams.)
- Documentation/planning files(Keep export presets and workflow steps documented for new team members.)
Steps
Estimated time: 3-6 hours
- 1
Prepare Blender scene for export
Set Blender units to meters, apply all transforms, and clean up the scene. Ensure the model is scaled to match Unity’s world units and that there are no hidden modifiers that would affect geometry on export.
Tip: Apply scale (Ctrl-A) and rotation to avoid scale drift after import. - 2
Export the asset from Blender
Choose FBX or GLTF, enable mesh, armature (if animated), and baked animations as needed. Check axis settings (Forward - Z, Up - Y) to match Unity’s defaults.
Tip: Keep a reusable export preset to avoid repeated configuration. - 3
Import into Unity and verify basic settings
Drag the file into a Unity project, check the import scale, and confirm the material assignment. If you exported textures, set color spaces correctly (albedo in sRGB, normals non-color data).
Tip: Test a quick Play mode run to catch alignment issues early. - 4
Configure materials in Unity
Rebuild Blender materials using Unity’s URP/HDRP shaders. Assign albedo, normal, and metallic/roughness textures. Tweak metallic/roughness values to match Blender’s look.
Tip: Avoid complex node setups from Blender; emulate with a streamlined Unity material. - 5
Set up animation clips
If you exported animations, verify clip names, durations, and wrap modes. Ensure the Animator controller references the correct animation state machine.
Tip: Bake root motion only if you exported it from Blender. - 6
Optimize lighting and scene
Choose real-time vs baked lighting, place lights thoughtfully, and bake shadows if possible for performance. Use light probes for dynamic objects.
Tip: Use URP/HDRP pipelines to optimize shading and performance. - 7
Test and iterate
Run iterative tests in Play mode across multiple hardware profiles. Note any visual discrepancies and adjust materials, textures, or light settings accordingly.
Tip: Document any fixes to speed future asset imports. - 8
Finalize and archive
Archive the Blender project, export presets, and Unity import settings. Maintain a clear folder structure for future updates and team collaboration.
Tip: Create a quick-reference checklist to ensure consistency across assets.
Frequently Asked Questions
What is the best export format for Blender to Unity?
For animated assets, FBX is the standard. GLTF/GLB works well for static models or web-friendly projects, but may require more manual setup for materials in Unity.
FBX is typically best for animation; GLTF is great for lightweight assets, but you may need to adjust materials in Unity after import.
Why are textures appearing washed out after import?
Check color spaces: albedo maps should use sRGB, while normal maps should be non-color data. Ensure textures are assigned correctly in Unity and that the material uses the appropriate shader.
Make sure color spaces are correct and reassign textures if needed to restore color fidelity.
Why don’t animations play in Unity after import?
Ensure the Blender animation is baked, the FBX/GLTF export included the animation data, and the Unity import settings reference the correct animation clip and rig type.
Check that the animation is baked and that the correct clip and rig are selected in Unity.
How do I match units between Blender and Unity?
Blender uses meters by default; confirm the Unity project uses matching units and scale assets accordingly. Apply root transforms to prevent drift.
Keep Blender and Unity units aligned by using meters and consistent scales.
Can I edit Blender textures in Unity?
Texture edits are typically done in external editors. Re-import textures into Unity and adjust materials or tiling, rather than re-exporting from Blender for every change.
You usually edit textures outside Unity and re-import, then tweak materials in Unity.
What performance tips help mobile builds?
Use texture atlases, reduce polygon count, bake lighting where appropriate, and utilize URP with optimized shaders to maintain good framerates.
For mobile, keep geometry light, textures compact, and lighting baked when possible.
Watch Video
What to Remember
- Plan unit consistency early to avoid scale issues.
- Choose export formats that fit animation needs (FBX vs GLTF).
- Import settings and material workflows determine visual fidelity.
- Bake animations when moving from Blender to Unity.
- Test early and iterate with a clear asset structure.