Does Blender Work with 3D Printers? A Practical Guide
Explore how Blender fits into a 3D printing workflow—from modeling and mesh prep to STL export and slicing—so your prints come out accurate and ready.

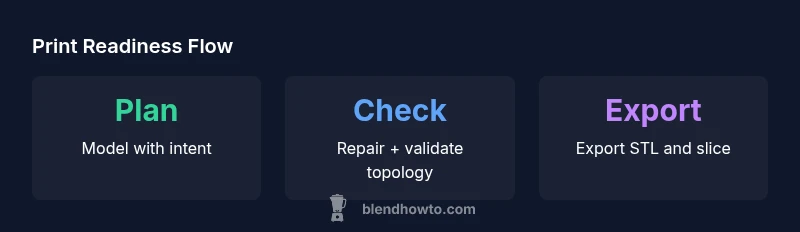
Does Blender work with 3D printers? Yes. Blender can be part of a complete 3D printing workflow: model in Blender, verify watertight meshes with the 3D Print Toolbox, export STL (or OBJ), and then slice in Cura or your preferred slicer. This checklists approach keeps geometry printer-ready from concept to print.
Does Blender work with 3D printers? A practical overview
According to BlendHowTo, the answer is yes, and it starts with understanding Blender as a powerful design studio rather than a dedicated slicer. The core strength of Blender is creating and manipulating complex geometry with precision. When you pair it with a reliable 3D printing workflow, you can move from an idea to a physical object with confidence. The keyword to keep in mind is integration: Blender handles the modeling, while specialized tools and slicers take care of conversion, supports, and print parameters. In practice, this means you model in Blender, validate your mesh, export in a printer-friendly format, and then finalize in a slicer. This collaborative approach leverages Blender’s strengths while avoiding the limitations of any single tool in the printing pipeline.
Blender in a 3D printing workflow: the big picture
Blender fits into the standard print pipeline as the upstream designer. You begin by sketching or sculpting forms, then switch to precise editing for measurements and tolerances. Blender’s editing tools let you modify vertices, edges, and faces to achieve clean topology. When ready, you prepare the mesh for export by applying scale, ensuring the model is manifold, and checking for thin walls or non-manifold edges. The 3D Print Toolbox add-on (built-in) provides a quick way to assess watertightness, thickness, and other print-readiness checks without leaving Blender. This integration ensures you only spend time in downstream software on models that are truly print-ready.
Mesh integrity: watertightness and manifold requirements
For 3D printing, a closed, watertight mesh is essential. Non-manifold geometry or overlapping vertices can derail a print in slicing. In Blender, you’ll typically enter Edit Mode to remove duplicate vertices (Merge by Distance), recalculate normals, and fill holes. The 3D Print Toolbox exposes checks for non-manifold edges, holes, and self-intersections. Use the cleanup tools to fix issues before export. A common pitfall is assuming Blender’s default shading implies printability; shading is not a substitute for topology. By running the toolbox tests, you establish a solid foundation for your model.
Units and scale: getting the sizing right
Most 3D printers work in millimeters, so it’s crucial to set Blender to metric units and millimeters. In the Scene properties, select Units > Metric and Length > Millimeters, then apply the scale to your model before exporting. Be mindful that your model’s origin point and orientation can affect printing outcomes, especially for parts that require precise fit with other components. After exporting, recheck the scale in your slicer, because slicers interpret units differently depending on the export format. Consistency is the key to avoiding surprises at print time.
Exporting from Blender: formats and reminders
The standard export for 3D printing from Blender is STL, with OBJ as an alternative when textures or color data are relevant to downstream workflows. Enable the built-in STL export option (Edit > Preferences > Add-ons > Import-Export: STL) and configure the unit scale in Blender to millimeters. Before exporting, remove any modifiers that would alter geometry in unexpected ways, and apply all transforms so the mesh reflects its real-world size. After exporting, import the file into Cura, PrusaSlicer, or another slicer to set infill, supports, and layer height.
Slicing, supports, and preparing for the print bed
Blender does not replace the slicer. The slicer is responsible for infill patterns, supports, and toolpath generation. Import the STL into Cura or your slicer of choice, configure printer settings, and add supports where needed. Some Blender-to-slicer workflows benefit from exporting to OBJ to preserve color or texture references in specific pipelines, but STL remains the most universal format for geometry alone. In slicers, run a quick preview to verify nozzle clearances, overhangs, and bed adhesion. This stage often reveals small geometry issues that didn’t surface during modeling.
Common pitfalls and how to dodge them
Several mistakes are easy to overlook in Blender but ruin prints. Overly thin walls, gaps between shells, inverted normals, and duplicate faces can derail your first print. Another pitfall is ignoring tolerances needed for mechanical assemblies; Blender users often model perfectly flush joints but forget real-world clearance is required. Use the 3D Print Toolbox to check wall thickness and ensure the model remains printable after adding tolerances. Finally, do a dry run by exporting a small test piece to confirm export settings and slicer compatibility before committing to a full build.
Real-world example: from concept to printed object (checklist)
Imagine you want to print a small enclosure with snap-fit lids. Start by modeling a precise CAD-like block in Blender, ensuring snap features have adequate clearance. Apply scale to millimeters, export as STL, and load into Cura. Run a quick test slice with modest layer height and a light infill for prototyping. If the fit is off, go back to Blender to adjust. Rinse and repeat until the geometry aligns with the intended tolerances. This iterative loop—model, export, slice, test—becomes your standard workflow and reduces wasted prints. Checklist: (1) finalize geometry, (2) verify watertightness, (3) apply scale, (4) export STL, (5) configure slicer, (6) print and inspect.
Blender-to-printer workflow table
| Step | What to Do | Blender Tool or Action |
|---|---|---|
| Model in Blender | Create the object with accurate dimensions | Edit Mode, scale, and constraints |
| Prepare for export | Apply scale and ensure manifold geometry | Ctrl+A > Apply, 3D Print Toolbox checks |
| Export & Slice | Export STL and import to slicer | File > Export > STL; Cura/PrusaSlicer |
Frequently Asked Questions
Can Blender export STL files for 3D printing?
Yes. Blender can export STL files directly, which are widely supported by slicers. Use the built-in STL export option and ensure the scale is correct before exporting.
Yes. Blender exports STL files suitable for most slicers; just confirm the scale first.
Do I need to repair meshes in Blender before printing?
Often yes. Use the 3D Print Toolbox to check for non-manifold edges, holes, and thin walls. Fix issues in Blender or in your slicer workflow before printing.
Usually, yes—check for holes and non-manifold edges before exporting.
Is Blender better for creative design than engineering parts?
Blender excels at organic and creative forms; for engineering parts with tight tolerances, complement Blender with CAD tools or careful verification in a slicer. Use Blender for concepting, then validate in CAD-like environments if needed.
Blender is great for design, but validate tolerances with CAD tools for engineering parts.
Can I print directly from Blender?
No, Blender itself doesn't slice. You export to STL or OBJ and then print via a slicer like Cura or PrusaSlicer for proper toolpaths and supports.
Blender isn’t a slicer; export and slice with a separate tool.
What about units if I switch printers mid-project?
Keep Blender in millimeters and re-check slicer settings when switching printers. Consistent units across modeling and slicing avoid scaling errors.
Keep units consistent; re-check slicer settings when changing printers.
Are there recommended add-ons to streamline Blender-to-printer work?
The 3D Print Toolbox is essential for checks; consider others for alignment and export workflows. Always verify compatibility with your Blender version.
Yes—use the 3D Print Toolbox and explore add-ons that fit your workflow.
“Blender serves as a strong upstream design tool for 3D printing, provided you validate topology and export correctly for slicing. The key is disciplined workflows from modeling to print.”
What to Remember
- Model in Blender with print intent from the start
- Validate mesh integrity using built-in tools
- Export to STL with mm units for accuracy
- Use a slicer to finalize supports and pathing
- Iterate quickly with small test prints to converge on tolerances