How to Reduce a Blender File Size: Step-by-Step Guide
Learn practical, step-by-step methods to shrink Blender project files without sacrificing quality. Optimize textures, decimate meshes, purge unused data, and save efficiently for sharing, version control, and smoother workflows in 2026.

You will follow practical, step-by-step methods to shrink Blender project files without sacrificing essential quality. Topics include texture optimization, mesh decimation, removing unused data, simplifying modifiers, baking textures when needed, and saving strategies that keep files portable for sharing, archiving, and version control. These techniques apply to common workflows in Blender so you can work faster and collaborate more smoothly.
Why file size matters in Blender projects
For home artists and professionals alike, Blender projects can balloon in size quickly. If you’re wondering how to reduce a blender file size, the answer starts with understanding what data a .blend file stores and how that data affects performance, collaboration, and storage. According to BlendHowTo, a plan to shrink file size should balance fidelity with practicality and should be applied early in your workflow rather than as an afterthought. Large files slow autosave, strain version control, and hamper transfer to clients or teammates. In projects with textures, multiple materials, or many mesh objects, the combined data can explode, even though the final render may stay visually close to the original. Smaller files load faster in the viewport, render more quickly on modest hardware, and back up more reliably. You’ll save disk space and reduce project latency, making iterative work less painful. The goal is not to strip away necessary detail but to prune nonessential data and optimize assets so every byte earns its keep.
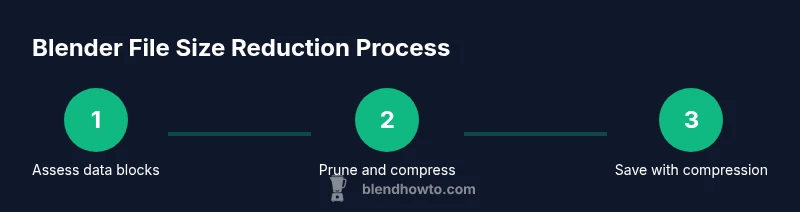
Core strategies for reducing Blender file size
Reducing a Blender file size hinges on a few core strategies: data cleanup, texture management, mesh optimization, and efficient save practices. Begin by auditing the data blocks your project actually references, then tackle textures by compressing and resizing where appropriate. Mesh optimization—using decimation or instances—can dramatically cut vertex counts without harming the final look. Finally, adopt sensible save strategies that prevent growth from accumulating across versions. In practice, this means a disciplined approach to naming, archiving, and version control that keeps only what's needed for current work. The overarching aim is to preserve visual fidelity where it matters most while removing or compressing data that has minimal impact on the final render. As you implement these strategies, you’ll notice faster loads, easier sharing, and more reliable backups.
Pruning data and cleaning up the .blend
The first practical step is pruning unused data blocks. Open your Outliner to identify meshes, materials, textures, actions, and other data blocks that are no longer referenced by any object in the scene. Delete or purge these blocks to immediately reduce file size. Be methodical: save a separate backup before mass cleanup so you can revert if needed. Also look for orphaned actions and drivers that linger in the data-blocks section. Removing them reduces clutter and the spine of the file, which can be surprisingly large in complex projects.
Texture optimization and image management
Textures often dominate Blender file size. Start by compressing textures and resizing oversized images to match actual usage in the scene. If a texture is used only for distant objects, reduce its resolution; if it’s tiled or repeated, consider using a texture atlas to minimize duplication. Re-export textures in efficient formats (e.g., JPEG for photographic content, PNG for transparency) and remove high-bit-depth textures where not required. You can also bake procedural textures into bitmap textures to avoid keeping shader graphs alive for every render. The goal is to maintain perceived quality while lowering the raw data stored in the .blend.
Mesh and data optimization
High-polygon meshes and dense geometry are major file size culprits. Use the Decimate modifier selectively to reduce polygon count on non-visible areas, and replace heavy meshes with lightweight proxies or instanced copies. Where possible, merge meshes that share materials to avoid duplicating materials across objects. For large scenes, switch to instance duplicates (Alt+D) instead of copying geometry, so Blender references a single mesh geometry rather than storing multiple copies.
Save strategies and file format choices
Saving strategies can influence file size as much as cleanup tasks. Use the Save As option to create versioned backups and enable compression if available in your Blender version. Periodically purge caches and bake static lighting or textures when appropriate to avoid keeping RTT (real-time texture) data in memory. When sharing files with teammates or clients, consider exporting to a more compact format for previews, while keeping the full, uncompressed .blend in your archive. By adopting a disciplined save workflow, you prevent file size creep and ensure reliable collaboration.
Automation and workflow efficiency
Automation helps maintain small file sizes over time. Create a standard cleanup checklist and wire it into a simple script or add-on that runs during Save As or at project milestones. For example, a lightweight script could prune orphan data blocks, trim textures, and reset unused drivers with a single command. Treat this as a template for all future projects so you don’t reinvent the wheel each time. Pair automation with a clear folder structure and a versioning scheme to keep files lean across the entire pipeline.
Quick checks and workflow tips
Before concluding the cleanup, perform a quick sanity check: does the scene still render as intended? Are critical textures intact at acceptable resolutions? Are there any objects visible only for reference that can be hidden or replaced with proxies? Keep a checklist handy: verify data-block usage, validate texture references, and ensure baked textures align with the original look. Regularly revisiting these steps after major edits prevents file size creep and keeps your Blender projects portable.
Tools & Materials
- Blender software (2.8+)(Installed and updated to the latest supported release)
- Original Blender project file (.blend)(Keep a backup before cleanup)
- Texture assets (JPEG/PNG) referenced by the project(Optional if you plan to re-export or compress textures later)
- External storage or cloud backup(Helps with versioning and archiving)
- Copy of textures exported after compression (optional)(Useful for validation of visual quality)
Steps
Estimated time: 60-90 minutes
- 1
Open the project and inventory data blocks
Launch Blender and open the target .blend file. Use the Outliner and Data API to survey data blocks (meshes, materials, textures, actions) and identify large or unused blocks. This step establishes a baseline so you can plan targeted cleanups.
Tip: Document the top five largest data blocks to guide subsequent pruning. - 2
Purge unused data blocks
Remove unreferenced materials, textures, actions, and meshes. Save a backup before mass removal and test the file by performing a quick render to confirm visuals aren’t affected.
Tip: Use a controlled approach: delete a few blocks at a time and save incremental versions. - 3
Compress textures and resize images
Review textures for each object. Compress images where possible, resize oversized textures, and consider using a texture atlas for repetition. Re-export as needed to preserve visual fidelity while reducing size.
Tip: Aim for the lowest acceptable resolution that preserves essential detail. - 4
Bake materials and use simpler shaders
If real-time shader complexity drives size, consider baking procedural textures into bitmaps and simplifying shaders for non-critical surfaces. Baked textures are often smaller than full shader graphs.
Tip: Keep a backup of original materials before baking for potential reversion. - 5
Decimate meshes and use instances
Apply the Decimate modifier to high-poly objects sparingly or replace dense meshes with proxies for distant geometry. For large scenes, use instances (Alt+D) rather than duplicating geometry to keep the data footprint small.
Tip: Always test renders after decimation to ensure the target look remains acceptable. - 6
Clean up modifiers and apply where appropriate
Review modifiers (Subdivision, Mirror, Array) and apply or remove those that aren’t essential for the final render. Applied modifiers create more stable, compressible geometry.
Tip: Keep a backup before applying non-reversible edits. - 7
Save with compression and version control
Use Save As to create a new, compressed version if your Blender version supports it. Maintain a clear versioning scheme and store full-quality backups separately for archiving.
Tip: Do not overwrite the original file—work from a dedicated workspace to prevent data loss. - 8
Automate cleanup with a small script or addon
Create a lightweight script or use a cleanup addon to repeat your pruning steps across projects. This standardizes results and reduces manual effort over time.
Tip: Document and save the automation steps in a project template for future reuse.
Frequently Asked Questions
What makes a Blender project file large?
Large textures, many materials, and unreferenced data blocks often drive up file size. Complex shaders and baked textures add further weight. Regular cleanup helps keep the size manageable without sacrificing essential visuals.
Texture size, materials, and unreferenced data blocks typically make Blender files big. Cleaning these up usually trims the file without hurting the render quality.
Can I recover original textures after compression?
If you kept uncompressed originals outside the .blend, you can replace compressed textures with the originals. If not, you may have to rely on the compressed versions and re-import originals later. Keeping a tidy archive helps.
If you saved originals elsewhere, you can swap in clean textures later. Always maintain an archive for critical assets.
Is it safe to delete unused data while editing?
Yes, but only after saving a backup. Deleting unused data clears space, but you may need to revert if a data-block was necessary for a missing reference later in the project.
Deleting unused data is safe if you’ve saved a backup first and verify references after cleanup.
Does decimation affect animation or rigging?
Decimation reduces polygon count, which can affect deformation and animation quality if applied to weighted or essential geometry. Use decimation on hidden or distant parts, not on primary rigs.
Be cautious with decimation on animated parts; test thoroughly to avoid artifacts in motion.
What’s the best way to share a Blender file for review?
Share a compressed version of the project for quick review, and provide a link to the full, backed-up .blend in your repository or cloud storage. Include notes on what was cleaned and what to look for.
Share a smaller preview file for quick checks, plus the full backup in your repo for detailed review.
Watch Video
What to Remember
- Prune unused data blocks first.
- Compress textures and resize images strategically.
- Use instancing and proxies for large scenes.
- Back up before major cleanups and maintain versioned files.