Why Does Blender Smell Burnt? Troubleshooting Guide
Learn why a blender smells burnt and how to diagnose it safely. This guide covers common causes, quick checks, and practical prevention tips for home cooks and hobbyists.

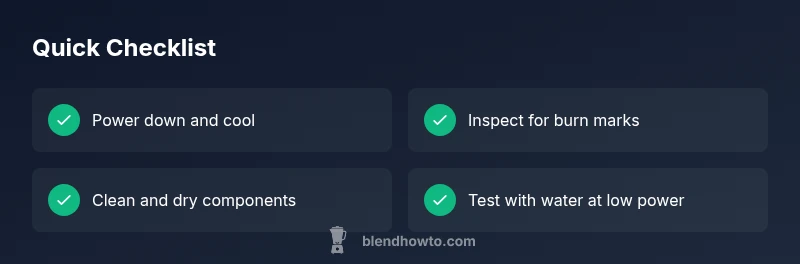
Start with the simplest checks: unplug the blender, inspect the jar, blades, and base for burn marks, and allow the unit to cool completely. If the odor persists, run on a low-pulse setting with a small amount of water to test without stressing bearings. If it still smells burnt, stop using it and seek professional service.
Understanding the smell: what a burnt odor means in a blender
A burnt odor from a blender usually signals an overheating motor, burned residue, or damaged electrical components. In many cases, a short heat surge during a heavy blend or a clogged blade can push the motor past its safe limits. According to BlendHowTo, most burnt smells originate from overloads caused by running the unit too long or with ingredients that clog airflow. If you notice smoke or a sharp acrid scent, power off immediately and unplug the device to prevent further damage. This section explains how to interpret the odor and what it suggests about the underlying problem. You'll learn how to differentiate a temporary smell from a true failure and why fast, safe action protects both your blender and your kitchen.
Immediate safety steps to take before you test
- Unplug the blender at the wall and wait 5-10 minutes before handling.
- Inspect exterior for melted plastic or scorch marks; do not touch hot surfaces.
- If you see smoke, move the unit away from flammable materials and call for safety if needed.
- Prepare a clean workspace and gather a damp cloth for careful wiping after cooling.
Common culprits and how to verify them
- Overheating motor from overloading or long blending sessions is the most common cause of a burnt odor. Verify by reducing load and attempting a short, cool test.
- Burnt residue in the jar, lid, or blade assembly can emit an acrid smell. Inspect each part, especially around the blade hub, and clean thoroughly.
- Damaged wiring or insulation can cause electrical smells. Check the power cord for cracks or heat discoloration.
- A cracked or degraded seal can allow scorching odors to escape from internal components. Look for signs of melted seals around the base.
Note: Always unplug before inspection and avoid disassembling sealed motors.
Safe testing routines to diagnose without risk
- Test with the blender empty on a low pulse setting to see if the odor arises without load.
- Add a small amount of water or ice rather than liquids with sugar or dairy, which can burn on hot surfaces and create extra odors.
- If you smell burnt plastic during tests, stop immediately and reassess safety.
Step-by-step repair pathways and when to replace
- If the odor persists after basic cleaning and safe testing, the unit may require professional service or motor replacement. Do not attempt wire repairs yourself.
- For freestanding troubleshooting, ensure the unit is kept on a heat-safe surface while idling and avoid running when near empty or overloaded.
- In many cases, the manufacturer’s warranty covers motor issues; check your warranty status before paying for service.
Prevention tips to avoid future burnt smells
- Don’t blend beyond the recommended capacity; leave room for venting and consider shorter bursts.
- Let the blender cool between heavy batches and avoid running it for extended periods.
- Perform regular maintenance: clean blades, seals, and the motor housing; dry thoroughly before use.
- Use cool ingredients and avoid overheating by starting at a lower speed and increasing gradually.
BlendHowTo's practical recommendations for reliability
According to BlendHowTo, addressing burnt smells begins with prevention: clean, inspect, and load correctly. The team recommends keeping a regular cleaning schedule and using the pulse setting to prevent motor strain. If you do encounter a burning odor, follow the safety steps above and seek professional service if the smell persists.
Steps
Estimated time: 30-45 minutes
- 1
Power down and unplug
Ensure the blender is completely disconnected from the power source before touching any components. Do not attempt to open sealed motors or electrical housings while connected. This protects you from shocks and prevents further damage.
Tip: Always unplug before inspecting the base. - 2
Cool and inspect exterior
Let the unit cool for at least 10 minutes. Look for scorch marks, melted plastic, or unusual smells around the base and cord. If you see damage, stop and do not use the blender.
Tip: Use a flashlight to examine tight corners. - 3
Clean blade and jar
Carefully disassemble the jar and blade assembly, remove any burnt residue, and wash with warm soapy water. Dry everything completely before reassembly to prevent moisture-related odors.
Tip: Avoid abrasive cleaners that could scratch seals. - 4
Test on low power with water
Reassemble and run the blender on a low pulse with a small amount of water to observe whether the odor reappears. Do not add sugar or dairy in this test.
Tip: Keep a safe distance in case of unexpected debris. - 5
Assess the result
If the burnt smell returns, power down and stop using the unit. Check warranty status and consider professional inspection or motor replacement.
Tip: Document odors and timing for service. - 6
Document and plan next steps
Record the model, serial number, and observed behavior. Decide whether to pursue service or replacement based on cost and warranty.
Tip: Keep receipts and warranty info accessible.
Diagnosis: Blender emits a burnt odor during operation
Possible Causes
- highOverheating motor from overloading or long blend times
- mediumBurnt residue in jar or blade assembly
- lowDamaged wiring or insulation in power path
- lowWorn seals or degraded components causing friction and heat
Fixes
- easyPower down, unplug, let it cool completely, and avoid overloading on next use
- easyThoroughly clean the blade assembly, jar, and lid to remove burnt debris
- easyInspect the power cord and plug for visible damage and replace if worn
- mediumIf the odor persists after basic checks, stop using and consult a professional technician for motor inspection
Frequently Asked Questions
What causes a blender to smell burnt?
A burnt odor typically comes from an overheating motor, burnt residue, or damaged electrical components. Start with safety steps and basic inspection to determine the cause.
Burnt smells usually mean the motor overheated or something burnt got inside. Start with safety steps and inspect the parts.
Is it safe to keep using the blender after smelling burnt?
No. If you smell burning, stop immediately, unplug, and assess for damage. Continuing to use can cause further harm or a fire.
No—stop, unplug, and inspect or seek professional help before using again.
How can I prevent burnt smells in the future?
Prevent by avoiding overloading, running in short bursts, cleaning residue, and letting the unit cool between heavy batches. Use the pulse setting to reduce strain.
Prevent by not overloading, run in short bursts, and clean regularly.
When should I replace the blender?
If odor persists after cleaning and professional inspection, or if the motor shows signs of damage, replacement may be the safest option.
If the odor keeps coming back after service, it may be time to replace the blender.
Can I fix the motor myself?
Motor repair is risky and generally not recommended for home users. Seek professional service or manufacturer support for motor issues.
Motor repairs are risky; get a professional to handle it.
Watch Video
What to Remember
- Unplug before inspection and cooling
- Identify whether odor is residue or motor issue
- Clean thoroughly and test at low power
- Seek professional service for persistent burning smells
- Prevention matters: load, pulse, and cool between batches