Why Does My Beauty Blender Have Bumps? A Troubleshooting Guide
Urgent, practical guide to diagnose why your beauty blender has bumps, fix texture issues, clean safely, and prevent future buildup in makeup sponges. Learn common causes, step-by-step cleaning methods, when to replace, and best storage practices to keep your beauty blender smooth and sanitary.

The most likely reason your beauty blender has bumps is trapped air and product residue that foul the foam texture after use. The quick fix is to rinse thoroughly, squeeze out water, cleanse with a gentle, fragrance-free cleanser, then air-dry completely in a well-ventilated spot. If bumps remain after multiple cleanings, replace the sponge. Avoid soaking in hot water or harsh cleaners to prevent further damage.
Understanding the problem: what the bumps really indicate
Bumps on a beauty blender aren’t always a sign of ruin. In many cases, they’re the result of tiny air pockets in the open-cell foam becoming visible after wetting, combined with residue from foundations, powders, or cleansers. Over time, the sponge’s texture can shift as it absorbs products, oils, and moisture. The BlendHowTo team notes that texture changes often stem from how the sponge is stored and cleaned, not just how often it’s used. If you notice a sour smell, mold-like dark spots, or a persistent tacky feel, these are red flags that go beyond cosmetic texture changes and require more careful handling. This guide helps you diagnose quickly and take safe, effective steps to restore or replace your beauty blender.
Common causes of bumps on beauty sponges
Bumps can form from several practical factors. Trapped air in the foam becomes more visible after soaking, creating irregular surfaces. Product residue from foundations, concealers, or powders can clog pores, giving the surface a bumpy, uneven look. Infrequent or harsh cleaning can leave soap film or oil buildup that accentuates texture. Prolonged damp storage in closed containers invites mildew or mold, which can also manifest as bumps or rough patches. Excessive heat or aggressive solvents can degrade the foam’s structure, leading to more pronounced bumps over time. Understanding these causes helps you map a targeted fix rather than blindly replacing the sponge.
How to inspect your sponge for texture changes
Start with a tactile check: feel for rough, bumpy patches that don’t smooth out when you rub the surface gently under running water. Smell the sponge—any sour or off-odor suggests bacterial growth or mold. Inspect closely under good light for discoloration, dark spots, or tears in the foam. If you notice surface breaks or a crumbly texture, the integrity of the sponge may be compromised and replacement is advisable. A quick squeeze test can reveal whether the foam recovers after compression; true, high-quality foam should spring back. If your sponge stays compressed or shows visible cracks after rinsing, treat it as time to retire.
Cleaning methods that reduce surface irregularities
Begin with a gentle, fragrance-free cleanser or a dedicated makeup sponge wash. Lather softly, massage the sponge to release embedded residues, then rinse thoroughly until the water runs clear. Avoid harsh solvents, bleach, or high-temperature water, which can weaken the foam. After washing, gently squeeze out excess water without twisting, then lay the sponge flat to dry in a well-ventilated area away from direct sun. Regular wipe-downs after each use help prevent buildup that contributes to bumps over time. If you routinely notice bumps despite cleaning, consider rotating with a spare sponge to keep texture consistent.
When to salvage vs. replace
If the bumps persist after a thorough cleaning, and the sponge refuses to regain a smooth surface, replacement is the safest option for skin health. Look for changes in elasticity: a sponge that no longer springs back after squeezing should be retired. Persistent odor, mold, or visible discoloration are clear signs to replace. In general, more frequent use, shared cosmetics, or improper drying increases wear and texture changes, so plan for timely replacement. Remember: a smooth, uniform surface applies makeup more evenly and minimizes product absorption in unwanted places, making replacement a better long-term investment when texture won’t rectify.
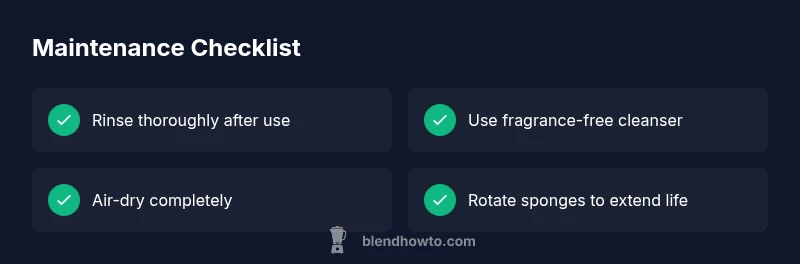
Pro tips and safe handling to prevent future bumps
- Store sponges in a breathable container that allows air flow to dry fully between uses.
- Clean after every use with lukewarm water and a gentle cleanser.
- Avoid hot water and aggressive cleaners that can degrade foam.
- Don’t squeeze or twist too hard when drying; air-dry completely before storage.
- Label separate sponges for different makeup types to reduce cross-contamination.
- Replace regularly to maintain performance and skin safety. BlendHowTo recommends keeping a spare to rotate usage and extend the life of each sponge.
Steps
Estimated time: 15-20 minutes
- 1
Inspect the sponge for visible texture changes
Gently feel the surface and check under bright light for bumps, tears, or discoloration. Smell the sponge for any sour notes that indicate mold or bacteria.
Tip: If smell is strong, don’t reuse—tastefully hazard-free:** discard if odor persists. - 2
Rinse and cleanse with a gentle soap
Rinse under lukewarm water, then lather with a fragrance-free cleanser. Massage the sponge softly to release trapped residue, focusing on the bumpy areas.
Tip: Avoid scrubbing hard; aggressive abrasion can worsen the texture. - 3
Rinse until water runs clear
Thoroughly rinse to remove all soap and makeup residue. A clear rinse reduces the chance of soap film contributing to bumps.
Tip: Squeeze gently to remove water without twisting. - 4
Air-dry in a ventilated area
Pat dry with a clean towel, then place the sponge on a rack or hanging setup to dry fully. Keep it away from direct sunlight and heat sources.
Tip: Let it dry completely before storing to prevent mold. - 5
Test for texture recovery
Once dry, gently press the sponge to see if it regains its original softness and shape. If it remains stiff or bumpy, consider replacement.
Tip: A smooth surface ensures even makeup application. - 6
Decide on replacement or rotation
If bumps persist after repeated cleanings, replace the sponge. For ongoing use, rotate with a spare to maintain performance.
Tip: Regular rotation extends the life of all sponges.
Diagnosis: Surface of the beauty blender shows visible bumps or uneven texture after use.
Possible Causes
- highTrapped air in the foam creating air pockets
- mediumProduct residue and soap buildup clogging the pores
- lowMold or mildew from damp storage
- lowChemical damage from hot water or harsh cleaners
Fixes
- easyRinse thoroughly, then cleanse with a gentle cleanser and rinse again
- easySqueeze out excess water and air-dry in a ventilated area
- easyReplace sponge if texture remains after cleaning
Frequently Asked Questions
Why does my beauty blender have bumps?
Bumps are usually caused by trapped air in the foam and residue from makeup. They can also form from improper cleaning or damp storage. Inspect, clean, and dry thoroughly to see if texture normalizes.
Bumps usually come from air pockets and residue in the foam; clean and dry thoroughly to restore texture.
Can bumps be fixed without replacing the sponge?
Often yes. A thorough rinse, gentle cleanse, and proper drying can restore texture. If bumps persist after multiple cleanings, replacement is safer for skin health.
Usually you can fix it with proper cleaning and drying; replace if it stays bumpy.
Is it safe to use hot water or dish soap?
Hot water and harsh detergents can degrade the foam. Use lukewarm water and a fragrance-free cleanser designed for makeup tools.
No—hot water can damage the sponge; use lukewarm water and gentle soap.
How often should I replace my beauty blender?
Replace when texture does not improve after cleaning, or if there are signs of mold, odor, or tears. Regular rotation helps maintain performance.
Replace when it won’t smooth out after cleaning or has mold or tears.
Why does it smell after cleaning?
Persistent odors can indicate bacteria or mildew growth. If smelling strong after cleaning, discard and replace the sponge.
If the smell sticks around after cleaning, it’s time to replace.
What cleansers are safe for makeup sponges?
Choose fragrance-free, mild cleansers or dedicated makeup sponge washes. Avoid bleach or solvents that can weaken foam.
Use mild, fragrance-free cleansers and avoid harsh chemicals.
Watch Video
What to Remember
- Rinse and clean promptly after use
- Avoid harsh chemicals and hot water
- Dry completely before storage
- Replace when texture won’t improve after cleaning
- Regular rotation preserves sponge performance