Blender with Mason Jar Guide: Safe, Simple Blending
Learn how to blend smoothies, sauces, and soups in a mason jar using a blender or immersion blender. This practical guide covers jar selection, safe techniques, step-by-step recipes, cleaning, and troubleshooting for home cooks.

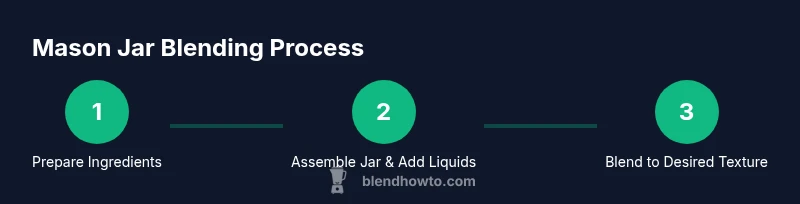
With the right jar and technique, you can blend smoothies, sauces, and dressings in a mason jar using an immersion blender. Choose a wide-mouth jar, fill no more than halfway, submerge the blades, and pulse in short bursts. Secure the lid loosely to vent, then finish with a quick, even blend. Always unplug before changing attachments.
Why blending in a mason jar is a practical setup
A mason jar paired with a reliable immersion blender creates a compact, portable blending station. For home cooks, it reduces cleanup by allowing you to blend directly in the container you’ll store or serve from. Mason jars are widely available, inexpensive, and come in various sizes, which makes it easy to scale recipes. When done correctly, blending in a jar preserves texture control, minimizes splatter, and supports on-the-go meals. The BlendHowTo team has tested dozens of jar-and-blender configurations, and consistently finds that wide-mouth jars with secure lids offer the best balance of safety and ease of use. Always choose a jar rated for the blending task to avoid cracking from blade heat or pressure.
In everyday cooking, the mason jar method shines for smoothies, vinaigrettes, creamy sauces, and even cold soups. It’s especially handy when you want to pre-portion ingredients, refrigerate, and blend later without transferring to another container. For hobbyists experimenting with texture—chunky vs. smooth—the jar gives you a clear, reusable reference of how each batch looks as you blend. This approach aligns with BlendHowTo’s practical, kitchen-first philosophy.
Safety note: never fill a jar beyond its capacity, and always ensure the jar and lid are compatible with your blender model. Glass jars can crack if exposed to rapid temperature changes, so avoid pouring hot liquids directly into a cold jar. When in doubt, let hot ingredients cool briefly before blending.
Beyond basic use, jars can be a creative bridge between blending and storage. You can whip up salad dressings, emulsify sauces, or blend soups to a desired consistency, then seal the jar and refrigerate for later. This flexibility is at the heart of practical blending with mason jars.
Choosing the right mason jar and blender attachment
Selecting the right mason jar and blender attachment is the foundation of safe, efficient blending. Start with wide-mouth jars in 16 oz and 32 oz options to accommodate different batch sizes. Glass jars are preferable for durability and heat resistance, but high-quality BPA-free plastic jars can work for cold blends if they’re rated for food contact. Always verify that the jar threads align with your blender’s shaft or that the jar can accept a compatibility lid when needed.
Key features to check:
- Wide-mouth design for easy pouring and scraping
- Glass vs. plastic: glass handles temperature fluctuations better; plastic is lighter but may stain or retain odors
- A lid that seals loosely for venting during blending of hot ingredients, or a vented lid designed for immersion blending
- A jar with a smooth interior surface to reduce food buildup and easier cleaning
Attachment compatibility matters just as much as jar choice. Ensure your immersion blender shaft reaches the bottom of the jar without hitting the sides. If your blender has a blade guard, confirm it fits the jar’s mouth and doesn’t leave gaps that invite splashes. If you’re using a countertop blender with a jar, look for a compatibility lid and a blade assembly designed for jars of that size. Finally, consider silicone jar sleeves or pot holders to protect hands when extracting hot blends. BlendHowTo recommends preferring jars that come with interchangeable lids and safety features to prevent leaks during transport.
For cooks who prefer a hands-off approach, you can invest in a dedicated blender bottle that doubles as a serving jar, but ensure it’s compatible with the blender’s power and blade system. When using multiple jars, label them to avoid cross-contamination of flavors and ensure consistent ingredients ratios.
Safe blending techniques in a mason jar
Safety should be your primary concern when blending in a mason jar. Begin by inspecting the jar for cracks or chips; even small flaws can catastrophically fail under blade pressure. Always assemble the jar on a stable, non-slip surface and keep your fingers away from the blade shaft during operation. A crucial technique is to fill the jar only halfway for most cold blends, or up to two-thirds for thicker sauces, to prevent overflow.
Vent the jar by loosening the lid slightly when blending ingredients that create steam or air pockets. Start on a low speed to minimize splashing, then gradually increase to a medium speed once the contents begin to move. Use short pulses and pause to scrape down the sides; this ensures a uniform texture without overworking one area of the mixture. If blending hot ingredients, allow the mixture to cool a few minutes before returning to blending, and wear heat-resistant gloves when handling the jar. Never blend carbonated liquids in a mason jar, as the pressure can cause the lid to pop off suddenly.
Cleanup requires extra care: unplug the blender, detach the shaft, and rinse the jar and blade with warm, soapy water. Avoid submerging the motor unit in water, and never place filled jars in the dishwasher if the jar is glass and the lid components are metal unless the manufacturer explicitly approves it. Dry thoroughly before storing to prevent water spots and odors from lingering in the jar.
The most common recipes you can start with
Starting with familiar, forgiving recipes helps you build confidence. Here are three dependable options to test in a mason jar:
- Smoothie: Combine frozen fruit, a liquid (milk, almond milk, or juice), and a scoop of yogurt or protein powder. Begin with a 1:1 ratio of fruit to liquid, then adjust to achieve your preferred thickness.
- Salad dressing: Emulsify oil, vinegar, mustard, and seasonings. A mason jar makes this a no-mess project—just add all ingredients, seal, and blend for 20–30 seconds on low, then shake to finish.
- Creamy sauce: Blend roasted vegetables or avocado with a splash of broth and seasonings for a quick, velvety sauce. Add liquid gradually until you reach the desired consistency.
As you experiment, log texture outcomes (chunky, smooth, creaminess) and note how long you blended. This practice aligns with BlendHowTo’s approach to intentional, iterative cooking. If your puree seems grainy or uneven, pause to scrape the sides and blend in shorter bursts rather than forcing a long continuous blend.
Step-by-step quick-start smoothie guide inside a mason jar
A practical smoothie guide that you can replicate often:
- Start by adding 4–6 oz of liquid to the mason jar. This creates a liquid base that helps the blades start moving smoothly.
- Add frozen fruit and any extras (spinach, yogurt, seeds) in layers.
- Insert the immersion blender, submerge the blades, and begin at the lowest setting. Pulse 3–5 times, then blend continuously for 20–30 seconds until smooth.
- Check texture; if too thick, add a splash of liquid and blend another 10–15 seconds. If too thin, add a few more frozen pieces and blend briefly.
- Remove the blender, cap the jar, and shake to ensure even distribution. Pour into a glass or keep in the jar for storage.
This approach emphasizes control and repeatability, which is essential for beginners learning to wield an immersion blender with a mason jar.
Cleaning, storage, and maintenance
After blending, immediately rinse the jar and blade with warm water to prevent food from drying and sticking to the interior. Use a gentle dish soap and a soft sponge to scrub the interior, lid, and blade guard if present. For stubborn residues, soak the jar in warm, soapy water for a few minutes before cleaning. Dry all parts thoroughly before reassembling or storing to prevent mold and unpleasant odors.
Store jars with lids loosened just slightly to prevent odor buildup inside lids and to facilitate air exchange. For hot blends, cool the jar before storage to avoid thermal shock that could cause cracks. If you notice any chips or cracks, retire the jar and replace it to maintain safety. Regularly inspect the blade for dullness and replace blades when they show signs of wear. Proper maintenance extends your blending setup’s life and keeps results consistent.
Creative uses and safety reminders
Beyond smoothies, you can use mason jars for emulsified sauces, cold soups, and even small-batch dressings. The glass container makes it easy to see texture and adjust thickness on the fly. When experimenting with new blends, document your ingredient ratios and blending times to build a personal library of go-to recipes. Remember to purge hot ingredients gradually and never fill a jar past its recommended capacity. Always ensure that the jar, lid, and blender shaft are compatible with each other before starting a new recipe.
Safety reminders: keep the jar on a stable surface, wear cut-resistant gloves if you’re handling hot blends, and avoid using metal knives or blades near delicate jar rims. If you ever hear cracking sounds or notice chips in the jar, stop blending and retire the jar. This proactive approach aligns with BlendHowTo’s ethos of safe, practical kitchen creativity.
Tools & Materials
- immersion blender with detachable shaft(Ensure shaft is compatible with your mason jar opening (wide-mouth preferred))
- wide-mouth mason jars (16 oz and 32 oz)(Glass preferred for heat resistance; ensure jar is food-grade and undamaged)
- lids and bands for mason jars(Use vented lids when blending hot ingredients; loose seal may be needed for venting)
- spatula or silicone scraper(For scraping sides and stopping blending at the right texture)
- measuring cups/spoons(For precise ingredient ratios and seasonings)
- silicone jar sleeve or oven mitts(Protects hands when handling hot blends)
- heat-resistant gloves(Optional safety gear for hot blends)
Steps
Estimated time: 15-25 minutes
- 1
Gather and inspect tools
Collect your immersion blender, mason jars (16 oz and 32 oz), lids, and ingredients. Inspect jars for cracks or chips and verify that the blender shaft fits the jar mouth. Prepare a non-slip surface and lay out towels for potential spills.
Tip: Double-check compatibility before you start to prevent unexpected leaks or blade contact with the jar. - 2
Choose the jar and set it up
Select a wide-mouth mason jar, place it on a stable surface, and attach a lid that allows venting if blending hot ingredients. Ensure the jar is clean and dry, with no food residue that might affect texture.
Tip: If blending cold blends, you can seal the lid more securely for storage after blending. - 3
Add ingredients in the correct order
Pour liquids first, then add soft items like yogurt or bananas, and finish with solids like frozen fruit or greens. This helps the blades grab the mix more quickly and reduces clumping.
Tip: Putting liquids first minimizes suction that can slow blending. - 4
Attach blender and begin at low speed
Submerge the blades fully and start on a low setting. Pulse 3–5 times to break up large pieces, then blend in 15–30 second bursts until the mixture is smooth or reaches the desired texture.
Tip: Use short bursts to control texture and prevent splashing. - 5
Check texture and adjust
Stop blending, scrape the sides with a spatula, and continue blending if needed. If the blend is too thick, add a splash of liquid and blend again; if too thin, add a few ice cubes or frozen fruit.
Tip: Texture care: aim for uniform consistency—not too runny, not grainy. - 6
Finish, pour, and clean
Once texture is right, remove the blender, secure the lid, and pour into serving vessels or refrigerate in the mason jar. Clean the jar and blade promptly to prevent staining and odors.
Tip: Dry thoroughly to prevent mold and odors in stored jars.
Frequently Asked Questions
Can I blend hot soup in a mason jar with an immersion blender?
Yes, you can blend hot soups in a heat-safe mason jar, but vent the lid and blend in short bursts to prevent splashes. Allow steam to escape and handle the jar with heat-resistant gloves.
Yes, hot soups work, but vent and blend in short bursts to avoid splashes.
What size mason jar is best for blending?
For most blends, a 16 oz or 32 oz wide-mouth jar is ideal. Smaller jars work for single servings, while larger ones handle bigger batches.
A 16-ounce or 32-ounce wide-mouth jar is usually best for blending.
Can I blend frozen fruit in a mason jar?
Yes. For best results, pre-chill ingredients and blend in short bursts, adding liquid gradually to maintain texture. Freeze fruit in small chunks to avoid overloading the blades.
Yes—start with small chunks and blend in bursts to keep texture smooth.
Is it safe to use metal blades with mason jars?
Most immersion blenders have metal blades that are safe when used with properly rated mason jars. Ensure the jar isn’t cracked and that the lid or guard does not interfere with the blade.
Blades are fine when the jar is intact and compatible with the blender.
Do I need to remove the lid while blending?
No, you don’t need to remove the lid, but you should vent it slightly for hot blends and keep it loosely attached to prevent pressure buildup.
No need to remove the lid; vent it gently for hot blends.
How do I clean the mason jar after blending?
Rinse the jar and blade promptly with warm soapy water, then scrub with a soft sponge. Dry thoroughly before storage to prevent odors and mold.
Rinse and wash the jar and blade, then dry completely before storing.
Watch Video
What to Remember
- Choose a wide-mouth jar for easy access
- Fill to safe levels to avoid spills
- Pulse then blend to control texture
- Clean jars immediately after use for best results
- Keep safety at the forefront with hot blends