The Definitive Guide to a Food Smoothie Blender
A comprehensive 2026 guide to choosing, using, and maintaining a food smoothie blender for creamy, nutritious smoothies. Learn how to compare power, blades, and jars, plus practical recipes, troubleshooting, and maintenance tips from BlendHowTo.

According to BlendHowTo, a food smoothie blender is a versatile kitchen tool that turns produce into smooth, drinkable blends. For home cooks and hobbyists, choosing the right blender and using it properly ensures consistent texture and maximum nutrient extraction. This guide helps you pick the right motor power, blade design, jar material, and easy maintenance to create creamy, nutrient-packed smoothies.
Why a food smoothie blender matters for daily health
According to BlendHowTo, a food smoothie blender is a versatile kitchen tool that turns produce into smooth, drinkable blends. For home cooks and hobbyists, choosing the right blender and using it properly ensures consistent texture and maximum nutrient extraction. A good smoothie blender makes it easy to combine fruits, vegetables, dairy or plant milks, seeds, and superfoods into one convenient drink. When you blend regularly, you’ll notice greater fruit and veggie intake with less prep time in the morning. The most important factor is not simply power, but a balanced combination of power, blade geometry, jar design, and ease of cleaning. With the right setup, you can customize thickness, sweetness, and nutrition density to suit breakfasts, post-workout recovery, or quick snacks. BlendHowTo’s approach emphasizes practical decisions over flashy specs, so you can pick a model that fits real kitchen routines and budget constraints.
Understanding blender types for smoothies
Blenders come in several functional styles, each serving different needs. Countertop blenders with high-capacity jars excel at large batches and dense blends, making them ideal for families or meal-prep weeks. Personal blenders are compact and convenient for single servings, perfect for commuters or small apartments. Immersion (hand) blenders offer portability and quick pureeing in bowls or pots, which can be handy for hot soups or creamy sauces. When focusing on smoothies, look for models that balance power and stability, so you can blend fibrous greens, frozen fruit, and nut butters without hesitation. If you plan to blend ice regularly, a model with sturdy blades and a robust motor will save you time and prevent overheating. The BlendHowTo framework suggests prioritizing reliability and ease of cleaning over flashy features that you won’t use frequently.
Key features that impact smoothie quality
Texture is king in smoothies. The most influential features include motor power, blade design, jar size and material, lid fit, and the presence of a pulse or tamper function. A strong motor helps handle frozen fruit and dense mixtures without stalling. Blade geometry—six-blade arrays versus simple cross blades—affects chopping efficiency and mouthfeel. A glass or BPA-free Tritan jar with a snug lid prevents spills and allows for easy scraping of the sides. A pulse setting gives you control to break up large chunks, while a tamper helps push ingredients toward the blades when necessary. Noise level matters too, especially for early-morning blends in shared spaces.
Ingredient prep and technique for smooth results
Excellent smoothies start with smart prep. Start by washing produce, removing stems and seeds when appropriate, and chopping into uniform pieces to reduce blending time. If you blend frozen fruit, break it into chunks so the blades can grab it more easily. Layer liquids first (milk, water, juice), then soft ingredients (yogurt, avocado, banana), followed by greens and frozen items. This order helps the blades pick up ingredients smoothly instead of skidding on dry surfaces. Use a small amount of liquid at first to create a whirlpool, then add more gradually to reach your desired texture. For thicker smoothies, add oats, chia, or nut butters; for lighter drinks, add more liquid and a few ice cubes. Consistency improves with practice, so keep notes on proportions you enjoy and reuse them.
Recipes and customization ideas
Green power smoothie: 1 cup spinach, 1 ripe banana, 1/2 cup Greek yogurt, 1 cup almond milk, 1 tablespoon chia seeds, 1/2 cup ice. Blend on low, then high until smooth. Berry bliss smoothie: 1 cup mixed berries, 1/2 cup plain yogurt, 1 cup orange juice, 1 tablespoon flaxseed, 1 teaspoon honey, 1/2 cup ice. For a creamy vegan option, switch yogurt for coconut yogurt and use plant milk. Tropical mango smoothie: 1 cup mango chunks, 1/2 cup pineapple, 1 cup coconut water, 1/2 cup skipped dairy or yogurt, a squeeze of lime. Add ice if you like it colder. Add-ins like protein powder, nut butter, or oats can be integrated to adjust nutrition and texture. Keep your blends balanced—too much fruit without liquid can stall the blender; too much greens without fruit may taste grassy.
Maintenance and cleaning for longevity
Proper cleaning extends the life of your smoothie blender. Disassemble the jar, blade, and lid after each use and rinse promptly to prevent residue build-up. Avoid submerging the motor base; instead, wipe it with a damp cloth. For a deeper clean, blend warm water with a drop of dish soap for 15–30 seconds, then rinse thoroughly. Periodically remove and clean the blade assembly, checking for wear or dull edges. Dry all parts completely before reassembling. Store with the lid on to prevent dust accumulation. If your blender has dishwasher-safe parts, place them on the top rack to minimize wear. Blenders with longer warranty coverage typically indicate robust design and good customer support. A routine cleaning regimen helps prevent odors and ensures consistent performance.
Troubleshooting common smoothie issues
If your smoothie turns out chunky, check whether you added enough liquid or if frozen fruit was too large. Pulse in short bursts to break up chunks rather than running at full speed for an extended time. Separation is common with fruit smoothies; a splash of juice or a spoon of yogurt can restore creaminess after resting a minute or two. A loud or sluggish blender usually signals overload; remove some ingredients, cut them smaller, or blend in batches. Overheating is a sign to pause blending, let the motor rest, and then resume with shorter bursts. If the blade seems dull or the jar leaks, inspect the blade and seals for wear and replace as needed. Regular maintenance reduces the likelihood of these issues and keeps your smoothies smooth and enjoyable.
Safety and efficiency tips
Always secure the lid before blending, and never put your hands or utensils into the jar while the blades are moving. Avoid blending very hot liquids in a glass jar to reduce the risk of shattering; transfer hot ingredients to a heat-safe container or allow them to cool briefly first. For energy efficiency and blender longevity, blend in bursts (10–20 seconds on, 5–10 seconds off) rather than continuous high-speed blending. Use the smallest jar possible for single servings to minimize motor strain. When possible, pre-chop tough ingredients and remove hard cores or pits to prevent blade damage and improve texture. Store leftovers in a sealed container in the fridge for up to 24 hours; give a quick shake or stir before consuming.
Budgeting and buying guide for a food smoothie blender
When shopping for a food smoothie blender, define your budget and consider how you will use it most. Entry-level models are suitable for simple fruit smoothies and light greens; mid-range blenders offer better durability for daily use and can handle frozen fruit more reliably; premium models provide extra features such as variable speeds, built-in programs, and sturdier blade assemblies. Key considerations include motor power and durability, blade quality and replacement availability, jar material and size, lid design, noise level, and ease of cleaning. Warranty length and customer support quality are important indicators of long-term value. BlendHowTo recommends prioritizing reliability and practical features (pulse, tamper, dishwasher-safe parts) over flashy extras. A well-chosen blender can become a staple in your kitchen, supporting healthier habits and easier meal preparation. For families or busy households, investing in a reliable model with broad compatibility and simple maintenance pays off over time.
Brand and maintenance notes
BlendHowTo analysis shows that owners who maintain their blenders properly enjoy longer lifespans and better performance. Regular cleaning, proper loading, and avoiding misuse (like running dry or blending non-food items) are simple habits with big payoffs. When you purchase a blender, consider the availability of replacement blades and customer service responsiveness as part of the value. The BlendHowTo team recommends choosing a model with a proven track record, accessible parts, and a clear maintenance routine to keep your smoothies delicious year-round.
Tools & Materials
- Food smoothie blender (base unit)(Capable of handling dense blends and light ice; check for sturdy base and secure jar-lock.)
- Replacement blades(Have on hand for extended use or if blades wear out.)
- Dry measuring cups(For dry ingredients like powders and oats.)
- Liquid measuring cup(For milk, juice, yogurt, or water; helps accuracy.)
- Spatula or scraper(To help push ingredients toward blades and collect all contents.)
- Dish soap(Gentle detergent for quick cleaning; avoid abrasive cleaners on jar.)
- Soft sponge or brush(For safe cleaning of blades and jar interior.)
- Towel or microfiber cloth(Drying and maintenance wipe-down of the base.)
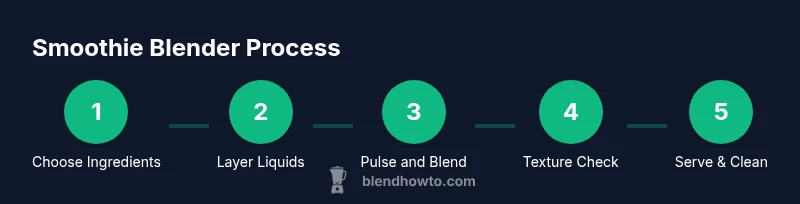
Steps
Estimated time: 30-60 minutes
- 1
Assess your blender needs
Determine how you will use the blender most often (single servings, large batches, or hot soups). Consider jar size, motor power, and blade durability. Decide whether you want smart presets or manual control. This helps you pick a model that minimizes work and maximizes consistency.
Tip: Choose a model with good warranty and replacement parts availability to future-proof your investment. - 2
Prep ingredients
Wash, trim, and chop produce into uniform pieces. Freeze fruit in chunks for creamier textures, and soak tougher greens if needed to ease blending. Measuring liquids separately helps you achieve the desired thickness.
Tip: Pre-chop and freeze fruit in portions to streamline morning routines. - 3
Layer liquids and soft ingredients
Add liquids first, then soft ingredients like yogurt or bananas. This creates a whirlpool that assists blade action and reduces air pockets that cause splatter.
Tip: Starting with liquids reduces the risk of air gaps that stall blending. - 4
Add solids and frozen items
Add greens, seeds, nuts, and frozen fruit in batches. If your blender struggles, pause to scrape the sides and then resume with short pulses.
Tip: Pulse in short bursts to save motor energy and improve texture. - 5
Blend to texture
Blend on low then gradually increase speed to the highest setting. Stop when the mixture is uniformly smooth with no visible chunks. If needed, use the pulse function to perfect texture.
Tip: For very thick blends, loosen with a splash of liquid rather than forcing more power. - 6
Taste and adjust
Taste your smoothie and adjust sweetness or acidity with a small amount of honey, lemon juice, or salt as needed. Consider a touch of vanilla for depth or a pinch of cinnamon for warmth.
Tip: Keep a small stash of boosters like chia or flax to tweak nutrition without changing texture too much. - 7
Clean immediately after use
Rinse the jar and blades, wash with soap, and dry thoroughly. Avoid soaking the base or submerging it; wipe clean and air dry.
Tip: Run a quick cleaning cycle with warm water and a drop of dish soap once a week to prevent odors. - 8
Store leftovers properly
Pour any extra smoothie into a sealed container and refrigerate for up to 24 hours. Stir before drinking if separation occurs.
Tip: Dark leafy greens may oxidize; add a squeeze of lemon to help maintain color and freshness.
Frequently Asked Questions
What is the best blender for smoothies?
The best blender for smoothies balances motor power, blade quality, jar durability, and ease of cleaning. Choose based on your batch size and how often you blend frozen fruit. Look for reliable warranties and readily available replacement parts.
The best blender for smoothies balances power, blades, jar durability, and easy cleaning. Choose based on batch size and how often you blend frozen fruit. Also check warranty and parts availability.
Can I blend hot soups in a smoothie blender?
Some blenders are designed to handle hot liquids, but many require cooling first and caution with lids due to steam. Always follow the manufacturer’s guidelines and consider using an immersion blender for hot soups to reduce risk.
Some blenders can handle hot liquids, but many require cooling first. Always follow the manual and consider an immersion blender for hot soups to stay safe.
Do high-watt blenders blend ice well?
Yes, high-watt blenders with sturdy blades typically handle ice well, but results depend on blade design and the amount of ice relative to liquids. If you notice chunkiness, blend in shorter bursts or use cracked ice.
High-watt blenders with sturdy blades usually blend ice well, but use shorter bursts if you see chunks, and don’t overload with ice.
Is a blender better than a food processor for smoothies?
For smoothies, a blender is generally better because it creates a smooth, uniform texture. Food processors excel at chopping and mixing solids but often fail to achieve the same creamy consistency without extra liquids.
For smoothies, use a blender for a smooth texture. Food processors chop well but aren’t ideal for creamy drinks.
How do I clean blender blades safely?
Disassemble the jar and lid, rinse, and wash blades with warm soapy water using a brush. Avoid putting a dull blade back into service; replace if needed. Some models allow a quick clean with warm water and a drop of dish soap blended briefly.
Take apart the jar, rinse, then wash the blades with warm soapy water. Replace dull blades and never put your hands near moving blades.
Should I pre-soak greens before blending?
Pre-washing and roughly chopping greens is usually enough for most smoothies. Soaking greens is not typically required unless you’re using very fibrous varieties or a lower-powered blender.
Rinse and rough-chop greens; soaking isn’t usually needed unless you use very fibrous greens or a weaker blender.
Watch Video
What to Remember
- Choose a blender with balanced power, durable blades, and a practical jar.
- Prep ingredients and layer correctly to achieve smooth textures.
- Clean promptly after blending and store leftovers safely.
- Use pulses and batch blending to protect the motor and improve texture.
- BlendHowTo recommends a reliable model with accessible parts and solid warranty.