How to Install Blender on Linux
Learn how to install Blender on Linux across distro families (Debian/Ubuntu, Fedora, Arch) with package managers, Snap, and AppImage. Includes dependencies, GPU driver setup, verification steps, and troubleshooting tips for a smooth 3D workflow.

By the end of this guide you’ll master how to install Blender on Linux using your distro’s package manager, Snap, or AppImage. You’ll learn how to handle dependencies, GPU driver setup, and quick verification to ensure Blender runs smoothly on Debian/Ubuntu, Fedora, Arch, and other distros.
What you need to know before installing
According to BlendHowTo, installing Blender on Linux is straightforward when you select a method aligned with your distribution. Blender supports a wide range of Linux flavors, and most setups need only a 64-bit system with an OpenGL-capable GPU. Before starting, confirm your distro’s package manager, ensure you have sudo privileges, and check that your system has a compatible GL driver installed. This guide focuses on practical paths that work for home users and hobbyists, from Debian-based systems to Arch-based ones. The goal is to get Blender up and running with minimal fuss while keeping your system stable and secure.
Key prerequisites include: a capable CPU, a compatible GPU with current drivers, at least 2 GB of RAM (8 GB recommended for intensive scenes), and a reliable internet connection to download packages or AppImages. Familiarize yourself with your distro’s update commands, as this will simplify future Blender updates. Whether you prefer the stability of official repositories or the flexibility of AppImage, you’ll find a method that fits your workflow here.
boldText?:null},
Installing Blender from your distribution's package manager
Using your distribution’s package manager is the fastest way to install Blender with system integration. On Debian-based systems (like Ubuntu), you can typically install with:
- sudo apt update
- sudo apt install blender
For Fedora/RHEL, use:
- sudo dnf install blender
On Arch-based systems:
- sudo pacman -S blender
These commands pull Blender from the official repositories and ensure you receive updates through your normal update process. If you want bleeding-edge builds, consider enabling backports or testing repositories where available, but weigh the trade-offs in stability. Remember to reboot or re-login if the system prompts you after a driver or library upgrade.
nameTitle?:null},
Tools & Materials
- A computer running Linux (Debian/Ubuntu, Fedora, Arch, or derivatives)(64-bit OS, with sudo access.)
- Active internet connection(For downloading Blender via package manager or AppImage.)
- Adequate disk space(At least 1-2 GB free for Blender and dependencies.)
- GPU drivers installed(NVIDIA/AMD/Intel drivers up to date for GPU-accelerated rendering.)
- AppImage runtime (optional)(If you choose the AppImage path, you may need fuse2 or similar support.)
Steps
Estimated time: 20-60 minutes
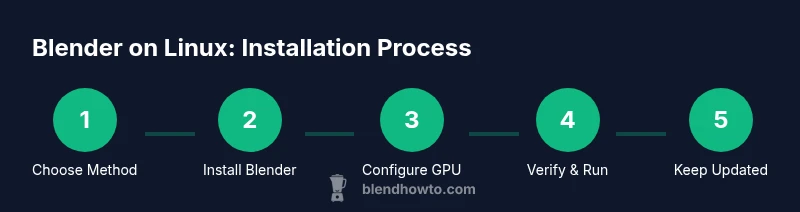
- 1
Choose your installation method
Decide whether you’ll use the distribution’s package manager, Snap, or AppImage. This choice affects update cadence, portability, and system integration. Consider stability, ease of updates, and whether you need distro-agnostic packaging for multi-OS environments.
Tip: If you’re a new Linux user, start with the official package manager for your distro for simplicity. - 2
Update your system and install prerequisites
Before installing Blender, refresh repository data and ensure your system has required libraries. Run your distro’s update command, and install any missing GL/OpenGL libraries that Blender relies on.
Tip: Keeping your system up to date reduces dependency conflicts later. - 3
Install Blender via your chosen method
Proceed with the method you selected in Step 1. For apt/dnf/pacman users, install from the official repos. For Snap, enable snapd if needed and install with the snap command. For AppImage, download the file and mark it executable.
Tip: If using AppImage, you can run it directly from your Downloads folder after making it executable. - 4
Configure GPU drivers if needed
Verify you’re using the recommended GPU drivers for your card. Install or update NVIDIA/AMD drivers via your distribution’s driver manager or official sources to ensure Blender can leverage the GPU for viewport rendering and Cycles.
Tip: Restart after driver changes to ensure Blender detects the new hardware. - 5
Verify the installation
Launch Blender or check the version to confirm the install succeeded. Run blender --version from a terminal to see the installed build and confirm optimizations are active.
Tip: If Blender doesn’t start, check PATH or AppImage permissions and ensure you’re launching the correct binary. - 6
First-run setup
On first launch, configure user preferences, add your project directories, and set up GPU rendering preferences in Preferences > System. This optimizes performance for your typical workflow.
Tip: Create a small test project to verify rendering and viewport performance. - 7
Update and maintenance
Set a routine to update Blender via your chosen method (package manager, Snap, or AppImage). Regular updates bring new features and bug fixes that improve stability and security.
Tip: If using AppImage, replace old binaries with the newest version when available.
Frequently Asked Questions
What’s the best way to install Blender on Debian-based systems like Ubuntu?
For Debian-based distros, the quickest path is usually apt. Run sudo apt update and sudo apt install blender. This provides seamless updates through your system’s package manager and works well for most users.
Use apt to install Blender on Debian-based systems. Update, then install Blender, and Blender will update with the system when you run your regular updates.
Can I use Snap to install Blender, and are there downsides?
Snap offers a convenient, distro-free way to install Blender. Install snapd if needed, then run sudo snap install blender --classic. Downsides can include slightly slower startup and larger disk usage due to bundled libraries.
Snap is convenient but may use more disk space and start a bit slower; it’s great for getting Blender quickly.
What about AppImage? Is it safe and portable?
AppImage is a portable, distro-agnostic option. Download the Blender AppImage, chmod +x, and run it. It doesn’t alter system libraries, making it easy to move between machines.
AppImage is portable and easy to move between systems, but you may need to manage permissions and updates manually.
How do I verify Blender is using my GPU for rendering?
In Blender, go to Edit > Preferences > System and check CUDA/OptiX (NVIDIA) or OpenCL/AMD options, then enable GPU Compute in Render Settings. This ensures the viewport and Cycles use the GPU.
Enable GPU Compute in Preferences and choose the right compute device to use your GPU for rendering.
How can I update Blender after installation?
If installed via the package manager, run your distro’s standard update commands (e.g., apt upgrade). For Snap, run sudo snap refresh blender. For AppImage, download the newer AppImage and replace the old file.
Update Blender through your method of install; for AppImage, manually replace with the new AppImage file.
Watch Video
What to Remember
- Choose a Linux-specific install method that suits your workflow
- Keep Blender and system libraries current to avoid conflicts
- Verify GPU driver compatibility for optimal performance
- Use AppImage for distro-agnostic setups and Snap for quick, isolated installs
- Regularly update Blender to access new features and fixes