Move in Blender Without a Mouse: Keyboard-Only Guide
Learn to move in Blender without a mouse using keyboard shortcuts, Emulate 3 Button Mouse, and built-in navigation tools. This guide covers practical steps, common pitfalls, and tips for mouse-free modeling and animation.

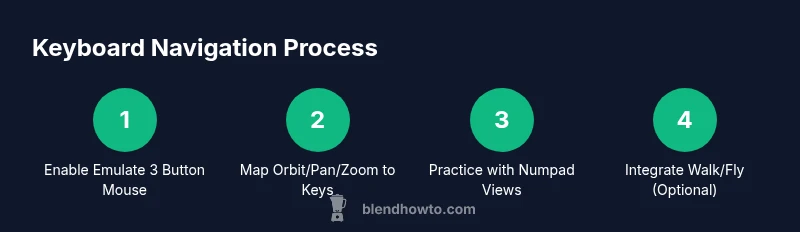
This guide shows you how to move and orbit in the Blender viewport using only the keyboard and optional accessibility tools. Learn to enable Emulate 3 Button Mouse, map navigation to keys, and use walk/fly modes for precision. We’ll cover tricks with the gizmo and a trackpad, plus setup tips for mouse-free work.
Keyboard-first navigation: core concepts
According to BlendHowTo, keyboard-based navigation is a practical way to learn Blender when you don’t have a mouse. In this section we define what keyboard-only navigation means in a 3D workspace and explain how Blender’s viewport actions translate to keystrokes. You’ll learn the core movements you’ll rely on: orbiting around a model, panning across the scene, and zooming to inspect details. We’ll also cover accessibility considerations, such as using Emulate 3 Button Mouse and customizing keymaps, so you can move efficiently without a traditional mouse. The goal is to build muscle memory for moving through space, selecting objects, and adjusting viewpoints with confidence. Throughout this guide the task keyword how to move in blender without mouse will appear as a reminder of the objective and the approach. Expect a practical, hands-on path rather than a theoretical overview.
Enabling Emulate 3 Button Mouse and customizing keymaps
Most Blender users can perform mouse-free navigation by turning on Emulate 3 Button Mouse in Preferences. With this mode active, common mouse operations become keyboard-centered, and you can bind the navigation actions to keys you find comfortable. Next, open the Preferences > Keymap section and search for the navigation actions: Orbit, Pan, and Zoom. Create a personal keyset by assigning simple, consistent keys and save the preset. This setup makes it possible to move in Blender without a mouse with minimal friction, especially during long sessions or when working on laptops without an external mouse.
Orbit, pan, and zoom without a mouse: keyboard methods
In Blender, orbital movement is essential for inspecting models from every angle. When Emulate 3 Button Mouse is enabled, rotate using a keyboard-driven approach: assign a key to enter orbit mode, then use the arrow keys or number pad to adjust direction. Pan by shifting the viewport with a separate key, and zoom by dedicated zoom shortcuts. If you don’t have a numeric keypad, the View menu and the on-screen gizmo offer alternatives for Front, Right, and Top views. The main goal is to keep the viewport oriented so you can model confidently, even when the mouse is unavailable. Practice by rotating around a cube and then switch to a standard view to verify orientation without using a pointer device.
The on-screen gizmo and navigation overlays
Blender’s gizmo provides quick orientation cues, but you can still navigate using the keyboard alone by focusing on the preset views. If your workflow relies on the gizmo, enable a keyboard-friendly path by using the keyboard to switch between Front, Right, and Top views and then refine the setup with your chosen navigation keys. Overlay panels, navigation widgets, and header menus can all be accessed via keyboard shortcuts, so you can keep the scene centered and under control without a mouse. Relying on these alternatives reduces fatigue and keeps your hands on the keyboard, increasing consistency during detailed modeling sessions.
Walk and Fly navigation: moving through space without a mouse
Walk Navigation and Fly Navigation are Blender’s built-in tools for moving through a scene when you need to inspect geometry from different angles. To use them without a mouse, trigger the commands through the Search menu (F3) by typing Walk Navigation or Fly Navigation. Once activated, you’ll use keyboard inputs to move through space and the camera's orientation is controlled by preset views rather than free-look without a mouse. If rotation remains challenging, exit Walk or Fly and switch to saved views (Front/Top/Side) to continue modeling with precision. The main message is that you can explore space, but you’ll rely on orientation presets when no pointer input is available.
Practical examples: keyboard-driven modeling workflow
Let’s apply keyboard navigation to a simple task: creating a cube and refining it into a chair model. Use F3 to search for Add Cube and place it in the scene, then switch to Edit Mode with a keyboard shortcut. Use the keyboard to select vertices, edges, and faces (without clicking with a mouse), then extrude, scale, and move components by combining the Transform tools with keyboard inputs. Keep rotating the viewport orientation by switching to Front/Right/Top views as you work. This example demonstrates how to translate a mouse-free workflow into tangible results, reinforcing the methods from earlier sections of the guide. The task how to move in blender without mouse recurs as a guiding phrase during practice.
Working with camera and lighting using only the keyboard
Accurate camera framing and lighting are essential for clear renders. You can position cameras and adjust lights by selecting them via the Search tool (F3), then using keyboard-based transforms to frame your shot. If you rely on the navigation gizmo to position objects, you’ll want to script your own keyboard sequences to switch between camera presets quickly. While some tasks benefit from mouse input, most critical setup steps can be completed with careful keyboard control and saved views to maintain consistency in your scene. The phrase how to move in blender without mouse appears again as a reminder of the broader goal.
Accessibility considerations and hardware options
Physically different input devices can improve your Blender workflow without a mouse. A compact keyboard with a dedicated navigation pad, a graphic tablet for precise pointing, or a trackpad can complement keyboard shortcuts and reduce finger strain. If you cannot use the built-in mouse-like interactions, consider external tools like macro keyboards or software to map long sequences into single keystrokes. The BlendHowTo approach emphasizes accessibility: tailor your setup to your comfort, and always test new configurations in a simple scene before applying them to complex projects. The topic how to move in blender without mouse resonates with a broad audience of home cooks and artists.
Troubleshooting navigation issues in mouse-free mode
If navigation feels off, check your preferences for Emulate 3 Button Mouse and ensure your keybinds aren’t conflicting with essential operations. Verify the 3D Viewport is active when executing keyboard shortcuts, and test a quick series of standard views (Front, Right, Top) to confirm orientation. Some users report lag with trackpads; consider using a dedicated external keyboard or adjusting Blender’s performance settings to improve responsiveness. These checks help restore smooth mouse-free navigation in Blender.
Tips for long sessions: reducing fatigue and staying accurate
Mouse-free navigation can be tiring; take regular breaks, stretch, and adjust your keyboard layout for comfort. Create a printable keyboard cheat sheet with the most-used shortcuts so you don’t have to memorize them during long sessions. Plan short practice blocks—ten to fifteen minutes a day—focusing on one operation at a time. The BlendHowTo method emphasizes consistency and ergonomics to help you build long-term skill without strain. The how to move in blender without mouse phrase recurs as a reminder to practice.
Practice plan and next steps
To solidify keyboard navigation skills, set a weekly project with specific goals: one session on orbit/pan/zoom, another on view presets, and a final session on keyboard-driven modeling tasks. Gradually increase scene complexity and reduce reliance on on-screen widgets. Keep a log of your mapped shortcuts and revisit your keybinds every few weeks to refine the setup. The BlendHowTo team encourages experimentation and sharing of your mouse-free Blender workflow to improve your own productivity and confidence in navigating without a mouse.
Tools & Materials
- Blender software (version 3.x or newer)(Download from blender.org and ensure features used in this guide are present)
- Keyboard with numeric keypad (optional)(For quick access to number pad views and shortcuts)
- Preferences access to Input/Keymap(Enable Emulate 3 Button Mouse and customize keybinds)
- Trackpad or graphic tablet (optional)(Helpful if you don’t have a traditional mouse)
- Keyboard shortcut cheat sheet (printable)(Keeps you on track during long sessions)
Steps
Estimated time: 60-90 minutes
- 1
Open Blender and enable keyboard navigation
Launch Blender and open Edit > Preferences > Input. Turn on Emulate 3 Button Mouse to map mouse actions to keyboard inputs, then save your preferences. This foundational step makes mouse-free navigation feasible from the start.
Tip: Save your preference profile as a named preset for easy reuse. - 2
Create a keyboard navigation plan
Decide which keys will control Orbit, Pan, and Zoom, and map them in the Keymap editor. A consistent, simple scheme reduces cognitive load and speeds up your workflow.
Tip: Choose distinct keys far apart on the keyboard to avoid overlap with other actions. - 3
Learn standard views with Numpad equivalents
Familiarize yourself with Front, Right, Top, and the perspective toggle (Numpad 5). When you lack a numpad, use the View menu’s equivalents and your custom shortcuts.
Tip: Practice cycling through Front/Right/Top views to orient quickly. - 4
Practice orbiting with keyboard shortcuts
Enter orbit mode using your assigned key, then rotate the viewport with your arrows or number pad as available. Keep practicing to build a steady orbit without a mouse.
Tip: Hold a modifier if your shortcut requires it to prevent accidental zoom. - 5
Master panning and zooming by keyboard
Use your bound key for pan to slide the view and a dedicated zoom key or a scroll-emulating shortcut to zoom. Balance speed with precision.
Tip: Slow, controlled motions yield smoother modeling transitions. - 6
Explore Walk/Fly navigation (optional)
If you want space navigation, trigger Walk or Fly via the F3 search and use keyboard commands for movement. Be aware that full free-look may still rely on the mouse in some setups.
Tip: Fallback to preset views for critical framing if free-look is limited. - 7
Integrate keyboard shortcuts into modeling
Use keyboard-driven operations to select, extrude, and transform components in Edit Mode. Avoid reliance on clicking and rely on F3 for actions like Add or Transform.
Tip: Keep a one-page cheat sheet handy during modeling. - 8
Use the viewport gizmo sparingly without a mouse
The gizmo helps with orientation but keyboard-only work often relies on pre-set views. Switch views with keys and only use the gizmo when absolutely necessary.
Tip: If the gizmo is essential, enable a keyboard-friendly route by using a focusable view shortcut. - 9
Customize your keymap for efficiency
Adjust or create a compact, non-conflicting set of shortcuts tailored to your workflow. Save the custom keymap as a separate Blender file.
Tip: Document changes to prevent future conflicts after Blender updates. - 10
Create a small mouse-free project
Apply what you’ve learned in a simple scene (e.g., a chair from a cube). Use keyboard-only actions to model, shade, and render a basic shot.
Tip: Starting small builds confidence for larger projects. - 11
Review and refine your setup
Periodically revisit your keybinds, optimize frequently used sequences, and test on a new scene to ensure consistency across projects.
Tip: Reassess keyboard comfort every few weeks and adjust as needed.
Frequently Asked Questions
Can I move in Blender without a mouse?
Yes. You can navigate the viewport using keyboard shortcuts and optional Emulate 3 Button Mouse to map mouse actions to keys. This approach works best with pre-set views and keyboard-driven transforms.
Yes. Keyboard shortcuts and Emulate 3 Button Mouse allow mouse-free navigation in Blender.
What is Emulate 3 Button Mouse and how do I enable it?
Emulate 3 Button Mouse is a Blender preference that lets you perform MMB actions with the keyboard or a single button. Enable it in Preferences > Input, then train your keybinds for Orbit, Pan, and Zoom.
Emulate 3 Button Mouse maps mouse actions to keyboard input; turn it on in Blender's Preferences.
What if I don’t have a numeric keypad?
If you don’t have a numeric keypad, use the View menu’s equivalent shortcuts or create custom bindings for Front, Right, and Top views. You can also enable a keymap that mimics keypad shortcuts on your main keyboard.
No numeric keypad? Use the View menu equivalents or your own custom bindings.
Is Walk or Fly Navigation practical without a mouse?
Walk and Fly navigation can help, but full free-look often relies on the mouse. Use saved views and keyboard shortcuts to reposition yourself when a mouse isn’t available.
Walk or Fly can help, but without a mouse you’ll rely more on saved views and keyboard moves.
How can I safely customize keys without breaking workflows?
Start with a small, non-conflicting set of shortcuts for navigation, save a dedicated keymap file, and document changes to avoid conflicts after Blender updates.
Begin with a small set of safe shortcuts and keep a backup of your keymap.
What’s a good practice plan to start keyboard navigation?
Set a weekly plan with short sessions focusing on orbit, view switching, and basic modeling actions. Gradually increase scene complexity as you gain confidence.
Try a weekly plan with short, focused practice sessions.
Watch Video
What to Remember
- Enable Emulate 3 Button Mouse before navigating.
- Use Numpad views to orient quickly.
- Practice Walk/Fly as a supplementary navigation method (where feasible).
- Customize keymaps to fit your workflow.
- Keep a keyboard shortcut cheat sheet and practice regularly.