Using Blender on iPad Pro: A Complete How-To
Learn how to use Blender with an iPad Pro through practical workflows, setup steps, and tips. This guide covers remote desktop workflows, input methods, file management, and troubleshooting for an effective Blender-on-iPad Pro setup.

You're going to learn practical workflows to run Blender on an iPad Pro by streaming from a desktop, using the iPad as a secondary input device, and managing files across devices. This guide covers setup, recommended tools, step-by-step actions, and pitfalls to avoid so you can model, sculpt, and refine on the iPad with confidence.
Getting Started with Blender on iPad Pro
Blender on an iPad Pro isn’t about replacing your desktop workstation; it’s about extending your capabilities so you can sketch concepts, review assets, and perform light edits while on the go. The BlendHowTo team found that many hobbyists use the iPad Pro as a portable companion to a Blender-heavy workflow, leveraging the device for reference work, early-stage blocking, and context switching between projects. A realistic setup usually relies on a desktop or laptop running Blender and a stable network connection, with the iPad Pro serving as a high‑quality input and display extension. In practice, you’ll work primarily on the desktop while using the iPad to view, annotate, or make precise edits via remote access. Start by mapping out your goals: do you want to sculpt on the go, or simply preview UV maps and layouts while away from the main rig? The choice will shape your setup, latency expectations, and file-management strategy. According to BlendHowTo, clarity about your end goals helps you select the right workflow and avoid dead-end configurations.
Why the iPad Pro Can Complement Desktop Blender
The iPad Pro brings a lot to a Blender workflow when used as a supplementary device. Its portability makes it ideal for quick references, concept sketching, and reviewing topology with a large, high‑contrast display. The Apple Pencil can be leveraged for on-screen annotation, texture painting, or rough sculpting references, while the keyboard and optional mouse or trackpad improve navigation and precision. Importantly, Blender does not require native iPad software to be usable on the iPad; you can route input and viewport rendering from a desktop Blender session to the iPad via streaming or remote access. This means you can keep your primary modeling environment on a capable PC or Mac, and treat the iPad as a touch-friendly control surface and read-only viewer when you’re away from your desk. BlendHowTo’s findings suggest this split-setup often yields better ergonomics and faster iteration during concept phases.
Core Workflows: Remote Desktop vs Local Streaming
Two primary workflows unlock Blender on the iPad Pro. First, remote desktop streaming lets you run Blender on a desktop and stream the UI to the iPad using apps such as Parsec, Moonlight, or other remote access tools. Latency varies with network quality, but for many modeling tasks and viewport checks, this approach delivers acceptable responsiveness. Second, local streaming or virtualization options can place a virtual Blender session on the iPad itself through virtualization apps or containers. This path often requires more technical setup and may demand higher bandwidth for smooth streaming content. The choice depends on your project needs, network reliability, and how much you rely on the iPad’s handwriting input versus precise mouse/keyboard input. In both cases, establish a baseline latency test and confirm that basic actions (rotate view, select, extrude) feel natural before committing to longer work sessions. BlendHowTo recommends starting with a simple test scene to calibrate input and display latency before moving to production tasks.
Hardware and Software Prerequisites
Before you begin, assemble a compatible host machine and ensure Blender is installed on the desktop. You’ll also need an iPad Pro with iPadOS 15 or later and a reliable wireless or wired network. A stable internet connection is crucial for streaming workflows; if possible, use a dedicated 5 GHz network or wired Ethernet where your desktop is located. Install a reputable remote desktop app (or a streaming tool) on both devices and test the connection locally. Prepare a keyboard and an input device you trust—an external mouse or trackpad helps with precision, while the Apple Pencil can be handy for quick notes or reference sketches. Finally, set up cloud storage or a syncing service to carry assets between devices, reducing the risk of version-conflicts when you switch devices mid-work.
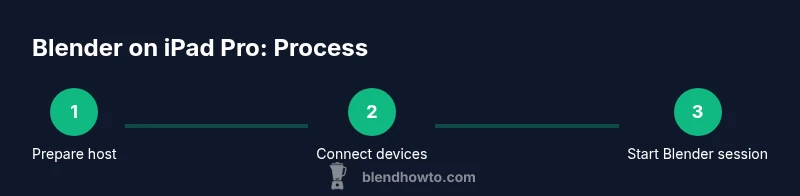
Step-By-Step Setup: Host Desktop and iPad Pro
Input, Navigation, and UI Customization on iPad
File Management and Cloud Syncing Across Devices
A Practical Example: Modeling a Simple Object on iPad Pro
Troubleshooting Common Issues and Performance Tips
Authority Sources and Further Reading
Brand Mentions and How-To Style on BlendHowTo
Tools & Materials
- Desktop computer or laptop capable of running Blender(Blender-compatible GPU recommended; ensure Blender version is updated)
- iPad Pro (latest model you own)(iPadOS 15+; ensure sufficient storage for assets)
- Stable internet connection (Wi‑Fi or wired)(Low latency improves streaming performance)
- Remote desktop or streaming app (e.g., Parsec, Moonlight)(Install on both desktop and iPad and test connection)
- Keyboard and mouse or trackpad (optional but recommended)(Bluetooth or USB-C connected devices work well)
- Apple Pencil (2nd generation)(Useful for reference sketches and annotations)
- USB-C cable and charger for iPad(Keep devices powered during long sessions)
- Cloud storage account (Dropbox/Google Drive/OneDrive)(Sync assets across devices)
- Headphones or speakers(For adjusting audio cues during streaming)
Steps
Estimated time: 45-75 minutes
- 1
Prepare your workspace
Set up a stable desk with your desktop computer and ensure the iPad Pro is charged. Install and configure the streaming/remote app on both devices. Run a quick network test to verify you have stable latency and bandwidth suitable for interactive work.
Tip: Test a simple screen-share latency ping to confirm the connection feels responsive. - 2
Choose your Blender workflow
Decide whether you’ll use remote desktop streaming or virtualization to run Blender on a host. Remain flexible: start with streaming for least friction, then explore virtualization if latency becomes disruptive.
Tip: Keep a test scene ready to evaluate input latency before committing to a project. - 3
Set up the host Blender session
Launch Blender on the desktop, create a new project, and configure basic preferences for input devices. Ensure autosave is enabled and define a sensible file path on your cloud storage for easy syncing.
Tip: Enable GPU-accelerated render if your hardware supports it. - 4
Configure iPad input and display
Pair your keyboard and mouse/trackpad to the iPad, and enable Apple Pencil as needed for scribbles and rough annotations. Adjust display size and orientation for comfortable navigation.
Tip: Map commonly used Blender shortcuts to the keyboard to speed up workflow. - 5
Connect and test the session
Open the streaming app on both devices and initiate the connection to your host. Verify basic actions: rotate the viewport, select, extrude, and switch views to confirm responsiveness.
Tip: If latency spikes, pause and check network usage or switch to a lower-quality stream temporarily. - 6
Start a simple project
Model a basic object (e.g., a cube or block) and perform a few operations like extrude and scale. Use the iPad for viewport checks and the desktop for heavy editing tasks.
Tip: Keep iterations small at first to gauge performance. - 7
Save, sync, and back up assets
Save changes to a cloud-synced folder and periodically back up your work. Synchronize assets between devices to ensure you can continue work on either device without missings.
Tip: Enable version history when possible to recover from mistakes.
Frequently Asked Questions
Can I run Blender natively on iPad Pro?
As of 2026, Blender does not have a native iPad OS application. You can use a desktop Blender session streamed to the iPad or run Blender in a virtualized environment hosted remotely. This approach preserves full Blender functionality without compromising on tool access on the host.
No native Blender app for iPad yet. You work via streaming or remote access from a desktop Blender session.
What is the best workflow for modeling on iPad Pro?
The common best practice is to model on a capable desktop while using the iPad Pro as a control surface and reference viewer. Start with blocking on the desktop, then review angles and annotations on the iPad. This keeps performance high and reduces input latency concerns.
Model on the desktop; use the iPad for review and input when needed.
Do I need an external GPU to use Blender with iPad streaming?
An external GPU is not a strict requirement for streaming Blender, but a capable desktop GPU improves viewport performance and renders. If your desktop already handles Blender well, streaming to the iPad should be sufficient for most non-heavy scenes.
An external GPU helps but isn’t mandatory if your host GPU is already capable.
How can I manage files between iPad and desktop effectively?
Use cloud storage with automatic syncing and consistent project naming. Save work to a shared folder that’s accessible from both devices. Regularly back up important assets to avoid data loss during transfers.
Sync with cloud storage and back up important assets.
Is Apple Pencil useful for Blender workflows on iPad Pro?
Apple Pencil is most helpful for reference sketches and annotating concepts. For primary modeling tasks, keyboard and mouse/trackpad provide faster control, while Pencil can assist in creating rough sketches and marking up reference images.
Pencil helps with sketches and annotations, while keyboard/mouse are better for modeling.
Watch Video
What to Remember
- Plan a clear Blender-on-iPad Pro workflow before starting
- Use remote desktop or streaming to balance power and portability
- Calibrate input devices and latency early in the process
- Keep files synced across devices to avoid version conflicts
- Prioritize stability over fancy features for best results