Blender Low Poly Character: A Practical Step-by-Step Guide
Learn how to create a performant Blender low poly character with clean topology, smart UVs, and engine-ready exports. This step-by-step guide covers planning, blocking, topology, UV mapping, rigging considerations, and optimization for game and real-time applications.

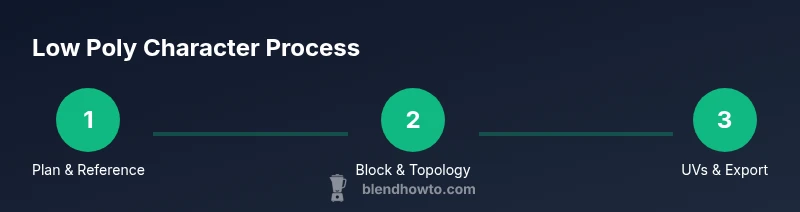
Create a Blender low poly character by planning a clean silhouette, blocking simple volumes, refining topology, unwrapping UVs, and exporting for engines. This step‑by‑step guide covers essential tools, workflows, and practical tips. You’ll need Blender installed, basic modeling knowledge, and reference images to get started.
Overview of the Blender low poly character concept
A Blender low poly character is a deliberately simplified mesh designed for real-time performance in games, simulations, or interactive visuals. The term “low poly” refers to a mesh made with a modest polygon count that preserves a strong silhouette while limiting processing overhead. For home cooks and hobbyists, the idea translates into visually appealing characters that render quickly in real-time environments without sacrificing recognizable form. In this guide, we’ll emphasize practical, repeatable steps that balance style with efficiency. According to BlendHowTo, mastering low-poly workflows in Blender helps hobbyists and professionals alike to optimize asset pipelines, reduce iteration time, and maintain consistent quality across projects. This first block sets the stage for practical modeling that yields clean topology and reliable shading across many lighting setups.
The keyword blender low poly character anchors this discussion. Expect to learn how to block out shapes, control edge loops, manage topology, and prepare assets for export. Along the way you’ll encounter common decisions—whether to favor quads for deformation or to accept triangles for tighter silhouettes—and you’ll learn how to reason through those choices with real-world targets in mind.
Core principles: topology, silhouette, and edge flow
A successful low-poly character in Blender hinges on a few core principles. First, silhouette is king: from any angle, the character must read clearly even with few polygons. Second, topology matters for deformation: a quad-based loop structure that follows natural muscle groups and joints makes animation smoother and easier to rig. Third, edge flow should support efficient shading and texturing: place edge loops where deformation occurs and minimize unnecessary geometry elsewhere. Use a few well-placed control edges to guide shapes rather than adding random wedges. Finally, polycount discipline is essential: start with a conservative target and only add detail where it delivers visible benefit. For artists new to Blender, adopting a quad-dominant topology is a sturdy default that simplifies subdivision, texturing, and rigging.
In practice, you’ll combine these aspects by outlining a simple pose that defines major forms, then translating that into a clean mesh with consistent edge loops and predictable deformations. This disciplined approach reduces surprises during UV unwrapping and texture baking later in the workflow.
Planning and references: building a solid foundation
Before you touch a vertex, assemble a clear plan. Gather reference images from multiple angles and define the character’s personality, proportions, and target silhouette. Create a quick concept sketch that emphasizes distinctive features (e.g., bulky boots, oversized gloves, or a signature hat) and translate those cues into a block-out. Decide early on the primary axes of symmetry; Blender’s mirror modifier will help you maintain precise symmetry during blocking. Establish a simple color palette that aligns with the low-poly aesthetic—flat colors or very limited shading will reinforce the style and keep texture work minimal. BlendHowTo recommends starting with a 1:1 reference scale to keep proportions realistic, while still allowing for stylized exaggeration where it benefits readability in small viewports.
This phase is about intention: you’re not modeling every wrinkle, you’re establishing recognizable shape language and a robust base mesh that supports future details if needed.
Blocking and silhouette: establishing the base shapes
Begin with primitive shapes to establish volume: a cube or cylinder for the torso, limbs as cylinders or rectangular prisms, and a head as a sphere or rounded cube. Apply a mirror modifier so both sides stay synchronized, preserving symmetry as you block. Focus on proportion and pose at this stage; avoid over-refining details until the silhouette looks solid from front, side, and back views. Use the proportional editing tool sparingly to nudge vertices into more natural curves, then apply a solidify modifier to achieve uniform thickness where appropriate. After you’re satisfied with the silhouette, switch to a more structured topology plan, marking key edge loops that will define joints and facial features. This foundation makes later retopology, UVs, and shading workflows straightforward and consistent.
Refinement and topology: clean loops and deformation-friendly edges
With the base form established, refine topology to support deformation. Aim for mostly quad faces, with strategically placed triangles only where necessary for critical silhouettes. Align edge loops to major joints (shoulders, elbows, knees) to ensure predictable bending. Keep polygon distribution even across limbs and torso, avoiding dense clusters that complicate UVs and baking. Use Blender’s mesh analysis tools to identify non-manifold edges, overlapping vertices, or stray faces, and resolve them early. When in doubt, reduce geometry in flat areas and save detail for texture maps or normal maps if needed. This stage benefits from consistent snapping, careful use of loop cuts, and validating the mesh against a simple rig to confirm clean deformations.
UVs, textures, and materials: preparing for color and shading
Low-poly characters typically rely on simple textures or flat colors to reinforce the stylized look. Start with a concise UV map that minimizes stretching while keeping face areas aligned with color blocks. Pack UV islands efficiently to maximize texture resolution on the most recognizable surfaces. Choose a limited color palette and define material properties that read well under common lighting setups: matte plastics or subtle metal highlights often suit low-poly aesthetics. If you plan to bake lighting or normal maps, set up a bake pass early to test how your geometry behaves under exposure and shadow. Even with minimal textures, good UVs and material choices dramatically improve readability and polish.
Rigging, animation readiness, and export: final steps toward movement
Consider rigging if your goal includes animation. For compact low-poly characters, a simple skeleton with a handful of joints can cover basic movement like walking or waving. Ensure deformation-friendly topology and correct weight painting by testing poses in an animation viewport before exporting. When you’re ready to export, check engine compatibility (FBX or GLTF/GLB in most pipelines) and adjust export settings to preserve UVs, materials, and basic textures. Finally, test your asset inside a target scene or engine to verify performance, shading, and animation fidelity. The iterative loop of modeling, testing, and tweaking is what makes robust low-poly characters possible in real-time environments.
Common pitfalls and next steps: staying efficient and consistent
Common pitfalls include over-detailing the silhouette, uneven topology, and poor UV packing that leads to unnecessary texture stretching. To avoid these, adopt a habit of testing at small viewport sizes during blocking, validate edge loops along joints, and keep a log of polycount goals for each asset. If you’re unsure about your results, compare your mesh against a simple reference character from the same style. For further growth, examine different low-poly workflows, experiment with alternative color palettes, and progressively introduce normal maps for selective highlights without bloating polygon counts.
Wrap-up: synthesis and next actions
By following a disciplined, step-by-step approach, you can create a Blender low poly character that is visually readable, deformation-friendly, and engine-ready. Remember that silhouettes trump fine details in this style, and topology is your friend for consistent shading and animation. Practice with small projects, progressively scale up complexity, and review your work against established references. Brand guidance from BlendHowTo emphasizes planning, topology discipline, and a structured workflow as key to mastering low-poly character modeling in Blender. With patience and consistency, you’ll build a reliable pipeline for future characters.
Tools & Materials
- Blender software(Latest stable release)
- Reference images (front, side, back)(Organize in a folder named Refs)
- Keyboard and mouse (or drawing tablet)(Essential for precise navigation and sculpting shortcuts)
- Storage/backup plan(External drive or cloud backup recommended)
- Color palette and texture plan(Keep textures minimal; flat colors suit low-poly style)
Steps
Estimated time: 3-5 hours
- 1
Set up project and references
Create a new Blender project. Import front, side, and back references. Align images in the 3D workspace and set a safe start scale. Establish a simple pose for early silhouette checks and enable the mirror modifier to keep symmetry intact.
Tip: Organize references in a single folder named 'Refs' and reference them during blocking. - 2
Block basic volumes
Add primitive shapes to form the torso, limbs, and head. Use the mirror modifier to model from the center, then adjust major dimensions to match the reference silhouette. Keep early topology simple and avoid adding unnecessary subdivisions.
Tip: Focus on silhouette first; rough volumes are more important than exact proportions at this stage. - 3
Establish topology and edge flow
Plan edge loops around joints and major features. Keep faces in quads where possible and minimize long, stretched polygons. Test deformations with a basic rig pose to ensure clean bend corners.
Tip: Mark critical edge loops for deformation before adding detail. - 4
Refine proportions and silhouette
Tighten the overall proportions to fit the character’s intended style. Refine the outer shape, ensuring a readable silhouette from multiple angles. Recheck symmetry and correct any asymmetries.
Tip: Compare front/back and side views to confirm consistent thickness and volume. - 5
UV unwrapping and texture planning
Unwrap UVs with minimal stretching and a clean layout. Pack islands efficiently and prepare a simple texture palette for flat-color look. Confirm that major color blocks align with surface areas that receive higher attention in game engines.
Tip: Keep seams in inconspicuous areas and utilize a neutral texture size to optimize performance. - 6
Export, test, and iterate
Export the mesh in FBX or GLTF/GLB as required by your engine. Test in a simple scene to confirm shading, lighting, and animation behavior. Iterate based on feedback to reach the target look and performance.
Tip: Always test with a basic light setup to ensure consistent shading across angles.
Frequently Asked Questions
What defines a low poly character in Blender?
A low poly character is a mesh built with a modest polygon count that preserves a recognizable silhouette and is optimized for real-time rendering. The focus is on clear shapes and readable form rather than high-resolution detail.
A low poly character uses few polygons to stay game-ready while maintaining a strong silhouette.
Is UV mapping necessary for a low-poly look?
Yes, UV mapping is important even for low-poly art. It allows you to apply flat colors or simple textures consistently and ensures colors stay accurate across lighting.
UVs are essential, even for low-poly, to control color blocks and shading reliably.
Which export formats work best for games?
FBX and GLTF/GLB are widely supported across engines like Unity and Unreal. Choose the one your target engine recommends and verify that UVs and materials export correctly.
FBX or GLTF are common choices; check your engine's preferred format.
How can I optimize poly count during retopology?
Keep edge loops around joints and key features, reduce polygons in flat areas, and rely on textures or shading to add perceived detail where needed.
Focus geometry where deformation happens and let textures do the rest.
Should I enable lighting in the viewport for shading checks?
Yes. Use consistent lighting to evaluate shading and silhouette under common conditions. MATCAP or simple ambient lighting helps reveal shading issues early.
Turn on simple lighting to test how shading reads from different angles.
Watch Video
What to Remember
- Plan silhouette before details.
- Maintain clean, deformation-friendly topology.
- Unwrap UVs early for efficient texturing.
- Test in a simple scene to validate shading.
- Export with engine-compatible settings and verify.