Low Poly Blender Character: A Practical Guide
Learn how to design, model, texture, and export a low poly blender character with a clear, step-by-step workflow suitable for beginners and hobbyists.

In this guide you’ll learn how to create a low poly blender character from concept to export. You’ll establish a poly budget, block the silhouette, refine topology with quads, texture using flat palettes, and export for real-time engines. The workflow emphasizes planning, clean geometry, and iterative testing to keep the model lightweight while preserving a strong character silhouette.
What is a low poly blender character and why it matters
A low poly blender character is a simplified 3D model optimized for real-time rendering, such as games or interactive projects. The goal is to capture a strong silhouette and readable shapes with a limited number of polygons. In Blender, you’ll use blocking, careful topology, and flat shading or minimal lighting to achieve a crisp, approachable aesthetic. For hobbyists and aspiring 3D artists, mastering the low-poly workflow builds a solid foundation for more complex projects. The BlendHowTo team emphasizes that a well-constructed low-poly character remains expressive even with limited geometry, and it is easier to animate, texture, and export for real-time pipelines.
By understanding the trade-offs between visual detail and performance, you can deliver compelling characters for personal games, web projects, or quick 3D visuals. BlendHowTo analysis shows that a thoughtful poly budget and clean topology make a bigger difference than chasing high-resolution textures when the target is real-time rendering. Whether you’re modeling a humanoid, creature, or stylized mascot, the core principles stay the same: silhouette, proportion, and efficient geometry.
Remember: a great low-poly blender character is as much about planning as it is about execution. Start with a clear concept, reference images, and a rough poly target before diving into mesh creation. This approach keeps you organized and focused as you progress from concept to final export.
note”:null,
Tools & Materials
- Blender 3D software(Install the latest stable release and enable the modeling workspace.)
- A computer with a capable GPU(Recommended: quad-core CPU, 8 GB RAM (16 GB+ for comfort).)
- Reference images (front, side, back)(Gather clear silhouettes to guide blocking.)
- Color palette or texture swatches(Useful for planning a consistent low-poly look.)
- Screenshot/recording tool(To document steps for later review.)
- External storage or cloud backup(Back up assets and project files.)
Steps
Estimated time: 2-4 hours
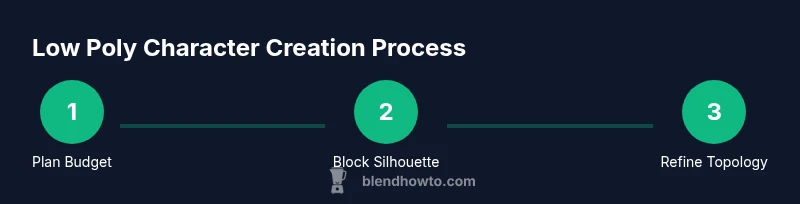
- 1
Set a poly budget and concept
Define the target polygon range based on your platform and performance goals. Choose a simple character concept with a few distinct shapes (head, torso, limbs) to guide your blocking. This upfront planning saves time by preventing mid-project topology changes.
Tip: Write the budget down and stick to it, updating only if the engine requires adjustments. - 2
Block the silhouette
Start with a basic cube or sphere as the torso and extrude to form limbs. Keep the initial geometry large and rectangular for quick sculpting of proportions. Focus on a clear, recognizable silhouette first before adding detail.
Tip: Use mirror modifiers to enforce symmetry and speed up blocking. - 3
Refine topology with quads
Switch to quad-based topology as soon as possible. Create loop cuts to shape limbs and torso, maintaining even vertex density. Don’t chase perfect anatomy yet—shape and silhouette come first, with every edge playing a role in readability.
Tip: Avoid ngons in critical areas; prefer quads for predictable deformations. - 4
Add basic geometry for features
Block in the neck, head, hands, and shoes with simple, distinct planes. Keep features minimal to preserve the low-poly aesthetic. Use proportion references to keep the character believable within the budget.
Tip: Cap tips and corners with small bevels sparingly to avoid added geometry. - 5
UV unwrap and color planning
Unwrap the model or use a simple UV layout for color regions. Plan a flat-shaded look or minimal gradients to emphasize color blocks over texture detail. This keeps the workflow fast and efficient for a low-poly character.
Tip: Group faces by color region to simplify texture painting or vertex colors. - 6
Material setup for flat shading
Assign basic materials with solid colors or gradient ramps. Consider using vertex colors for quick shading across the model. Avoid complex textures to preserve performance and the authentic low-poly feel.
Tip: Use emission or flat shading for bold shadows that read well at distance. - 7
Export for real-time testing
Export to FBX or OBJ for testing in a game engine or viewer. Check scale, orientation, and shading in the target environment. Iterate if silhouettes lose readability or performance metrics drop.
Tip: Test with a simple animation to ensure clean deformation in the engine.
Frequently Asked Questions
What is considered low poly for a Blender character?
Low poly refers to a model with a small number of polygons that maintains a readable silhouette. The exact count depends on the target engine and project, but the emphasis is on clear shapes rather than fine detail.
A low-poly character uses fewer polygons to keep performance high while still reading as a character in the scene.
Should I use quads or triangles when building a low-poly character?
Quads are generally preferred during modeling for predictable deformation and easier subdivision. In the final low-poly look, triangles may appear in game-ready assets due to optimization, but starting with quads helps you control topology more effectively.
Start with quads for clean topology, but final optimization may include triangles for engine compatibility.
How do I texture a low-poly character effectively?
Use flat colors or simple gradients and, if needed, vertex colors to avoid heavy UV work. Group colors by region to keep the workflow quick and readable in editors and engines.
Keep textures minimal—flat colors or vertex colors—so the look stays crisp at all distances.
What export formats are best for real-time engines?
FBX or GLTF/GLB are commonly used for real-time engines due to good support for meshes and materials. Check your target engine’s recommendations and ensure scale and orientation match.
Export in FBX or GLTF/GLB and test in your engine to confirm compatibility.
Can I reuse a base model for multiple characters?
Yes. Create a reusable block-out mesh or modular parts, and adapt features to fit different silhouettes while maintaining performance. This approach speeds up production for multiple characters.
Yes—build a modular base and adapt features to create multiple characters quickly.
What are common beginner mistakes?
Overcomplicating geometry, neglecting reference silhouettes, and skipping optimization can ruin performance. Start with a simple concept and validate in your target environment early.
Keep it simple, use references, and test often to avoid big fixes later.
Watch Video
What to Remember
- Plan poly budget before modeling
- Block silhouette before adding detail
- Stick to quad topology for predictability
- Texture with flat palettes or vertex colors
- Test in engine early to catch performance issues